1997 Nissan Pathfinder Owner's Manual - Page 82
1997 Nissan Pathfinder Manual
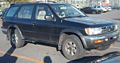
Page 82 highlights
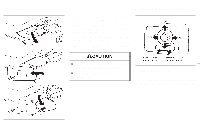
TILTING STEERING WHEEL 5. Before placing the child in the child restraint, use force to tilt the child restraint from side to side, and tug it forward to make sure that it is securely held in place. 6. Check that the retractor is in the automatic locking mode by trying to pull more belt out of the retractor. If you cannot pull any more belt webbing out of the retractor, the belt is in the automatic locking mode. 7. Check to make sure that the child restraint is properly secured prior to each use. If the lap belt is not locked, repeat steps 3 through 6. PD1336 Be sure to follow the child restraint manufacturer's instructions for belt routing. 3. Pull on the shoulder belt until all of the belt is fully extended and a click is heard. At this time, the belt retractor is in the automatic locking mode (child restraint mode). (It will revert back to "emergency locking" when the belt is fully retracted.) 4. Allow the belt to retract. A clicking sound will be heard as the belt retracts. This indicates that the retractor is in the automatic locking mode. Pull up on the belt to remove any slack in the belt. After the child restraint is removed and the seat belt is allowed to wind back into the retractor, the automatic locking mode (child restraint mode) is canceled; the seat belt may be used as normal and will only lock during a sudden stop or impact. SPA0394 Tilt operation While pushing down on the lock lever, adjust the steering wheel up or down to the desired position. Push the lock lever up securely to lock the steering wheel in place. Do not adjust the steering wheel while driving. You could lose control of your vehicle and cause an accident. 2-41
-
 1
1 -
2
-
3
-
4
-
5
-
6
-
7
-
8
-
9
-
10
-
11
-
12
-
13
-
14
-
15
-
16
-
17
-
18
-
19
-
20
-
21
-
22
-
23
-
24
-
25
-
26
-
27
-
28
-
29
-
30
-
31
-
32
-
33
-
34
-
35
-
36
-
37
-
38
-
39
-
40
-
41
-
42
-
43
-
44
-
45
-
46
-
47
-
48
-
49
-
50
-
51
-
52
-
53
-
54
-
55
-
56
-
57
-
58
-
59
-
60
-
61
-
62
-
63
-
64
-
65
-
66
-
67
-
68
-
69
-
70
-
71
-
72
-
73
-
74
-
75
-
76
-
 77
77 -
 78
78 -
 79
79 -
 80
80 -
 81
81 -
 82
82 -
 83
83 -
 84
84 -
 85
85 -
 86
86 -
 87
87 -
88
-
89
-
90
-
91
-
92
-
93
-
94
-
95
-
96
-
97
-
98
-
99
-
100
-
101
-
102
-
103
-
104
-
105
-
106
-
107
-
108
-
109
-
110
-
111
-
112
-
113
-
114
-
115
-
116
-
117
-
118
-
119
-
120
-
121
-
122
-
123
-
124
-
125
-
126
-
127
-
128
-
129
-
130
-
131
-
132
-
133
-
134
-
135
-
136
-
137
-
138
-
139
-
140
-
141
-
142
-
143
-
144
-
145
-
146
-
147
-
148
-
149
-
150
-
151
-
152
-
153
-
154
-
155
-
156
-
157
-
158
-
159
-
160
-
161
-
162
-
163
-
164
-
165
-
166
-
167
-
168
-
169
-
170
-
171
-
172
-
173
-
174
-
175
-
176
-
177
-
178
-
179
-
180
-
181
-
182
-
183
-
184
-
185
-
186
-
187
-
188
-
189
-
190
-
191
-
192
-
193
-
194
-
195
-
196
-
197
-
198
-
199
-
200
-
201
-
202
-
203
-
204
-
205
-
206
-
207
-
208
-
209
-
210
-
211
-
212
-
213
-
214
-
215
-
216
-
217
-
218
-
219
-
220
-
221
-
222
-
223
-
224
-
225
-
226
-
227
-
228
-
229
-
230
-
231
-
232
-
233
 |
 |
