2010 Nissan Murano Owner's Manual
2010 Nissan Murano Manual

2010 Nissan Murano manual content summary:
- 2010 Nissan Murano | Owner's Manual - Page 1
- 2010 Nissan Murano | Owner's Manual - Page 2
through this manual before operating your vehicle. A separate Warranty Information Booklet explains details about the warranties covering your vehicle. The NISSAN Service and Maintenance Guide explains details about maintaining and servicing your vehicle. Additionally, a separate Customer Care/Lemon - 2010 Nissan Murano | Owner's Manual - Page 3
and illustrations in this manual are those in effect at the time of printing. NISSAN reserves the right to change specifications or design front of the vehicle. CALIFORNIA PERCHLORATE ADVISORY Some vehicle parts, such as lithium batteries, may contain perchlorate material. The following advisory is - 2010 Nissan Murano | Owner's Manual - Page 4
trademarks of Gracenote. XM Radio® requires a subscription, sold separately after the first 90 days. It is not available in Alaska, Hawaii or Guam. For more information, visit www.xmradio.com. C * 2009 NISSAN MOTOR CO., LTD. All rights reserved. No part of this Owner's Manual may be reproduced or - 2010 Nissan Murano | Owner's Manual - Page 5
the top of the instrument panel on the driver's side) - Date of purchase - Current odometer reading - Your NISSAN dealer's name - Your comments or questions OR You can write to NISSAN with the information at: For U.S. customers Nissan North America, Inc. Consumer Affairs Department P.O. Box 685003 - 2010 Nissan Murano | Owner's Manual - Page 6
contents Safety - Seats, seat belts and supplemental restraint system Instruments and controls Pre-driving checks and adjustments Monitor, heater, air conditioner, audio, phone and voice recognition systems Starting and driving In case of emergency Appearance and care Maintenance and do-it-yourself - 2010 Nissan Murano | Owner's Manual - Page 7
Illustrated table of contents Seats, seat belts and Supplemental Restraint System (SRS) ...0-2 Exterior front ...0-3 Exterior rear ...0-5 Passenger compartment ...0-6 Instrument panel ...0-7 Meters and gauges...0-9 Engine compartment ...0-10 VQ35DE engine ...0-10 Warning and indicator lights ...0-11 - 2010 Nissan Murano | Owner's Manual - Page 8
center seat belt (Page 1-22) Adjustable headrest (P.1-12) Seat belts (P.1-15) Armrest (P.1-14) Head restraints (P.1-9) - Front-seat Active Head Restraints (P.1-11) Roof-mounted curtain side-impact and rollover supplemental air bags (P.1-45) Supplemental front-impact air bags (P.1-45) Child restraint - 2010 Nissan Murano | Owner's Manual - Page 9
installation (P.9-11) Fog lights* - Switch operation (P.2-35) - Bulb replacement (P.8-27) Tires - Wheel and tires (P.8-30, P.9-7) - Flat tire (6-2) - Tire Pressure Monitoring System (TPMS) (P.2-12, P.5-3) Outside mirrors (P.3-29) Doors - Keys (P.3-2) - Door locks (P.3-4) - Intelligent Key system - 2010 Nissan Murano | Owner's Manual - Page 10
14. Fuel-filler door - Operation (P.3-23) - Fuel recommendation (P.9-3) *: if so equipped 0-4 Illustrated table of contents - 2010 Nissan Murano | Owner's Manual - Page 11
washer - Switch operation (P.2-30) - Window washer fluid (P.8-12) Rear window defroster (P.2-31) High-mounted stop light - Bulb replacement (P.8-27) Antenna (P.4-62) - Satellite radio antenna* (P.4-32) Back-up light - Bulb replacement (P.8-27) Rear combination light - Bulb replacement (P.8-27) if - 2010 Nissan Murano | Owner's Manual - Page 12
glare adjustment* (P.3-28) - HomeLink® universal transceiver* (P.2-55) - Compass* (P.2-7) Cargo area - Storages (P.2-45) - Luggage hooks (P.2-46) - Cargo light (P.2-55) - Spare tire (P.6-3) Rear cup holders (P.2-41) Heated seat switch (rear)* (P.2-37) Console box - rear (P.2-43) Auxiliary input jack - 2010 Nissan Murano | Owner's Manual - Page 13
ventilator (P.4-25) Power lift gate switch* (P.3-19) Headlight, fog light* and turn signal switch (P.2-32) Fuel-filler door opener switch (P.3-23) 5. 6. Steering-wheel-mounted controls (left side)* - Audio control* (P.4-61) - Bluetooth® Hands-Free Phone System control* (P.4-75) Meters and gauges - 2010 Nissan Murano | Owner's Manual - Page 14
37) 26. Selector lever (P.5-13) 27. Front passenger air bag status light (P.1-52) 28. Power outlet (P.2-39) 29. All-Wheel Drive (AWD) LOCK switch* (P.5-21) 30. Rear window and outside mirror* defroster switch (P.2-31) 31. Heater/air conditioner control (P.4-26) or Audio system (P.4-31) 32. Glove box - 2010 Nissan Murano | Owner's Manual - Page 15
gauge (P.2-7) Warning/indicator lights (P.2-10) Trip computer switch (P.2-21) Dot matrix liquid crystal display (P.2-17) Engine coolant temperature gauge (P.2-6) Vehicle information display - Odometer/twin trip odometer (P.2-5) - Continuously Variable Transmission (CVT) position indicator (P.2-15 - 2010 Nissan Murano | Owner's Manual - Page 16
Power steering fluid reservoir (P.8-11) Drive belt location (P.8-15) Engine oil filler cap (P.8-8) Brake fluid reservoir (P.8-12) Air cleaner (P.8-16) 6. 7. 8. 9. 10. 11. Fuse/fusible link holder (P.8-20) Window washer fluid reservoir (P.8-12) Engine coolant reservoir (P.8-7) Radiator filler cap - 2010 Nissan Murano | Owner's Manual - Page 17
2-10 Name All-Wheel Drive (AWD) LOCK indicator light (AWD models)* Continuously Variable Transmission (CVT) position indicator light Cruise indicator light Page 2-14 2-15 2-11 2-15 2-15 2-15 2-15 2-16 2-16 2-16 2-16 2-16 Brake warning light 2-11 Front passenger air bag status light High beam - 2010 Nissan Murano | Owner's Manual - Page 18
MEMO 0-12 Illustrated table of contents - 2010 Nissan Murano | Owner's Manual - Page 19
restraints ...1-9 Adjustable headrest side-impact supplemental air bag and roof-mounted curtain side-impact and rollover supplemental air bag systems ...Seat belts with pretensioners (front seats) ...Supplemental air bag warning labels...Supplemental air bag warning light...Repair and replacement - 2010 Nissan Murano | Owner's Manual - Page 20
on the floor and adjust the seat properly. See "PRECAUTIONS ON SEAT BELT USAGE" later in this section. . After adjustment, gently rock in the seat to make sure it is securely locked. Do not leave children unattended inside the vehicle. They could unknowingly activate switches or controls. Unattended - 2010 Nissan Murano | Owner's Manual - Page 21
SSS0792 SSS0793 FRONT SEATS Front manual seat adjustment Forward and backward: 1 Pull the lever * up and hold it while you slide the seat forward or backward to the desired position. Release the lever to lock the seat in position. The reclining feature allows adjustment of the seatback for - 2010 Nissan Murano | Owner's Manual - Page 22
. Do not operate the power seat switch for a long period of time when the engine is off. This will discharge the battery. . SSS0684 See "AUTOMATIC DRIVE POSITIONER" in the "3. Pre-driving checks and adjustments" section for the seat position memory function. Lumbar support (if so equipped): The - 2010 Nissan Murano | Owner's Manual - Page 23
P (Park) position. Seat lifter (if so equipped): Push the front or rear end of the switch up or down to adjust the angle of the front portion or height of the seat. Reclining: 2 Move the recline switch * backward until the desired angle is obtained. To bring the seatback 2 forward again, move the - 2010 Nissan Murano | Owner's Manual - Page 24
rear seat * . Pull the lever beside the cargo area and fold the seatback. SSS1028 SSS0569 Lumbar support (if so equipped): The lumbar support feature provides lower back support to the driver. 1 2 Push the front * or back * end of the switch to adjust the seatback lumbar area. REAR SEATS Folding - 2010 Nissan Murano | Owner's Manual - Page 25
the seatbacks: Manual operation: Lift up each seatback and push it to the upright position until it is latched. Power operation (if so equipped): Push and hold the corresponding switch located B on the lower side of the instrument panel * or A the right or left side in the cargo area * . A beep - 2010 Nissan Murano | Owner's Manual - Page 26
sit well back in the seat with both feet on the floor and adjust the seat belt properly. See "PRECAUTIONS ON SEAT BELT USAGE" later in this section. After adjustment, check to be sure the seat is securely locked. . SSS0227A Reclining A Pull the reclining strap * and position the seatback at - 2010 Nissan Murano | Owner's Manual - Page 27
. Do not use the seat if the head restraint has been removed. If the head restraint was removed, reinstall and properly adjust the head restraint before an occupant uses the seating position. Failure to follow these instructions can reduce the effectiveness of the head restraints. This may increase - 2010 Nissan Murano | Owner's Manual - Page 28
SSS0997 SSS0993 SSS0994 Adjustment Adjust the head restraint so the center is level with the center of your ears. To raise the head restraint, pull it up. To lower, push and hold the lock knob and push the head restraint down. 1-10 Safety - Seats, seat belts and supplemental restraint system - 2010 Nissan Murano | Owner's Manual - Page 29
restraint up to the highest position. 2. Push and hold the lock knob. 3. Remove the head restraint from the seat. 4. Store the head restraint properly in a secure place so it is not loose in the vehicle. 5. Install and properly adjust the head restraint before an occupant uses the seating position - 2010 Nissan Murano | Owner's Manual - Page 30
not use the seat if the adjustable headrests have been removed. If the headrest was removed, reinstall and properly adjust the headrest before an occupant uses the seating position. Failure to follow these instructions can reduce the effectiveness of the adjustable headrests. This may increase the - 2010 Nissan Murano | Owner's Manual - Page 31
SSS0997 SSS0993 SSS0994 Adjustment Adjust the headrest so the center is level with the center of your ears. To raise the headrest, pull it up. To lower, push and hold the lock knob and push the headrest down. Safety - Seats, seat belts and supplemental restraint system 1-13 - 2010 Nissan Murano | Owner's Manual - Page 32
headrest up to the highest position. 2. Push and hold the lock knob. 3. Remove the headrest from the seat. 4. Store the headrest properly in a secure place so it is not loose in the vehicle. 5. Install and properly adjust the headrest before an occupant uses the seating position. Install 1. Align - 2010 Nissan Murano | Owner's Manual - Page 33
feet on the floor, your chances of being injured or killed in an accident and/or the severity of injury may be greatly reduced. NISSAN strongly encourages you and all of your passengers to buckle up every time you drive, even if your seating position includes a supplemental air bag. Most U.S. states - 2010 Nissan Murano | Owner's Manual - Page 34
WARNING . Every person who drives or rides in this vehicle should use a seat belt at all times. Children should be properly restrained in the rear seat and, if appropriate, in a child restraint. The seat belt should be properly adjusted to a snug fit. Failure to do so may reduce the effectiveness of - 2010 Nissan Murano | Owner's Manual - Page 35
instructions and replacement recommendations. The child restraints should be replaced if they are damaged. CHILD SAFETY Children need adults to help protect them. They need to be properly restrained. In addition to the general information in this manual, child safety information is available - 2010 Nissan Murano | Owner's Manual - Page 36
instructions for minimum and maximum weight person who drives or rides floor and adjust the seat belt WARNING Never let a child stand or kneel on any seat and do not allow a child in the cargo a commercially available booster seat run the lap/shoulder belt over . 1-18 Safety - Seats, seat - 2010 Nissan Murano | Owner's Manual - Page 37
belt out of the retractor. SSS0292 Fastening the seat belts 1. Adjust the seat. (See "SEATS" earlier in this section.) 2. the buckle until you hear and feel the latch engage. . The retractor is designed to lock during a sudden stop or on impact. A slow pulling motion permits the belt to move - 2010 Nissan Murano | Owner's Manual - Page 38
allow the driver and passengers some freedom of movement in the seat. The ELR locks the seat belt when the vehicle slows down rapidly or during certain impacts. The Automatic Locking Retractor (ALR) mode (child restraint mode) locks the seat belt for child restraint installation. When ALR mode is - 2010 Nissan Murano | Owner's Manual - Page 39
belt operation, see a NISSAN dealer. . WARNING After adjustment, release the adjustment button and try to move the shoulder belt anchor up and down to make sure it is securely fixed in position. The shoulder belt anchor height should be adjusted to the position best for you. Failure to do so may - 2010 Nissan Murano | Owner's Manual - Page 40
SSS0845 SSS0846 SSS0241 Seat belt hooks When the rear seat belts are not in use and when folding down the rear seats, hook the rear outer seat belts on the seat belt hooks. Rear center seat belt The rear center seat belt has a connector tongue 1 2 * and a seat belt tongue * . Both the connector - 2010 Nissan Murano | Owner's Manual - Page 41
Stowing rear center seat belt: When folding down the rear seat, the rear center seat belt can be retracted into a stowed position as follows: 1 1. Hold the connector tongue * so that the seat belt does not retract suddenly when the tongue is released from the connector buckle. Release the connector - 2010 Nissan Murano | Owner's Manual - Page 42
in the correct position, serious personal injury may result in an accident or sudden stop. Attaching rear center seat belt: Always be sure the rear center seat belt connector tongue and connector buckle are attached. Disconnect only when folding down the rear seat. To connect the buckle: 1. Pull - 2010 Nissan Murano | Owner's Manual - Page 43
to avoid dropping it under the seat cushion. SEAT BELT EXTENDERS If, because of body size or driving position, it is not possible to properly fit the lap-shoulder belt and fasten it, an extender is available that is compatible with the installed seat belts. The extender adds approximately 8 in (200 - 2010 Nissan Murano | Owner's Manual - Page 44
the webbing is found, the entire seat belt assembly should be replaced. PRECAUTIONS ON CHILD RESTRAINTS WARNING . Infants and small children should always be placed in an appropriate child restraint while riding in the vehicle. Failure to use a child restraint can result in serious injury or death - 2010 Nissan Murano | Owner's Manual - Page 45
Follow all of the child restraint manufacturer's instructions for installation and use. When purchasing a child adult seat belts or harnesses. . Adjustable seatbacks should be positioned to fit the place the child in it. Push it from side to side while holding the seat near the LATCH attachment or - 2010 Nissan Murano | Owner's Manual - Page 46
the child restraint and check the various adjustments to be sure the child restraint is compatible with is designed for your child's height and weight. Always follow all recommended procedures. The on the vehicle. SSS0419B LATCH system anchor location Lower Anchors and Tethers for CHildren System - 2010 Nissan Murano | Owner's Manual - Page 47
or webbing-mounted attachments that can be connected to two anchors located at certain seating positions in your vehicle. With this system, this section for installation instructions.) When installing a child restraint, carefully read and follow the instructions in this manual and those supplied - 2010 Nissan Murano | Owner's Manual - Page 48
top tether strap is damaged. - If the cargo cover contacts the top tether strap when it is attached to the top tether anchor, remove the cargo cover from the vehicle or secure it on the cargo floor below its attachment location. If the cargo cover is not removed, it may damage the top tether strap - 2010 Nissan Murano | Owner's Manual - Page 49
: 1. Adjust the rear seatback to the upright position. 2. Position the child restraint on the seat. Always follow the child restraint manufacturer's instructions. SSS0645 Front-facing (webbing-mounted) - step 3 WARNING . Attach LATCH system compatible child restraints only at the locations shown - 2010 Nissan Murano | Owner's Manual - Page 50
the child restraint should be secured against the vehicle seatback. If necessary, adjust or remove the headrest to obtain the correct child restraint fit. (See "HEAD it before you place the child in it. Push it from side to side while holding the seat near the LATCH attachment path. The child restraint should not - 2010 Nissan Murano | Owner's Manual - Page 51
child restraint using the LATCH system: 1. Position the child restraint on the seat. Always follow the child restraint manufacturer's instructions. SSS0648 Rear-facing (webbing-mounted) - step 2 SSS0649 Rear-facing (rigid-mounted) - step 2 2. Secure the child restraint anchor attachments to - 2010 Nissan Murano | Owner's Manual - Page 52
3. For child restraints that are equipped with webbing-mounted attachments, remove any additional slack from the anchor attachments. Press downward and rearward it before you place the child in it. Push it from side to side while holding the seat near the LATCH attachment path. The child restraint should - 2010 Nissan Murano | Owner's Manual - Page 53
front passenger air bag status light is illuminated to indicate the passenger air bag is OFF. See "Front passenger air bag and status light" later in this section for details. . SSS0100 . A child restraint with a top tether strap should not be used in the front passenger seat. The instructions in - 2010 Nissan Murano | Owner's Manual - Page 54
2. Position the child restraint on the seat. Always follow the child restraint manufacturer's instructions. The back of the child restraint should be secured against the seatback. If necessary, adjust or remove the head restraint/headrest (front passenger seat only) to obtain the correct child - 2010 Nissan Murano | Owner's Manual - Page 55
(ALR) mode (child restraint mode). It reverts to Emergency Locking Retractor (ELR) mode when the seat belt is fully retracted. 5. Allow the seat belt to retract. Pull up on the shoulder belt to remove any slack in the belt. 6. Remove any additional slack from the seat belt; press downward and - 2010 Nissan Murano | Owner's Manual - Page 56
use. If the seat belt is not locked, repeat steps 3 through 9. SSS0641 Front- Push it from side to side while holding the seat near the seat switch to the ON position. The front passenger air bag should illuminate. If this status light light is not illuminated, see "Front passenger air bag and status light - 2010 Nissan Murano | Owner's Manual - Page 57
the child restraint on the seat. Always follow the restraint manufacturer's instructions. 2. Route the seat belt tongue through the child restraint and belt retractor is in the Automatic Locking Retractor (ALR) mode (child restraint mode). It reverts to Emergency Locking Retractor (ELR) mode when - 2010 Nissan Murano | Owner's Manual - Page 58
seat belt to retract. Pull up on the shoulder belt to remove any slack in the belt. 5. Remove any additional slack from the child restraint; press downward and rearward it before you place the child in it. Push it from side to side while holding the seat near the seat belt path. The child restraint should - 2010 Nissan Murano | Owner's Manual - Page 59
locked, repeat steps 3 through 7. After the child restraint is removed and the seat belt fully retracted, the ALR mode (child restraint mode) is canceled. SSS0099 between the adult and parts has a lap/shoulder belt. Failure to use a three-point Do not use towels, books, pillows or other items - 2010 Nissan Murano | Owner's Manual - Page 60
the lap and shoulder portions of the seat belt over the strongest portions of a child's body to provide the maximum protection during a collision. . Follow all of the booster seat manufacturer's instructions for installation and use. When purchasing a booster seat, be sure to select one which will - 2010 Nissan Murano | Owner's Manual - Page 61
Make sure the child's head will be properly supported by the booster seat or vehicle seat. booster seat and check the various adjustments to be sure the booster seat use the lap/shoulder belt Automatic Locking Retractor (ALR) mode when using is being operated. The instructions in this section apply - 2010 Nissan Murano | Owner's Manual - Page 62
. Only place it in a front-facing direction. Always follow the booster seat manufacturer's instructions. 3. The booster seat should be positioned on the vehicle seat so that it is stable. If necessary, adjust or remove the head restraint/headrest to obtain the correct booster seat fit. (See "HEAD - 2010 Nissan Murano | Owner's Manual - Page 63
and instructions for properly fastening a seat belt shown in the "THREE-POINT TYPE SEAT BELT" earlier in this section. 7. If the booster seat is installed in the front passenger seat, turn the ignition switch to the ON position. The front passenger air bag may or may not be status light illuminated - 2010 Nissan Murano | Owner's Manual - Page 64
seated a suitable distance away from the steering wheel, instrument panel and door finishers. (See "SEAT BELTS" earlier in this section for instructions and precautions on seat belt usage.) The supplemental air bags operate only when the ignition switch is in the ON position. After turning the - 2010 Nissan Murano | Owner's Manual - Page 65
wheel or instrument panel. Always use the seat belts. The driver and front passenger seat belt buckles are equipped with sensors that detect if the seat belts are fastened. The Advanced Air Bag System monitors the severity of a collision and seat belt usage then inflates the air bags. Failure - 2010 Nissan Murano | Owner's Manual - Page 66
SSS0007 SSS0008 SSS0099 SSS0006 SSS0009 SSS0100 1-48 Safety - Seats, seat belts and supplemental restraint system - 2010 Nissan Murano | Owner's Manual - Page 67
be severely injured or killed when the front air bags, side air bags or curtain and rollover air bags inflate if they are not properly restrained. air bag could seriously injure or kill your child. See "CHILD RESTRAINTS" earlier in this section for details. . SSS0059A Do not lean against doors or - 2010 Nissan Murano | Owner's Manual - Page 68
sitting well back and upright in the seat with both feet on the floor. The side air bag and curtain and rollover air bag inflate with great force. Do not allow anyone to place their hand, leg or face near the side air bag on the side of the seatback of the front seat or near the - 2010 Nissan Murano | Owner's Manual - Page 69
and warnings in this manual still apply and must be followed. The driver supplemental front-impact air bag is located in the center of the steering wheel; the passenger supplemental front-impact air bag is mounted in the instrument panel above the glove box. The front air bags are designed to - 2010 Nissan Murano | Owner's Manual - Page 70
bags do not provide restraint to the lower body. Even with NISSAN Advanced Air Bags, seat belts should be correctly worn and the driver and passenger seated upright as far as practical away from the steering wheel or instrument panel. The front air bags inflate quickly in order to help protect the - 2010 Nissan Murano | Owner's Manual - Page 71
: The front passenger air bag status light is located on the instrument panel below the air conditioner controls. The light operates as follows: . Unoccupied passenger seat: The light is OFF and the front passenger air bag is OFF and will not inflate in a crash. Passenger's seat occupied by a small - 2010 Nissan Murano | Owner's Manual - Page 72
passenger air bag status light will take a few seconds to register a change in the passenger seat status. However, if the seat becomes unoccupied, the air bag status light will remain off. If a malfunction occurs in the front passenger air bag system, the supplemental air bag warning , located in - 2010 Nissan Murano | Owner's Manual - Page 73
the buyer about the front air bag system and guide the buyer to the appropriate sections in this Owner's Manual. FRONT SEAT-MOUNTED SIDE-IMPACT SUPPLEMENTAL AIR BAG AND ROOF-MOUNTED CURTAIN SIDE-IMPACT AND ROLLOVER SUPPLEMENTAL AIR BAG SYSTEMS The side air bags are located in the outside of the - 2010 Nissan Murano | Owner's Manual - Page 74
restraint to the lower body. The seat belts should be correctly worn and the driver and passenger seated upright as far as practical away from the side air bags. Rear seat passengers should be seated as far away as practical from the door finishers and side roof rails. The side air bags and curtain - 2010 Nissan Murano | Owner's Manual - Page 75
and, if necessary, replaced by a NISSAN dealer. No unauthorized changes should be made air promptly. When selling your vehicle, we request that you inform the buyer about the side air bag and curtain and rollover air bag systems and guide the buyer to the appropriate sections in this Owner's Manual - 2010 Nissan Murano | Owner's Manual - Page 76
, satellite sensors, occupant classification system, front air bag modules, side air bag modules, curtain and rollover air bag modules, pretensioners and all related wiring. When the ignition switch is in the ON position, SRS air bag 1 The warning labels * are located on the surface of the sun - 2010 Nissan Murano | Owner's Manual - Page 77
need servicing: ...The supplemental air bag warning light remains on after approximately 7 seconds. The supplemental air bag warning light flashes intermittently. The supplemental air bag warning light does not come on at all. REPAIR AND REPLACEMENT PROCEDURE The front air bags, side air bags - 2010 Nissan Murano | Owner's Manual - Page 78
Models with color display...Vehicle Dynamic Control (VDC) OFF switch ...Power outlet ...Cigarette lighter and ashtray (if so equipped)...Storage ...Cup holders...Sunglasses holder ...Glove box ...Console box ...Storage box (if so equipped) ...Cargo floor box ...Luggage side box...Cargo cover (if so - 2010 Nissan Murano | Owner's Manual - Page 79
...Map lights ...Personal lights...Interior light control switch ...Mood lights ...Vanity mirror lights ...Cargo lights... 2-48 2-48 2-51 2-51 2-53 2-53 2-53 2-53 2-54 2-55 2-55 HomeLink® Universal Transceiver (if so equipped) ...Programming HomeLink® ...Programming HomeLink® for Canadian customers - 2010 Nissan Murano | Owner's Manual - Page 80
PANEL 7. Steering wheel - Horn - Driver supplemental air bag - Power steering system Steering-wheel-mounted controls (right side) - Cruise control switches Wiper and washer switch Push-button ignition switch Center ventilator Center display/Center color display*/Navigation system** Heater/air - 2010 Nissan Murano | Owner's Manual - Page 81
28. 29. 30. 31. 32. *: **: Power outlet All-Wheel Drive (AWD) LOCK switch* Rear window and outside mirror* defroster switch Heater/air conditioner control or Audio system Glove box if so equipped Refer to the separate Navigation System Owner's Manual (if so equipped). Instruments and controls 2-3 - 2010 Nissan Murano | Owner's Manual - Page 82
control switch Tachometer Speedometer Fuel gauge Warning/indicator lights Trip computer switch Dot matrix liquid crystal display Engine coolant temperature gauge Vehicle information display - Odometer/twin trip odometer - Continuously Variable Transmission (CVT) position indicator 10. RESET switch - 2010 Nissan Murano | Owner's Manual - Page 83
the trip odometer: 3 Pushing the TRIP A/B RESET switch * for more than 1 second resets the trip odometer records the distance of individual trips. Changing the display: 3 Pushing the TRIP A/B RESET switch * on the right side of the combination meter panel changes the display as follows: TRIP A ? - 2010 Nissan Murano | Owner's Manual - Page 84
engine coolant temperature zone * . ENGINE COOLANT TEMPERATURE GAUGE The gauge indicates the engine coolant temperature. The engine coolant temperature is within the the illustration. The engine coolant temperature varies with the outside air temperature and driving conditions. CAUTION When engine - 2010 Nissan Murano | Owner's Manual - Page 85
a small reserve of fuel in the tank when the fuel gauge needle reaches "E". indicates that the fuel-filler door is The located on the driver's side of the vehicle. CAUTION . If the vehicle runs out of fuel, the malfunction indicator light (MIL) may come on. Refuel as soon as possible. After a few - 2010 Nissan Murano | Owner's Manual - Page 86
5 MPH (8 km/h). You can also calibrate the compass by driving your vehicle on your everyday route. The compass will be calibrated once it has tracked 3 complete circles. To turn on and off the compass manually, push A switch * while the ignition switch is in the the ON position. SIC0611B Zone map - 2010 Nissan Murano | Owner's Manual - Page 87
CHANGE PROCEDURE The difference between magnetic north and geographical north is known as variance. In some areas, this difference can sometimes be great enough to cause false compass readings. Follow these instructions to set the variance for your particular location if this happens: switch - 2010 Nissan Murano | Owner's Manual - Page 88
light (AWD models)* Anti-lock Braking System (ABS) warning light Low tire pressure warning light Master warning light Seat belt warning light Supplemental air bag warning light Brake warning light All-Wheel Drive (AWD) LOCK indicator light (AWD models)* Continuously Variable Transmission (CVT - 2010 Nissan Murano | Owner's Manual - Page 89
repaired, by a NISSAN dealer promptly. (See "Anti-lock Braking System (ABS) warning light" earlier in this section.) Instruments and controls 2-11 or Anti-lock Braking System (ABS) warning light . When the ignition switch is in the ON position, the Anti-lock Braking System (ABS) warning - 2010 Nissan Murano | Owner's Manual - Page 90
effort as well as pedal travel. If the brake fluid level is below the minimum or MIN mark on the brake fluid reservoir, do not drive until the brake system has been checked at a NISSAN dealer. NISSAN dealer immediately. Intelligent Key warning light After the ignition switch is pushed to the ON - 2010 Nissan Murano | Owner's Manual - Page 91
does not illuminate with the ignition switch pushed ON, have the vehicle checked by a NISSAN dealer as soon as possible. If the light illuminates while driving, avoid sudden steering maneuvers or abrupt braking, reduce vehicle speed, pull off the road to a safe location and stop the vehicle as soon - 2010 Nissan Murano | Owner's Manual - Page 92
is turned to the ON position, and turns off within 1 second. When selecting the LOCK mode while the engine is running, this light will illuminate. (See "ALL-WHEEL DRIVE (AWD)" in the "5. Starting and driving" section.) Unless checked and repaired, the Supplemental 2-14 Instruments and controls - 2010 Nissan Murano | Owner's Manual - Page 93
blinks while the engine is running, it may indicate the cruise control system is not functioning properly. Have the system checked by a NISSAN dealer. (See "CRUISE CONTROL" in the "5. Starting and driving" section.) High beam indicator light (Blue) This light comes on when the headlight high beam - 2010 Nissan Murano | Owner's Manual - Page 94
system and/or CVT system checked and repaired as necessary could lead to poor driveability, reduced fuel economy, and possible damage to the emission control system. AUDIBLE REMINDERS Key reminder chime A chime will sound if the driver side door is opened while the ignition switch is pushed to - 2010 Nissan Murano | Owner's Manual - Page 95
reminder chime A chime will sound when the driver side door is or opened with the light switch in the position and the ignition switch in the ACC or OFF position. Turn the light switch off when you leave the vehicle. Parking brake reminder chime The chime will sound if the vehicle is driven with - 2010 Nissan Murano | Owner's Manual - Page 96
will start by pushing the ignition switch with the brake pedal depressed. You can start the engine directly in any position. 2. Steering lock release malfunction indicator (if so equipped) This indicator appears when the steering wheel cannot be released from the LOCK position. If this indicator - 2010 Nissan Murano | Owner's Manual - Page 97
. If this indicator appears, replace the battery with a new one. (See "BATTERY REPLACEMENT" in the "8. Maintenance and do-it-yourself" section.) 4. Key removal indicator This indicator appears when the driver's door is opened with the ignition switch in the OFF or LOCK position and the key placed - 2010 Nissan Murano | Owner's Manual - Page 98
FOR MAINTENANCE 1. Engine oil replacement indicator This indicator appears when the set time comes for changing the engine oil. You can set or reset the distance for changing the engine oil. (See "TRIP COMPUTER" later in this section.) 12. Door/lift gate open warning (ignition switch is in the ON - 2010 Nissan Murano | Owner's Manual - Page 99
to empty (dte) ? Outside air temperature (ICY) ? Setting ? Warning check SIC3580 SIC3673 TRIP COMPUTER Switches for the trip computer are located on the right side of the combination meter panel. To operate the trip computer, push the side or front of the switches as shown above. A * B * Current - 2010 Nissan Murano | Owner's Manual - Page 100
B switch * shows the average fuel consumption since the last reset. B switch * Resetting is done by pushing the for longer than 1 the last reset. The displayed time can be reset B switch * for longer than by pushing the 1 second. (The the B switch * for longer than 1 second. (The elapsed time - 2010 Nissan Murano | Owner's Manual - Page 101
the screen. When the fuel level drops even lower, the dte display will change to If the amount of fuel added is small, the display just before the ignition switch is Outside air temperature (ICY - 8F or 8C) The outside air temperature is displayed in 8F or 8C in the range of −22 to - 2010 Nissan Murano | Owner's Manual - Page 102
page of the setting mode, select "BACK". SIC3678 Setting Setting cannot be made while driving. A message "Setting can only be operated when stopped" is also displayed on the dot matrix crystal display. A B switch * and switch * are The used in the setting mode to select and decide a menu. SKIP - 2010 Nissan Murano | Owner's Manual - Page 103
to move to the B switch * to select other menus. SIC3679 SIC2133 Warning check To see if there are any of the following warnings and corresponding details, select this menu...No key warning Low fuel warning Low washer fluid warning Parking brake release warning Door/lift gate open warning Your - 2010 Nissan Murano | Owner's Manual - Page 104
to the OFF position. 3. Carry the Intelligent Key. 4. Close all doors, hood and lift gate. Lock all doors. The doors can be locked with: ...the lock button Key any request switch the power door lock switch on the Intelligent Even when the driver and/or passengers are in the vehicle, the system will - 2010 Nissan Murano | Owner's Manual - Page 105
(CONT ASSY - CARD SLOT) This device complies with part 15 of the FCC Rules and RSS-210 of Industry Canada. Operation is subject to the following two conditions; The light blinks after the ignition switch was in the ACC, OFF and LOCK position. This function indicates the security systems equipped on - 2010 Nissan Murano | Owner's Manual - Page 106
WINDSHIELD WIPER AND WASHER SWITCH service as soon as possible. Please bring all registered keys that you have when visiting a NISSAN dealer for service. WARNING In freezing temperatures the washer solution may freeze Do not use the window washer reservoir tank to . 2-28 Instruments and controls - 2010 Nissan Murano | Owner's Manual - Page 107
using the rain sensor located on the upper part of the windshield. To set the rain-sensing auto wiper system, push 1 the lever down to the AUTO position * . The wiper will sweep once while the ignition switch is in the ON position. The rain sensor sensitivity level can be adjusted 2 by turning the - 2010 Nissan Murano | Owner's Manual - Page 108
wiper may stop moving to protect its motor. If this occurs, turn the wiper switch to the OFF position and remove the snow or ice that is on and around the wiper arms. In approximately 1 minute, turn washer reservoir tank to mix the washer fluid concentrate . . 2-30 Instruments and controls - 2010 Nissan Murano | Owner's Manual - Page 109
window glass and outside mirrors (if so equipped), start the engine 1 and push the switch * on. The indicator light 2 * will come on. Push the switch again to turn the defroster off. It will automatically turn off in approximately 15 minutes. CAUTION When cleaning the inner side of the rear window - 2010 Nissan Murano | Owner's Manual - Page 110
signal). Even when the daytime running lights are active (Canada only), the xenon headlights dealer and have the headlights adjusted correctly. . SIC3668 HEADLIGHT SWITCH Lighting 1 * 2 * When the xenon headlight is initially turned on, its brightness or color varies slightly. However, the color - 2010 Nissan Murano | Owner's Manual - Page 111
" in the "4. Monitor, heater, air conditioner, audio, phone and voice recognition systems" section. SAA0642A Be sure not to put anything on top of the A photo sensor * located on the top of the instrument panel. The photo sensor controls the autolight; if it is covered, the photo sensor reacts as - 2010 Nissan Murano | Owner's Manual - Page 112
. Failure to do so could cause an accident injuring yourself and others. . 3 * Battery saver system A chime will sound when the driver side door is or opened with the light switch in the position and the ignition switch in the ACC, OFF or LOCK position. Daytime running light system (Canada only - 2010 Nissan Murano | Owner's Manual - Page 113
. When the turn is completed, the turn signals cancel automatically. 2 * Lane change signal To adjust the brightness of instrument panel lights, push the control switches. Pushing the A upper switch * will brighten the lights. When the brightness reaches the maximum level, a B beep will sound. The - 2010 Nissan Murano | Owner's Manual - Page 114
use of the hazard warning flasher switch while driving. SIC2574 SIC3586 A To sound the horn, push the pad area * of the steering wheel. Push the switch on to warn other drivers when you must stop or park under emergency conditions. All turn signal lights will flash. WARNING . If stopping for an - 2010 Nissan Murano | Owner's Manual - Page 115
or the occupants cannot monitor elevated seat temperatures or have an inability to feel pain in body parts that contact the seat. Use of the seat heater by such people could result in serious injury. . . CAUTION . The battery could run down if the seat heater is operated while the engine is not - 2010 Nissan Murano | Owner's Manual - Page 116
settings" in the "4. Monitor, heater, air conditioner, audio, phone and voice recognition systems" section. SIC3649 MODELS WITHOUT COLOR DISPLAY The digital clock (in the audio unit) displays the time when the ignition switch is in the ACC or ON position. Adjusting the time 1 1. Push and hold - 2010 Nissan Murano | Owner's Manual - Page 117
the VDC system, push the VDC OFF indicator will illuminate. switch. The Push the VDC OFF switch again or restart the engine to turn on the system. (See "VEHICLE DYNAMIC CONTROL (VDC) SYSTEM" in the "5. Starting and driving" section.) SIC3651 Cargo area Console box - Type B SIC3653 Instruments and - 2010 Nissan Murano | Owner's Manual - Page 118
120W (10A) power draw. Do not use double adapters or more than one electrical accessory. Use power outlet with the engine running to avoid discharging the vehicle battery. Avoid using power outlet when the air conditioner, headlights or rear window defroster is on. This power outlet is not designed - 2010 Nissan Murano | Owner's Manual - Page 119
source for any other accessory is not recommended. Do not use any other power outlet for an accessory lighter. CUP HOLDERS CAUTION . Avoid abrupt starting and braking when the cup the cup holder, push the lid To remove the inner tray for cleaning, pull it up as 2 illustrated * . Instruments and - 2010 Nissan Murano | Owner's Manual - Page 120
the glasses. SIC3042 Rear SIC3589 Pull the armrest forward until it is horizontal. SUNGLASSES HOLDER WARNING Keep the sunglasses holder closed while driving to prevent an accident. To open the sunglasses holder, push 1 *. CAUTION . . Do not use for anything other than glasses. Do not leave - 2010 Nissan Murano | Owner's Manual - Page 121
the bottom case is available for storing some larger ones. To close, push the lid in until the lock latches. 2 3 To lock * /unlock * the glove box, use the mechanical key. For the mechanical key usage, see "KEYS" in the "3. Pre-driving checks and adjustments" section. Instruments and controls 2-43 - 2010 Nissan Murano | Owner's Manual - Page 122
Rear knob 1 * and pull out 2 *. STORAGE BOX (if so equipped) To open, push the storage box lid illustrated. 1 * as 2 The inner tray can be removed * as illustrated. Do not place valuable items in the storage box. Do not use the storage box as an ashtray. SIC3656 Type B 2-44 Instruments and - 2010 Nissan Murano | Owner's Manual - Page 123
the opening of the lift gate. Type B A To open the cargo floor box, push * . To close, push the lid until the lock latches. The net partitions can be removed a larger storage space. B * to make SIC3594 The cargo floor box needs to be removed when you need a spare tire. (See "FLAT TIRE" in the - 2010 Nissan Murano | Owner's Manual - Page 124
opposite 3 side * . restraint top tether strap is damaged. - If the cargo cover contacts the top tether strap when it is attached to the top tether anchor, remove the cargo cover from the vehicle or secure it on the cargo floor below its attachment location. If the cargo cover is not removed, it - 2010 Nissan Murano | Owner's Manual - Page 125
Axle Weight Rating (GAWR front and rear). The GVWR and GAWR are located on the F.M.V.S.S. or C.V.M.S.S. certification label (located on the driver's door pillar). For more information regarding GVWR and GAWR, see "VEHICLE LOADING INFORMATION" in the "9. CAUTION Use care when placing or removing - 2010 Nissan Murano | Owner's Manual - Page 126
windows operate when the ignition switch is in the ON position or for about 45 seconds after the ignition switch is pushed to the OFF position. If the driver's or front passenger's door is opened during this period of about 45 seconds, power to the windows is canceled. 2-48 Instruments and controls - 2010 Nissan Murano | Owner's Manual - Page 127
. SIC3283A SIC3241 Main power window switch (driver's side) 1. 2. 3. 4. 5. Driver side window Front passenger side window Rear left passenger side window Rear right passenger side window Window lock button Passenger side power window switch The passenger side switch will open or close only the - 2010 Nissan Murano | Owner's Manual - Page 128
open or close all the way. To stop the window, just push or lift the switch in the opposite direction. A light push or pull on the switch will cause the window to open or close until the switch is released. If the windows do not close automatically If the power window automatic function - 2010 Nissan Murano | Owner's Manual - Page 129
switch is pushed to the OFF position. If the driver's door or the passenger's door body out of the moonroof opening while the vehicle is in motion or while the moonroof is closing. . CAUTION . Remove . . When the OPEN or CLOSE side of the moon3 roof switch is pushed to the second detent (* - 2010 Nissan Murano | Owner's Manual - Page 130
cannot be closed automatically when the auto reverse function activates due to a malfunction, push 2 and hold the CLOSE side * of the moonroof switch. Depending on the environment or driving conditions, the auto reverse function may be activated if an impact or load similar to something being caught - 2010 Nissan Murano | Owner's Manual - Page 131
map lights and rear personal lights will illuminate. 2 When the switch is in the DOOR position * , the map lights and rear personal lights will illuminate under the following conditions: ON position DOOR position . ignition switch is switched to the LOCK position Instruments and controls 2-53 - 2010 Nissan Murano | Owner's Manual - Page 132
Map lights A The mood lights * located in the following positions will illuminate whenever the headlight or position. switch is in the ... next to the map lights under the instrument panel under the driver's power window switch The mood lights can be adjusted with the illumination control buttons - 2010 Nissan Murano | Owner's Manual - Page 133
, gates, home and office lighting, entry door locks and security systems. Is powered by your vehicle's battery. No separate batteries are required. If the vehicle's battery is discharged or is disconnected, HomeLink® will retain all programming. . SIC2064 SIC2131A 1 When the switch is in the ON - 2010 Nissan Murano | Owner's Manual - Page 134
from the HomeLink® surface. . PROGRAMMING HomeLink® To program your HomeLink® Transceiver to operate a garage door, gate, or entry door opener, home or office lighting, you need to be at the same location as the device. Note: Garage door openers (manufactured after 2-56 Instruments and controls - 2010 Nissan Murano | Owner's Manual - Page 135
Push and release the program button located on the garage door opener's motor to activate the "training mode". This button is usually located near the antenna wire that hangs down from the motor. If the wire originates from under a light lens, you will need to remove the lens to access the training - 2010 Nissan Murano | Owner's Manual - Page 136
to have programming difficulties, please contact the NISSAN Consumer Affairs Department. The phone numbers are located in the Foreword of this Owner's Manual. 3. Push and hold the hand-held transmitter button. 4. The HomeLink® indicator light will flash, first slowly and then rapidly. When the - 2010 Nissan Murano | Owner's Manual - Page 137
be received, including interference that may cause undesired operation. The transmitter has been tested and complies with FCC and DOC/MDC rules. Changes or modifications not expressly approved by the party responsible for compliance could void the user's authority to operate the device. DOC: ISTC - 2010 Nissan Murano | Owner's Manual - Page 138
MEMO 2-60 Instruments and controls - 2010 Nissan Murano | Owner's Manual - Page 139
door lock switch ...3-6 Automatic door locks ...3-6 Child safety rear door lock ...3-7 Intelligent Key system...3-7 Intelligent Key operating range ...3-9 Door locks/unlocks precaution ...3-9 Intelligent Key operation...3-10 Battery saver system ...3-13 Warning signals ...3-13 Troubleshooting guide - 2010 Nissan Murano | Owner's Manual - Page 140
in the key head. Never leave these keys in the vehicle. Additional or replacement keys: SPA2406 Type A If you still have a key, the key number is given to your dealer at the time of registration will no longer be able to start your vehicle. SPA2431 Type B 3-2 Pre-driving checks and adjustments - 2010 Nissan Murano | Owner's Manual - Page 141
where temperatures exceed 1408F (608C). - Do not change or modify the Intelligent Key. - Do not use contact a NISSAN dealer. INTELLIGENT KEY SYSTEM be registered by a NISSAN dealer prior to use with the Intelligent NISSAN dealer. CAUTION . Be sure to carry the Intelligent Key with you when driving. - 2010 Nissan Murano | Owner's Manual - Page 142
into the key until the lock knob returns to the lock position. Use the mechanical key to lock or unlock the doors and glove box, if they are equipped with a key cylinder. See "DOORS" later in this section and "STORAGE" in the "2. Instruments and controls" section. 1. Remove the mechanical key from - 2010 Nissan Murano | Owner's Manual - Page 143
the vehicle * will lock all doors. Turning the driver's door key cylinder once 2 to the rear of the vehicle * will unlock the driver's door. After returning the key to the 3 neutral position * , turning it to the rear again within 1 minute will unlock all doors. You can switch the lock system to the - 2010 Nissan Murano | Owner's Manual - Page 144
seconds. To change AUTO LOCK settings: push and hold the power door lock switch to position (LOCK) for more than the 5 seconds. . SPA2300 LOCKING WITH POWER DOOR LOCK SWITCH Operating the power door lock switch will lock or unlock all the doors. The switches are located on the driver's and front - 2010 Nissan Murano | Owner's Manual - Page 145
type of radio wave remote control is used nearby. When the Intelligent Key is placed near an electric appliance such as a personal Pre-driving checks and adjustments 3-7 The Intelligent Key system can operate all the door locks using the remote controller function or pushing the request switch on - 2010 Nissan Murano | Owner's Manual - Page 146
information regarding replacement of a battery, see "BATTERY REPLACEMENT" in the "8. Maintenance and do-it-yourself" section. For models with a steering wheel lock mechanism: Because the steering wheel is locked electrically, unlocking the steering wheel with the ignition switch in the LOCK position - 2010 Nissan Murano | Owner's Manual - Page 147
you and then lock the doors. Pre-driving checks and adjustments 3-9 SPA1948A INTELLIGENT KEY OPERATING RANGE The Intelligent Key functions can only be used when the Intelligent Key is within the specified 1 operating range * from the request switch. When the Intelligent Key battery is discharged - 2010 Nissan Murano | Owner's Manual - Page 148
with the door handle request switch) can be set to remain inactive. (See "VEHICLE INFORMATION AND SETTINGS" in the "4. Monitor, heater, air conditioner, audio, phone and voice recognition systems" section.) SPA2408 SPA2434 . INTELLIGENT KEY OPERATION You can lock or unlock the doors without taking - 2010 Nissan Murano | Owner's Manual - Page 149
indicator flashes 4 times and the outside chime sounds. To close the lift gate, push the power lift gate button on the key, or power lift gate switch on the instrument panel or lower part of the lift gate. (See "LIFT GATE" in the "3. Pre-driving checks and adjustments" section.) Locking doors - 2010 Nissan Murano | Owner's Manual - Page 150
- once HAZARD - once HORN - none Hazard indicator mode: DOOR LOCK Intelligent Key system (Using door handle or lift gate request switch) Remote keyless entry system (Using or button) HAZARD - twice HAZARD - none DOOR UNLOCK HAZARD - twice HAZARD - none 3-12 Pre-driving checks and adjustments - 2010 Nissan Murano | Owner's Manual - Page 151
crystal display. When a chime or beep sounds or the warning displays, be sure to check the vehicle and Intelligent Key. See "TROUBLESHOOTING GUIDE" later in this section and "DOT MATRIX LIQUID CRYSTAL DISPLAY" in the "2. Instruments and controls" section. Pre-driving checks and adjustments 3-13 - 2010 Nissan Murano | Owner's Manual - Page 152
TROUBLESHOOTING GUIDE Symptom The SHIFT P warning appears on the display When pushing the ignition switch and the inside warning chime sounds conto stop the engine tinuously. When shifting the selector lever to the P (Park) position. When opening the driver's door to get out of the vehicle The - 2010 Nissan Murano | Owner's Manual - Page 153
depends upon the conditions around the vehicle.) The lock and unlock buttons will not operate when: . . the distance between the Intelligent Key and the vehicle is over 33 ft (10 m). the Intelligent Key battery is completely SPA2252A Type A SPA2436 Type B Pre-driving checks and adjustments 3-15 - 2010 Nissan Murano | Owner's Manual - Page 154
and lift gate.*2 3. Push the LOCK button 1 *. 4. All the doors and the lift gate will lock. 5. The hazard indicator flashes twice and the horn chirps once. *1: Doors will lock while the ignition switch is in the ACC or ON position. *2: Doors will not lock while any door is open. Opening windows To - 2010 Nissan Murano | Owner's Manual - Page 155
can be switched to the hazard indicator mode. In hazard indicator mode, when the LOCK button is pushed, the hazard indicator flashes button is twice. When the UNLOCK pushed, neither the hazard indicator nor the horn operates. HAZARD - twice HAZARD - none Pre-driving checks and adjustments 3-17 - 2010 Nissan Murano | Owner's Manual - Page 156
1. Pull the hood lock release handle * located below the instrument panel; the hood will then spring up slightly. 2 2. Pull the lever * up at the front of the hood with your fingertips and raise the hood. WARNING . Make sure the hood is completely closed and latched before driving. Failure to do so - 2010 Nissan Murano | Owner's Manual - Page 157
can be unlocked by: ...pushing the unlock button Intelligent Key twice. on the . pushing the lift gate request switch (if so equipped). pushing the door handle request switch twice (if so equipped). pushing the power door lock switch to the unlock position. Pre-driving checks and adjustments 3-19 - 2010 Nissan Murano | Owner's Manual - Page 158
the power lift gate main switch on the instrument panel. When the power lift gate main switch is pushed to the "OFF" position, the power operation is not available by the power lift gate switch on the lift gate and lift gate opener switch. SPA2462 SPA2440 3-20 Pre-driving checks and adjustments - 2010 Nissan Murano | Owner's Manual - Page 159
been detected in a single power cycle or if the battery voltage is low. When the power lift gate main switch is in the OFF position, the lift gate can be opened manually by pushing the lift gate opener switch. If the power lift gate opener switch is Pre-driving checks and adjustments 3-21 on on on - 2010 Nissan Murano | Owner's Manual - Page 160
lift gate can be operated manually. CAUTION . If the switches at any time in the safe mode. Do not operate the lift gate again until it is checked by a NISSAN dealer. CAUTION . The lift gate will automatically close from a partly open position. To avoid 3-22 Pre-driving checks and adjustments - 2010 Nissan Murano | Owner's Manual - Page 161
direction illustrated to open the lift gate. A * OPENING FUEL-FILLER DOOR To open the fuel-filler door, push the opener switch located below the instrument panel. To lock, close the fuel-filler door securely. as Have the vehicle checked by a NISSAN dealer. Pre-driving checks and adjustments 3-23 - 2010 Nissan Murano | Owner's Manual - Page 162
or install the cap and continue to drive the vehicle. The light should turn off after a few driving trips. If the light does not turn off after a few driving trips, have the vehicle inspected by a NISSAN dealer. . . CAUTION . If fuel is spilled on the vehicle body, flush it away with water to - 2010 Nissan Murano | Owner's Manual - Page 163
/TELESCOPIC STEERING WARNING . Do not adjust the steering wheel while driving. You could lose control of your vehicle and cause an accident. Do not adjust the steering wheel any closer to you than is necessary for proper steering operation and comfort. The driver's air bag inflates with great force - 2010 Nissan Murano | Owner's Manual - Page 164
system will make the steering wheel move up automatically when the driver's door is opened with the ignition switch in the LOCK position. This lets the driver get into and out of the seat more easily. For more information, see "AUTOMATIC DRIVE SIC3451 3-26 Pre-driving checks and adjustments - 2010 Nissan Murano | Owner's Manual - Page 165
at night. 2 Use the day position * when driving in daylight hours. 3 3. Draw out the extension sun visor * from the main sun visor to block from further glare. INSIDE MIRROR Adjust the height and the angle of the inside mirror to the desired position. Manual anti-glare type WARNING Use the night - 2010 Nissan Murano | Owner's Manual - Page 166
the inside rearview mirror operate normally. The indicator light will turn off. Push the "I" switch D * to turn the system on. For the HomeLink® Universal Transceiver operation, see "HomeLink® UNIVERSAL TRANSCEIVER" in the "2. Instruments and controls" section. Do not allow any object to cover the - 2010 Nissan Murano | Owner's Manual - Page 167
when moving to the right. Using only this mirror could cause an accident. Use the inside mirror or glance over your shoulder to properly judge distances to other objects. Adjusting outside mirrors The outside mirror control switch is located on the armrest. Pre-driving checks and adjustments 3-29 - 2010 Nissan Murano | Owner's Manual - Page 168
function was set on before. In such a case, after connecting the battery or replacing with a new fuse, open and close the driver's door more than two times after the ignition switch is turned from the ON position to the LOCK position. The entry/exit function will be activated. Cancel or activate - 2010 Nissan Murano | Owner's Manual - Page 169
switch to the ON position. 3. Adjust the driver's seat, steering column and outside mirrors to the desired positions by manually operating each adjusting switch move the driver's seat, the outside mirrors and the steering wheel. Pre-driving checks and adjustments 3-31 If the indicator light blinks, - 2010 Nissan Murano | Owner's Manual - Page 170
entry/exit function).) When the driver's door remains open for more than 45 seconds and the ignition switch is not in the ON position. . The driver's seat, steering column and outside mirrors will move to the memorized position with the indicator light flashing, and then the light will stay on for - 2010 Nissan Murano | Owner's Manual - Page 171
MEMO Pre-driving checks and adjustments 3-33 - 2010 Nissan Murano | Owner's Manual - Page 172
Compact Disc (CD) changer ...CompactFlash (CF) player operation (models with navigation system) ...iPod® player operation (if so equipped)..."MUSIC BOX" hard-disk drive (models with navigation system) ...CD/CF (CompactFlash) care and cleaning ...Steering-wheel-mounted controls for audio ...Antenna - 2010 Nissan Murano | Owner's Manual - Page 173
...Car phone or CB radio...Bluetooth® Hands-Free Phone System with navigation system...Regulatory information ...Voice commands...Control buttons ...Pairing procedure...Phonebook registration ...Making a call...Receiving a call ...During a call ...Phone setting...Troubleshooting guide ...Bluetooth - 2010 Nissan Murano | Owner's Manual - Page 174
FUNCTION CONTROL PANEL (models with color display dealer. Ignoring such conditions may lead to accidents, fire, or electric shock. Park the vehicle in a safe location and apply the parking brake to view the images on the front center display screen using devices connected to the auxiliary input jacks - 2010 Nissan Murano | Owner's Manual - Page 175
-function controller (P.4-4) OFF" brightness control and display ON/ " OFF button (P.4-8) "SETTING" button (P.4-12) When you use this system, make sure the engine is running. If you use the system with the engine not running (ignition ON or ACC) for a long time, it will use up all the battery power - 2010 Nissan Murano | Owner's Manual - Page 176
that have been input. ately with panel. Do not splash any liquid such as water or car available while driving will be "grayed out" or muted. Park the vehicle in a safe location and then operate the navigation system. With this system, the same operations as those for the multi-function controller - 2010 Nissan Murano | Owner's Manual - Page 177
. . Space: Inserts a space. Delete: Deletes the last character that has been input with one touch. Push and hold the button to delete all of the characters. . OK: Completes character inputs. Touch screen maintenance SAA1543 SAA1617 Adjusting the item: Touch the + settings. Inputting characters - 2010 Nissan Murano | Owner's Manual - Page 178
switch on the steering-wheel-mounted controls. 1. While the map (if so equipped) or status screen is displayed, push and hold the ENTER switch until the "Menu Options" screen appears. 2. Highlight the preferred item tilting the ENTER switch up or down, and then push the ENTER switch. Available - 2010 Nissan Murano | Owner's Manual - Page 179
function controller may be used to move UP/DOWN on the screen and select more options. 4. Screen Count: Shows the number of menu selections available for more information (if available) about the menu selection currently highlighted. (i.e. Cabin lighting when unlocking doors.) HOW TO SELECT MENUS - 2010 Nissan Murano | Owner's Manual - Page 180
screen should be a guide to determine the condition of the vehicle. See the following for details. HOW TO USE BRIGHTNESS CONTROL AND DISPLAY ON/OFF BUTTON Push the " OFF" button to switch the display brightness to the daytime mode or the nighttime mode, and to adjust the display brightness using - 2010 Nissan Murano | Owner's Manual - Page 181
control panel. The screens as illustrated will appear. 2. Choose an item using the multi-function controller and push the ENTER button. 3. After viewing or adjusting side bar) will be displayed for reference. To reset the Average Fuel Economy, use the multi-function controller be converted between - 2010 Nissan Murano | Owner's Manual - Page 182
in a safe place to see the information. The unit can be converted between "US" and "Metric". (See "HOW TO USE SETTING Service and Maintenance Guide". 3. To display the reminder automatically when the set trip distance is reached, highlight the "Interval Reminder" key with the multifunction controller - 2010 Nissan Murano | Owner's Manual - Page 183
distance and the ignition switch is pushed to the LOCK position. the ignition switch is pushed to the ACC or ON position the next time you drive the vehicle after displayed each time the ignition switch is pushed to Monitor, heater, air conditioner, audio, phone and voice recognition systems 4-11 - 2010 Nissan Murano | Owner's Manual - Page 184
will appear when the SETTING button is pushed. For navigation settings, refer to the separate Navigation System Owner's Manual. To show the "Comfort & Conv." item, push the ignition switch to the ON position. SAA1556 With navigation system SAA1514 Without navigation system 4-12 Monitor, heater - 2010 Nissan Murano | Owner's Manual - Page 185
Bass", "Treble", "Balance" or "Fade" key and adjust it with the multi-function controller. These items can also be adjusted by pushing and turning the AUDIO knob. Display settings The after the operation is finished. Monitor, heater, air conditioner, audio, phone and voice recognition systems 4-13 - 2010 Nissan Murano | Owner's Manual - Page 186
adjust the brightness to "Darker" or "Brighter", and the contrast to "Lower" or "Higher" using the multi-function controller. For information on the "Background Color Owner's Manual. Rear Display with the multi-function controller and pushing the ENTER switch is pushed to the OFF position. - 2010 Nissan Murano | Owner's Manual - Page 187
the guidance voice volume louder or softer, select the "Guidance Volume" and adjust it with the multi-function controller. SAA1561 You can also adjust the guidance voice volume by turning the VOLUME control knob while voice guidance is being announced. Guidance Voice: When this item is turned - 2010 Nissan Murano | Owner's Manual - Page 188
time application. Time Zone: SAA2001 Clock Adjust (if so equipped): Adjust the hour and the minute by selecting the "Clock" key with the multi-function controller and pushing the ENTER button. On-screen Clock: adjusted by the GPS system for models with navigation system. 4-16 Monitor, heater - 2010 Nissan Murano | Owner's Manual - Page 189
to ON, door lock/ unlock function by pushing the door handle request switch will be activated. Lift Steering Wheel on Exit (if so equipped): When this item is turned to ON, the steering wheel moves upward for easy exit if the ignition switch is in the OFF position and the driver's door is opened - 2010 Nissan Murano | Owner's Manual - Page 190
French Owner's Manual. To obtain a French Owner's Manual, see "OWNER'S MANUAL/SERVICE MANUAL ORDER INFORMATION" in the "9. Technical and consumer information" section. button, selecting the "Others" key with the multi-function controller and pushing the ENTER button. Voice Recognition: For the - 2010 Nissan Murano | Owner's Manual - Page 191
designed as an aid to the driver in detecting large stationary objects to help avoid damaging the vehicle. mirrors. Make sure that the lift gate is securely closed when backing up. Underneath the bumper and the corner areas of the bumper cannot be viewed on the RearView Monitor Monitor, heater, air - 2010 Nissan Murano | Owner's Manual - Page 192
SAA1896 Vehicle width guide lines 5 *: wheel is in the neutral position. . HOW TO PARK WITH PREDICTED COURSE LINES HOW TO READ THE DISPLAYED LINES Guiding lines which indicate the vehicle width and distances to objects with reference to the A vehicle body tires are replaced with different sized - 2010 Nissan Murano | Owner's Manual - Page 193
battery is disconnected or becomes discharged, the predicted course lines may be displayed incorrectly. If this occurs, please perform the following procedures: - Turn the steering wheel from lock to lock while the engine is running. - Drive appear. Use the inside mirror or glance over your shoulder - 2010 Nissan Murano | Owner's Manual - Page 194
SAA1898 SAA1978 3. Slowly back up the vehicle adjusting the steering wheel so that the predicted course B C lines * enter the parking space * . 4. Maneuver the steering wheel to make the D vehicle width guide lines * parallel to the C parking space * while referring to the predicted course lines - 2010 Nissan Murano | Owner's Manual - Page 195
and the vehicle width guide lines are shown further than the actual distance. For example, the display shows 3 ft (1.0 m) to A the place * , but the actual 3 ft (1.0 m) B distance on the hill is the place * . Note that Monitor, heater, air conditioner, audio, phone and voice recognition systems - 2010 Nissan Murano | Owner's Manual - Page 196
the item key and adjust the level using the multi-function controller. Do not adjust the Brightness, Tint, Color, Contrast and Black Level of the RearView Monitor while the vehicle is moving. Make sure the parking brake is firmly applied and the engine is not running. OPERATING TIPS . When the - 2010 Nissan Murano | Owner's Manual - Page 197
reflected light from the bumper. This is not a malfunction. The screen may flicker under fluorescent light. This is not a malfunction. The colors of detergent diluted with Side ventilators water. . . . . SAA1991 Center ventilators . . . . SAA1990 Monitor, heater, air conditioner, audio, - 2010 Nissan Murano | Owner's Manual - Page 198
BUTTON" earlier in this section.) Start the engine and operate the heater and air conditioner system. You can individually set the driver and front passenger side temperature using each temperature control button. 4-26 Monitor, heater, air conditioner, audio, phone and voice recognition systems - 2010 Nissan Murano | Owner's Manual - Page 199
control dial/OFF button " " intake air control button " "MODE" manual air flow control button Temperature control button (passenger side) "A/C" air conditioner ON/OFF button " " rear window defroster button (See "REAR WINDOW AND OUTSIDE MIRROR DEFROSTER SWITCH" in the "2. Instruments and controls - 2010 Nissan Murano | Owner's Manual - Page 200
button (See "REAR " WINDOW AND OUTSIDE MIRROR DEFROSTER SWITCH" in the "2. Instruments and controls" section.) "MODE" manual air flow control button 3. You can individually set driver and front passenger side temperature using each temperature control button (type A) or dial (type B). When - 2010 Nissan Murano | Owner's Manual - Page 201
lights will flash twice, and then the intake air will be controlled automatically. . Air flow control Pushing the "MODE" manual air flow control button selects the air outlet to: : : : : Air flows from center and side ventilators. Air flows from center and side ventilators and foot outlets. Air - 2010 Nissan Murano | Owner's Manual - Page 202
accordance with the maintenance schedule in the NISSAN Service and Maintenance Guide. To replace the filter, contact a NISSAN dealer. WARNING The system contains refrigerant under high pressure. To avoid personal injury, any air conditioner service should be done only by an experienced technician - 2010 Nissan Murano | Owner's Manual - Page 203
the radio. If you listen to the radio with the engine not running, the ignition switch should be pushed to the ACC position. Radio reception is affected by station signal strength, distance from radio transmitter, buildings, bridges, mountains and other external influences. Intermittent changes in - 2010 Nissan Murano | Owner's Manual - Page 204
an active XM® satellite radio service subscription. Satellite radio is not available in Alaska, Hawaii and Guam. Satellite radio performance may be affected if cargo carried on the roof blocks the satellite radio signal. If possible, do not put cargo near the satellite antenna. A build up of ice - 2010 Nissan Murano | Owner's Manual - Page 205
. CDs that are of poor quality, dirty, scratched, covered with fingerprints, or that have pin holes may not work properly. The following CDs may not work properly: - Copy control compact discs (CCCD) - Recordable compact discs (CD-R) . - Rewritable compact discs (CD-RW) Do not use the following CDs - 2010 Nissan Murano | Owner's Manual - Page 206
momentarily black out when the Play Mode is changed while using the iPod® In this case, please manually reset the iPod®. If and contact a NISSAN dealer to replace the cable with a support charging via a FireWire® connection. Devices that can . . . . . . . . . . . 4-34 Monitor, heater, air - 2010 Nissan Murano | Owner's Manual - Page 207
MP3 compression removes the redundant and irrelevant parts of a same amount of space when compared to MP3s second used by a digital music files. The size and a signal are converted from analog to or other countries. Compact Disc (CD)/ air conditioner, audio, phone and voice recognition systems 4-35 - 2010 Nissan Murano | Owner's Manual - Page 208
the order in which the files were written by the writing software, so the files might not play in the desired order. SAA1025 Playback order: Music playback order of the CD/CF with MP3 or WMA is as illustrated above. . The folder names of folders not containing MP3/WMA files are - 2010 Nissan Murano | Owner's Manual - Page 209
not supported. CompactFlash card: FAT12, FAT16, FAT32 Version MP3 Supported versions UNICODE (Non-UTF-16 BOM Little Endian) Supported file systems Folder levels Text character number limitation Protected WMA files (DRM) cannot be played. Available codes depend on what kind of media, versions and - 2010 Nissan Murano | Owner's Manual - Page 210
Troubleshooting guide: Symptom Check if by copyright. Poor sound quality It takes a relatively long time before the music starts playing. Music cuts off or skips Skipping with high bit rate files Move immediately to the 4-38 Monitor, heater, air conditioner, audio, phone and voice recognition systems - 2010 Nissan Murano | Owner's Manual - Page 211
rear window. This system automatically switches to the antenna which is receiving less interference. The auto loudness circuit enhances the low and high frequency ranges automatically in both radio reception and CD playback. ON·OFF/Volume control: Push the ignition switch to the ACC or ON position - 2010 Nissan Murano | Owner's Manual - Page 212
"2. Instruments and controls" section for the detailed clock adjustment operation. AM-FM radio operation radio (FM/AM) band select: Pushing the radio band select button will change the band as follows: AM ? FM1 ? FM2 ? AM When the radio band select button is pushed while the ignition switch is in - 2010 Nissan Murano | Owner's Manual - Page 213
desired stations. CD with MP3 or WMA: Compact Disc (CD) changer operation Push the ignition switch to the ACC or ON position, push the LOAD button and insert the compact disc into the slot with the label side facing up. The compact disc will be guided automatically into the slot and start playing - 2010 Nissan Murano | Owner's Manual - Page 214
laptop computers. Push the AUX button to play a compatible device when it is plugged into the AUX IN jack. (CD with MP3 AUX (Auxiliary) button: The AUX IN jack is located on the audio unit. The AUX IN audio input jack accepts any standard analog audio input such as from a 4-42 Monitor, heater, air - 2010 Nissan Murano | Owner's Manual - Page 215
radio reception is available unless optional satellite receiver and antenna are installed and an XM® satellite radio service subscription is active. SAA1850 1. 2. 3. 4. 5. 6. CD EJECT button ON·OFF/VOLUME control knob Radio station and CD selector buttons CD LOAD button (if so equipped) Radio - 2010 Nissan Murano | Owner's Manual - Page 216
signal, an available channel list will be automatically updated in the radio. For XM®, push the ignition switch from LOCK to ACC to update the channel list. SAA1851 With navigation system Without navigation system SAA1852 1. 2. 3. AM·FM band select button SAT button DISC·AUX button 1. 2. 3. AM - 2010 Nissan Murano | Owner's Manual - Page 217
Speed Sensitive Volume displays as follows: CD ? CompactFlash* ? DVD* ? AUX ? iPod®* ? Music Box* ? CD *: if so equipped pushed to ON. The satellite radio mode requires an active XM® satellite radio service subscription. Satellite radio is not available in Alaska, Hawaii and Guam. If another audio - 2010 Nissan Murano | Owner's Manual - Page 218
Other buttons can be set in the same manner. If the battery cable is disconnected, or if the fuse blows, the radio memory will be erased. In that case, reset the desired stations. Compact Disc (CD) player/changer operation Push the ignition switch to the ACC or ON position, push the LOAD button (if - 2010 Nissan Murano | Owner's Manual - Page 219
the radio will automatically be turned off and the compact disc will start to play. When the DISC button is pushed while a CD is loaded and a medium is played using the auxiliary input jacks, you can toggle back and forth between CD and medium. (CD with MP3 or WMA) Monitor, heater, air conditioner - 2010 Nissan Murano | Owner's Manual - Page 220
device connected to the jacks, push the AUX button repeatedly until the display switches to the AUX mode. The output from the device will be played through the monitor and audio system. SAA1856 Auxiliary input jacks The auxiliary input jacks are located on the rear side of the center console - 2010 Nissan Murano | Owner's Manual - Page 221
to the ACC or ON A position, remove the cover * and insert a CF B card * into the slot. Then, push the button repeatedly to switch to the CompactFlash mode. If the system has been turned off while the CompactFlash card was playing, pushing the ON·OFF/VOL control knob will start the CompactFlash card - 2010 Nissan Murano | Owner's Manual - Page 222
slot.) Compact Flash read error (The system cannot read a CF card.) Unplayable file (The system cannot play a music file.) No audio file (The CF card inserted in the slot or its folder does not contain any music files.) Type A SAA1853 SAA2011 Type B 4-50 Monitor, heater, air conditioner, audio - 2010 Nissan Murano | Owner's Manual - Page 223
connecting the iPod® to your vehicle audio unit. The battery of your iPod® is charged while it is connected to the vehicle if the iPod® supports charging via a FireWire® connection. Compatibility The following models are available: . Third generation iPod® (Firmware version 2.3 or later) (Audiobook - 2010 Nissan Murano | Owner's Manual - Page 224
in Super Audio CDs Compact Disc Digital Audio (CD-DA) specification in CD-Extras First session of multisession disc SAA1613 The following touch-panel buttons shown on the screen are also available: . . : returns to the previous screen. : plays/pauses the music selected. FF (Fast Forward - 2010 Nissan Murano | Owner's Manual - Page 225
track number. The "Music Box" hard-disk drive cannot perform recording under the following conditions. To stop the recording, select the STOP button by touching the screen or using the multifunction controller. If the CD is ejected, the audio system is turned off or the ignition switch is pushed to - 2010 Nissan Murano | Owner's Manual - Page 226
Playing recorded songs Select the "Music Box" hard-disk drive by using one of the following methods. . Push the source select switch repeatedly on the steering wheel until the center display changes to the "Music Box" mode. (See "STEERING-WHEEL-MOUNTED CONTROLS FOR AUDIO" later in this section - 2010 Nissan Murano | Owner's Manual - Page 227
playing the first track. SAA1684 SAA1685 There are some options available during playback. Select one of the following that are displayed by Mood Plays music from one of the following moods: Relaxing Music, Lively Music, Slow Music and Upbeat Music. Monitor, heater, air conditioner, audio, - 2010 Nissan Murano | Owner's Manual - Page 228
Blues, Country, Metal, Easy Listening, New Age, Soundtrack, Gospel & Religious, World, Classical, Children's and Other) . SAA1686 . Music Box System Info. Displays the following information about the "Music Box" hard-disk drive: a. "Music Box" Used / Free Space Search Keywords Input a search - 2010 Nissan Murano | Owner's Manual - Page 229
Hip Hop, Club/ Dance, Punk, Reggae, Folk, Blues, Country, Metal, Easy Listening, New Age, Soundtrack, Gospel & Religious, World, Classical, Children's and Others. Remove Track Reset the mood setting of a track. Restoring deleted data SAA1688 Deleted music data can be restored by performing the - 2010 Nissan Murano | Owner's Manual - Page 230
without prior notice for maintenance. SAA1616 Music Box settings To set the "Music Box" hard-disk drive to your preferred settings, select the "Menu" key during playback, "Music Box System Info." key, and "Music Box Settings" key with the multifunction controller, and then push the ENTER button - 2010 Nissan Murano | Owner's Manual - Page 231
data from the Gracenote Servers or to change data categories for any cause that music-related data from Gracenote, C Inc., copyright * 2000-2007 Gracenote. C Gracenote Software, copyright * 2000-2007 Gracenote. This product and service air conditioner, audio, phone and voice recognition systems 4-59 - 2010 Nissan Murano | Owner's Manual - Page 232
rough on the inner and outer edges. Remove the rough edges by rubbing the inner and outer edges with the side of a pen or pencil as illustrated switch ENTER (models with navigation system) or tuning (models without navigation system) switch Volume control switch BACK switch 4-60 Monitor, heater, air - 2010 Nissan Murano | Owner's Manual - Page 233
search Music Box hard-disk drive audio system (if so equipped) . Pushing DOWN " "/UP " " shorter Volume control switches Push the upper (+) or lower (−) side switch to increase or decrease the volume. Next or previous station SOURCE select switch Push the source select switch to change the - 2010 Nissan Murano | Owner's Manual - Page 234
is covered with a car cover. Always properly tighten the antenna rod during installation. Otherwise, the antenna rod may break during vehicle operation. . Roof antenna (if so equipped) Removing the antenna: You can remove the antenna if necessary. Hold the bottom of the antenna and remove by - 2010 Nissan Murano | Owner's Manual - Page 235
the vehicle battery, do not operate the system more than 15 minutes without starting the engine. WARNING . The driver must not drive position to reduce driver distraction. Audio is available when a movie is played. To view movies in the front display, stop the vehicle in a safe location, - 2010 Nissan Murano | Owner's Manual - Page 236
connected to the auxiliary input jacks (if so equipped). DIGITAL VERSATILE DISC (DVD) SYSTEM COMPONENTS DVD drive The DVD drive is located inside of the center console. Insert a DVD into the slot with the label side facing the front of the vehicle. The DVD will be guided automatically into the slot - 2010 Nissan Murano | Owner's Manual - Page 237
screen. 1. Push the REAR DISPLAY OPEN/CLOSE button on the remote controller to open or close the display. 2. Adjust the display angle by pushing the DISPLAY TILT button or . The screen can also be opened using the multifunction controller. See "Rear Display settings" earlier in this section. Do not - 2010 Nissan Murano | Owner's Manual - Page 238
an obstacle between the headphones and the transmitter. Remove the obstacle, such as opaque materials, hands, control: Turn the volume control knob to adjust the volume. The headphones will automatically be turned off in about 5 minutes if there is no sound during that period. To prevent the battery - 2010 Nissan Murano | Owner's Manual - Page 239
4. AUX button 5. ENTER button 6. DISP button 7. VOLUME CONTROL button ( or ) 8. Headphones button 9. controller SAA0978 SAA1861 Remote controller The remote controller has the following controls: 1. REAR DISPLAY OPEN/CLOSE button 2. DVD button 3. Joystick SAA0723 Headphones Monitor, heater, air - 2010 Nissan Murano | Owner's Manual - Page 240
the lid securely. If the battery is removed for any reason other than replacement, close the lid securely. . If you will not be using the remote control for long periods of time, remove the batteries. Replacement of the batteries is needed when the remote control only functions at extremely close - 2010 Nissan Murano | Owner's Manual - Page 241
then press the ENTER button. To adjust the display ON/OFF, brightness, tint, color, contrast and black level select each key using the multi-function controller and press the ENTER button. Then you can adjust each item using the multifunction controller. After changes have been made press the BACK - 2010 Nissan Murano | Owner's Manual - Page 242
" remote controller. SKIP " remote controller. SKIP controller. SAA2003 Setting (front) - DVD VIDEO-1 DVD operation keys To operate the DVD drive , select the preferred key displayed on the operation screen using the multi-function controller remote " controller. PLAY: controller. STOP: " - 2010 Nissan Murano | Owner's Manual - Page 243
DVD-VIDEO): Each title menu in the disc will be shown. For details, see the instructions attached to the disc. Audio* (DVD-VIDEO, VIDEO-CD) / Subtitle* (DVD-VIDEO): Choose the preferred language using the multifunction controller and push the ENTER button. To turn off the subtitle, push and hold the - 2010 Nissan Murano | Owner's Manual - Page 244
cancel the selection. Display tilt: Adjust the display angle by pushing the "DISor . PLAY TILT" button DVD mode: To select the DVD mode, push the DVD button. AUX mode: To select the AUX (Auxiliary input jacks) mode, push the AUX button. 4-72 Monitor, heater, air conditioner, audio, phone and voice - 2010 Nissan Murano | Owner's Manual - Page 245
time the button is pushed, the language will change to each language stored in the DVD. Headphones: The DVD sound can be heard through the headphones. " button. Each time the button is Push the " pushed the mode will switch to ON or OFF. To control the volume of sound from the headphones, use - 2010 Nissan Murano | Owner's Manual - Page 246
CAR PHONE OR CB RADIO . A new disc may be rough on its inner and outer edges. Remove the rough edges using the side of a pen or in a moving vehicle requires you to take notes, pull off the road to a safe location and stop your vehicle before doing so. . SAA0451 ... How to handle the DVD CAUTION - 2010 Nissan Murano | Owner's Manual - Page 247
. Adjust the antenna standing-wave ratio as recommended by the manufacturer. Connect the ground wire from the CB radio chassis to the body. For details, consult a NISSAN dealer. . WARNING Use a phone after stopping your vehicle in a safe location. If you have to use a phone while driving, exercise - 2010 Nissan Murano | Owner's Manual - Page 248
cellular phone is locked in order not to be dialed. . When the radio wave condition is location may reduce or eliminate the noise. Refer to the cellular phone Owner's Manual regarding the telephone pairing procedure specific to your phone, battery charging, cellular phone antenna, etc. The antenna - 2010 Nissan Murano | Owner's Manual - Page 249
Push the PHONE button or the button, and select the "Pair phone" key on the display using the multi-function controller. Then push the ENTER button. SAA1857 CONTROL BUTTONS 1) PHONE button 2) TALK/PHONE SEND button Monitor, heater, air conditioner, audio, phone and voice recognition systems 4-77 - 2010 Nissan Murano | Owner's Manual - Page 250
Owner's Manual for the details. You can also visit www.nissanusa.com/bluetooth or call NISSAN Consumer Affairs Department for instructions on pairing NISSAN recommended cellular phones. When the pairing is completed, the screen will return to the Bluetooth® setup display. PHONEBOOK REGISTRATION Up - 2010 Nissan Murano | Owner's Manual - Page 251
Data by Keypad Input the name and phone number manually using the keypad displayed on the screen. (See "HOW TO USE TOUCH SCREEN (models with navigation system)" earlier in this section.) - Copy from Downloaded Phonebook Copy a phonebook from the Bluetooth® cellular phone. The availability of this - 2010 Nissan Murano | Owner's Manual - Page 252
panel or the button on the steering wheel. The "PHONE" screen will appear on the display. 2. Select the "Call (Phonebook)" change to the call-in-progress screen. . Call (Downloaded) Select the name or phone number from the downloaded call list. . Dial (Keypad) Input the phone number manually - 2010 Nissan Murano | Owner's Manual - Page 253
CALL When you hear a phone ring, the display will change to the incoming call mode. To receive a call, panel. c) Push the button on the steering wheel. b) Push the PHONE button on the instrument panel. c) Push the button on the steering wheel. SAA1579 DURING A CALL There are some options available - 2010 Nissan Murano | Owner's Manual - Page 254
or quieter, push the volume control switch (+ or −) on the steering wheel or turn the volume control knob on the instrument panel while talking on the phone. This adjustment is also available in the SETTING mode. SAA1580 SAA1581 PHONE SETTING To set up the Bluetooth Hands-Free Phone System to your - 2010 Nissan Murano | Owner's Manual - Page 255
Delete an Entry of Downloaded Phonebook Delete an entry from the downloaded phonebook. . Pair Phone See "PAIRING PROCEDURE" later in this section. . Remove Paired Phone Delete a registered cellular phone from the paired list. . Priority Change Use this command to change the priority level of - 2010 Nissan Murano | Owner's Manual - Page 256
TROUBLESHOOTING GUIDE The system should respond correctly to all voice commands without difficulty. If problems are encountered, try the following solutions. Where the solutions are listed by number, try each solution in turn, starting with number 1, until the problem is resolved. Symptom Solution - 2010 Nissan Murano | Owner's Manual - Page 257
mountainous area. - Your cellular phone is locked in order not to be dialed. When the radio wave condition is not ideal or ambient bluetooth for troubleshooting help. . . CAUTION To avoid draining the vehicle battery, use a phone after starting the engine. Your NISSAN is equipped with Bluetooth - 2010 Nissan Murano | Owner's Manual - Page 258
speakers. Storing the device in a different location may reduce or eliminate the noise. Refer to the cellular phone Owner's Manual regarding the telephone pairing procedure specific to your phone, battery charging, cellular phone antenna, etc. The antenna display on the monitor will not coincide - 2010 Nissan Murano | Owner's Manual - Page 259
adjust the volume of the voice feedback, push the volume control switches (+ or −) on the steering wheel while being provided with feedback. You can also use the radio volume control (Available only best results, say phone numbers as single digits. . . . NOTE: The voice command "Help" is available - 2010 Nissan Murano | Owner's Manual - Page 260
, Spanish or French. See "HOW TO USE SETTING BUTTON" earlier in this section to change the language. CONTROL BUTTONS The control buttons for the Bluetooth® HandsFree Phone System are located on the steering wheel. TALK/PHONE SEND Push the button to initiate a VR session or answer an incoming call - 2010 Nissan Murano | Owner's Manual - Page 261
more than one paired Bluetooth® phone is in the vehicle. Follow the instructions provided by the system or see "SETUP" later in this section for more information on changing priorities. 7. The system will ask if you would like to G select a custom ringtone * . Follow the instructions provided by the - 2010 Nissan Murano | Owner's Manual - Page 262
on the steering wheel, you can choose the list of commands currently available any time the system book entry (voicetag) you wish to call. The system acknowledges the name. If there are multiple locations associated with the name, the system asks you to choose the location. 4-90 Monitor, heater, air - 2010 Nissan Murano | Owner's Manual - Page 263
location available. Press the button on the steering wheel to mute the receiving voice and enter commands..."Help" - The system announces the available command to transfer the call from the Bluetooth® Hands-Free Phone System to the air conditioner, audio, phone and voice recognition systems 4-91 - 2010 Nissan Murano | Owner's Manual - Page 264
for a location (Home, Office, Mobile or Other). SAA1928 the cellular phone via the Bluetooth® communication link. The transfer procedure varies according to each cellular phone. See the cellular phone Owner's Manual for details. You can also visit www.nissanusa.com/bluetooth for instructions on - 2010 Nissan Murano | Owner's Manual - Page 265
link. The transfer procedure varies according to each cellular phone. See the cellular phone Owner's Manual for details. You can also visit www.nissanusa.com/bluetooth for instructions on transferring phone numbers from NISSAN recommended cellular phones. The system repeats the number and prompts - 2010 Nissan Murano | Owner's Manual - Page 266
or button on the steering wheel. A tone sounds and the Setup command to change options associated with the Bluetooth® Hands-Free Phone System. Bluetooth® cellular phone, operate it to enter the code "1234". The code is always "1234" regardless of the number of phones paired. 4-94 Monitor, heater, air - 2010 Nissan Murano | Owner's Manual - Page 267
Bluetooth® Hands-Free Phone System are in the vehicle at the same time. The system asks you to name the phone and confirm the selection. Once the selection is confirmed, the selected phone remains active until the ignition switch is pushed to the LOCK position or you select a new phone. "Change book - 2010 Nissan Murano | Owner's Manual - Page 268
SA mode. The ignition switch is pushed to the OFF or LOCK position. Training procedure The procedure for training a voice is as follows. 1. Position the vehicle in a reasonably quiet outdoor location. 2. Sit in the driver's seat with the engine running, the parking brake on, and the transmission - 2010 Nissan Murano | Owner's Manual - Page 269
three two pause seven delete all entries call seven two four zero nine phone book delete entry memo pad record dial star two one seven oh Yes No select ringtone dial eight five six nine two Bluetooth on setup change priority call three one nine oh two nine seven pause pause three oh - 2010 Nissan Murano | Owner's Manual - Page 270
TROUBLESHOOTING GUIDE The system should respond correctly to all voice commands without difficulty. If problems are encountered, try the following solutions. Where the solutions are listed by number, try each solution in turn, starting with number 1, until the problem is resolved. Symptom Solution - 2010 Nissan Murano | Owner's Manual - Page 271
-free operation of Audio, Air Conditioner and Display systems is not available in this mode. SAA1566 Activating Standard Mode When the Alternate Command Mode is active, perform the following steps to switch to the Standard Mode. 1. Push the SETTING button on the instrument panel. 2. Highlight the - 2010 Nissan Murano | Owner's Manual - Page 272
voice commands by accessing a simplified User Guide, which contains basic instructions and tutorials for several voice commands. Note that the Command List feature is only available when Alternate Command Mode is active. 4-100 Monitor, heater, air conditioner, audio, phone and voice recognition - 2010 Nissan Murano | Owner's Manual - Page 273
section of the User Guide. 1. Highlight "Getting Started" and push the ENTER button. 2. You can confirm the page by scrolling the screen using the NISSAN controller. Tutorials on the " and push the ENTER button. Monitor, heater, air conditioner, audio, phone and voice recognition systems 4-101 - 2010 Nissan Murano | Owner's Manual - Page 274
available settings of the NISSAN Voice Recognition system are described. 1. Highlight "Voice Recognition Settings" and push the ENTER button. 2. You can confirm the page by scrolling the screen using the NISSAN controller. ... Giving voice commands 1. Push the TALK steering wheel. switch located - 2010 Nissan Murano | Owner's Manual - Page 275
adjust the volume of the system feedback, push the volume control buttons [+] or [−] on the steering switch or the icon on the to , speak a screen changes from command. 4. Continue to follow the voice menu a command after the tone. Commands that are available are always . . How to speak numbers: - 2010 Nissan Murano | Owner's Manual - Page 276
Corrects the phone number when it is not recognized. (Available during phone number entry) Command Dial Number Redial Phonebook International Call Change Number . . Navigation Command: See the separate Navigation System Owner's Manual. Information Command: Action Displays fuel economy information - 2010 Nissan Murano | Owner's Manual - Page 277
Manual. SAA1859 SAA1908 Example 1 - Placing a call to the phone number 800-662-6200: 1. Push the TALK steering wheel. switch located on the 2. The system announces, "Would you like to access Phone, Navigation, Information or Help?" 3. Speak "Phone". Monitor, heater, air - 2010 Nissan Murano | Owner's Manual - Page 278
SAA1909 SAA1910 SAA1911 4. Speak "Dial Number". 5. Speak "8 0 0". 6. The system announces, "Please say the next three digits or dial, or say change number." 7. Speak "6 6 2". 4-106 Monitor, heater, air conditioner, audio, phone and voice recognition systems - 2010 Nissan Murano | Owner's Manual - Page 279
Please use the "International Call" command for all other formats. If you say "Change Number" during phone number entry, the system will automatically request that you repeat the number " earlier in this section.) Monitor, heater, air conditioner, audio, phone and voice recognition systems 4-107 - 2010 Nissan Murano | Owner's Manual - Page 280
SAA1908 SAA1909 Example 2 - Placing an international call to the phone number 011-81-111-222-3333: 1. Push the TALK steering wheel. switch located on the 2. The system announces, "Would you like to access Phone, Navigation, Information or Help?" 3. Speak "Phone". 4. Speak "International Call - 2010 Nissan Murano | Owner's Manual - Page 281
Mode)" later in this section.) In the Alternate Command Mode, review the expanded command list for this mode, as some commands available in the Standard Mode are replaced. Please see the examples on the screen. Monitor, heater, air conditioner, audio, phone and voice recognition systems 4-109 - 2010 Nissan Murano | Owner's Manual - Page 282
list If you are controlling the system by voice commands for the first time or do not know the appropriate voice command, perform the following procedure for displaying the voice command list (available only in Alternate Command Mode). 4-110 Monitor, heater, air conditioner, audio, phone and - 2010 Nissan Murano | Owner's Manual - Page 283
. 5. Highlight an item using the NISSAN controller and push the ENTER button. 6. If necessary, scroll the screen using the NISSAN controller to view the entire list. 7. Press the BACK button to return to the previous screen. Monitor, heater, air conditioner, audio, phone and voice recognition - 2010 Nissan Murano | Owner's Manual - Page 284
Phonebook" list. Shows the outgoing call history (1 to 5). Shows the incoming call history (1 to 5). Makes an international call by allowing more than 10 digits to be spoken. ACTION Audio Commands: . Music Box COMMAND Music Box ACTION Turns on the "Music Box" hard-disk drive audio system. . Radio - 2010 Nissan Murano | Owner's Manual - Page 285
on, selecting the station and band last played. Satellite Radio . CD COMMAND ACTION Starts to play a CD. CD . Audio COMMAND ACTION Turns the the Fuel Economy screen. Displays the Maintenance screen. ACTION Monitor, heater, air conditioner, audio, phone and voice recognition systems 4-113 - 2010 Nissan Murano | Owner's Manual - Page 286
Climate Commands: COMMAND Climate Control Climate Control OFF Turns the climate control system off. ACTION Turns the climate control system on and operates it in the AUTO mode. 4-114 Monitor, heater, air conditioner, audio, phone and voice recognition systems - 2010 Nissan Murano | Owner's Manual - Page 287
the "User Guide" key using the NISSAN controller and push the ENTER button. 4. Highlight an item using the NISSAN controller and push the ENTER button. Available items: . Getting Started Describe the basics of how to operate the NISSAN Voice Recognition system. . Using the Address Book Refer to - 2010 Nissan Murano | Owner's Manual - Page 288
correctly. When the air conditioner is in the and release the TALK located on the steering wheel. switch 2. A list of changes from command. Operating tips: ...Voice commands cannot be accepted when . the icon is The list displayed can be scrolled by tilting the ENTER switch on the steering wheel - 2010 Nissan Murano | Owner's Manual - Page 289
switch again to pause switch to the operation. Push the TALK restart the operation. If you want to adjust the volume of the system feedback, push the volume control buttons (+ or −) on the steering wheel the instrument panel, highlight air conditioner, audio, phone and voice recognition systems 4-117 - 2010 Nissan Murano | Owner's Manual - Page 290
the following list and then push the ENTER button...Navigation Phone Audio Information Climate The voice commands in the category are displayed. 4-118 Monitor, heater, air conditioner, audio, phone and voice recognition systems - 2010 Nissan Murano | Owner's Manual - Page 291
on the screen changes from to , speak the command that the system requested. 9. When the system has recognized the voice command, the voice of the user is learned. Push the switch or BACK button system has learned. Monitor, heater, air conditioner, audio, phone and voice recognition systems 4-119 - 2010 Nissan Murano | Owner's Manual - Page 292
following steps. 1. Push the SETTING button on the instrument panel. 2. Highlight the "Others" key using the NISSAN controller and push the ENTER button. 3. Highlight the "Voice Recognition system is activated. 4-120 Monitor, heater, air conditioner, audio, phone and voice recognition systems - 2010 Nissan Murano | Owner's Manual - Page 293
matches what was originally stored. (See "BLUETOOTH® HANDS-FREE the phonebook. PHONE SYSTEM WITH NAVIGATION SYSTEM" earlier in this section; page 4-75.) 2. Replace one of the voicetags being confused with a different voicetag. Monitor, heater, air conditioner, audio, phone and voice recognition - 2010 Nissan Murano | Owner's Manual - Page 294
MEMO 4-122 Monitor, heater, air conditioner, audio, phone and voice recognition systems - 2010 Nissan Murano | Owner's Manual - Page 295
Transmission (CVT) ...5-13 Parking brake ...5-17 Cruise control ...Precautions on cruise control ...Cruise control operations ...Break-in schedule ...Increasing fuel economy ...All-Wheel Drive (AWD) (if so equipped) ...All-Wheel Drive (AWD) lock switch operations...AWD warning light ...Parking - 2010 Nissan Murano | Owner's Manual - Page 296
or collision, unsecured cargo could cause personal injury... dangerous. It can cause unconsciousness or death. If you suspect that exhaust fumes are entering the vehicle, drive with all windows fully open, and have the vehicle inspected immediately. Do not run the engine in closed spaces such as - 2010 Nissan Murano | Owner's Manual - Page 297
dealer. Avoid driving with an extremely low fuel level. Running tow your vehicle to start the engine. possible, and inflate them to the proper pressure. Driving on a significantly under-inflated tire causes the tire to overheat and can lead to tire failure replacement or alternate tires or wheels - 2010 Nissan Murano | Owner's Manual - Page 298
of emergency" section for changing a flat tire.) . When a spare tire is mounted or a wheel is replaced, the TPMS will not function and the low tire pressure warning light will flash for approximately 1 minute. The light will remain on after 1 minute. Contact your NISSAN dealer as soon as possible - 2010 Nissan Murano | Owner's Manual - Page 299
more Starting and driving 5-5 FCC Notice: Changes or modifications not expressly approved by the party responsible for compliance could void the user's authority to operate the equipment. This device complies with Part 15 of the FCC Rules and RSS-210 of Industry Canada. Operation is subject - 2010 Nissan Murano | Owner's Manual - Page 300
tire...Do not rapidly apply the brakes. Do not rapidly release the accelerator pedal. Do not rapidly turn the steering wheel. OFF-ROAD RECOVERY While driving, the right side or left side wheels may unintentionally leave the road surface. If this occurs, maintain control of the vehicle by following - 2010 Nissan Murano | Owner's Manual - Page 301
service to change the tire or see "CHANGING A FLAT TIRE" in the "6. In case of emergency" section of this Owner's Manual. Remember, drinking and driving . Remember that Two-Wheel Drive (2WD) models are less capable than All-Wheel Drive (AWD) models for rough road driving and extrication when stuck - 2010 Nissan Murano | Owner's Manual - Page 302
speeds ensure better vehicle control. Do not drive beyond the performance capability of the tires, even with AWD engaged. For AWD equipped vehicles, do not attempt to raise two wheels off the ground and shift the transmission to any drive or reverse position with the engine running. Doing so may - 2010 Nissan Murano | Owner's Manual - Page 303
Service and Maintenance Guide". Spinning the front wheels on slippery surfaces may cause the AWD warning light to flash and the AWD system to automatically switch from the AWD Intelligent Key battery is almost discharged or strong radio waves are present near the operating location, the Intelligent - 2010 Nissan Murano | Owner's Manual - Page 304
Push the ignition switch to the OFF position. 3. Open the door. The ignition switch will change to the LOCK position. SSD0910 . PUSH-BUTTON IGNITION SWITCH OPERATION When the ignition switch is pushed without depressing the brake pedal, the ignition switch position will change as follows: ...Push - 2010 Nissan Murano | Owner's Manual - Page 305
pushbutton ignition switch in ACC or ON positions when the engine is not running for an extended period. This can discharge the battery. SSD0837 KEY PORT ACC (Accessories) This position activates electrical accessories such as the radio, when the engine is not running. Starting and driving 5-11 - 2010 Nissan Murano | Owner's Manual - Page 306
. Also check tires for proper inflation. Lock all doors. Position seats and adjust head restraints/ headrests. Adjust inside and outside mirrors. Fasten seat belts and ask all passengers to do likewise. Check the operation of warning lights when the ignition switch is pushed to the ON position. (See - 2010 Nissan Murano | Owner's Manual - Page 307
the brake pedal and pushing the pushbutton ignition switch to start the engine. If the engine starts, but fails to run, repeat the above procedure. DRIVING THE VEHICLE CONTINUOUSLY VARIABLE TRANSMISSION (CVT) The Continuously Variable Transmission (CVT) in your vehicle is electronically controlled - 2010 Nissan Murano | Owner's Manual - Page 308
on slippery roads. This may cause a loss of control. WARNING . Do not depress the accelerator pedal while shifting from P (Park) or N (Neutral) to R (Reverse), D (Drive) or L (Low) position. Always depress the brake pedal until shifting is completed. Failure to do so could cause you to lose - 2010 Nissan Murano | Owner's Manual - Page 309
any other circumstances. SSD0692 Overdrive (O/D) OFF switch When the O/D OFF switch is pushed with the selector lever in the D (Drive) position, the indicator light in the instrument panel illuminates. Use the overdrive off mode when you need improved engine braking. To turn off the overdrive off - 2010 Nissan Murano | Owner's Manual - Page 310
position even with the brake pedal depressed and the selector lever button pushed. To move the selector lever, perform the following procedure: 1. Push the ignition switch to the OFF or LOCK position. 2. Apply the parking brake. 3. Remove the shift lock release cover using a suitable tool. A * Fail - 2010 Nissan Murano | Owner's Manual - Page 311
the steering wheel locked. Replace the removed shift lock release cover after the operation. If the selector lever cannot be moved out of the P (Park) position, have a NISSAN dealer check the CVT system as soon as possible. . . . To apply: Fully depress the parking brake pedal 1 *. To release - 2010 Nissan Murano | Owner's Manual - Page 312
light on the meter panel will then blink to warn the driver. If the engine coolant temperature becomes excessively high, the cruise control system will cancel automatically. If the CRUISE indicator light blinks, turn the cruise control main switch off and have the system checked by a NISSAN dealer - 2010 Nissan Murano | Owner's Manual - Page 313
Push the CANCEL switch. b) Tap the brake pedal. c) Turn the MAIN switch off. The CRUISE light will turn off. . If you depress the brake pedal while pushing the RESUME/ACCELERATE or SET/ COAST switch and reset at the cruising speed, the cruise control will disengage. Turn the MAIN switch off once and - 2010 Nissan Murano | Owner's Manual - Page 314
driving for long periods at constant speed, either fast or slow. Do not run the engine over 4,000 rpm. Do not accelerate at full throttle in any gear. Avoid quick starts. Avoid hard braking as much as possible. Do not tow a trailer for the first 500 miles (800 km). Your engine, axle or other parts - 2010 Nissan Murano | Owner's Manual - Page 315
located on the lower side of the instrument panel. This switch is used to select the AUTO or LOCK mode depending on the driving conditions. Each time you push the lower part of the switch A * , the AWD mode will switch: AUTO ? LOCK ? AUTO. Distribution of torque to the front and rear wheels changes - 2010 Nissan Murano | Owner's Manual - Page 316
and wait until the warning light stops blinking, the AWD returns to the AUTO mode. WARNING . When driving straight, shift the AWD LOCK switch to AUTO. Do not operate the AWD LOCK switch when making a turn or backing up. Do not operate the AWD LOCK switch with the front wheel spinning. Engine idling - 2010 Nissan Murano | Owner's Manual - Page 317
in the AWD system while the engine is running, the warning light will come on. The warning light may blink rapidly (about twice per second) while trying to free a stuck vehicle due to high powertrain oil temperature. The driving mode may change to 2WD. The AUTO mode may change to the LOCK mode - 2010 Nissan Murano | Owner's Manual - Page 318
, NO 3 CURB: * Turn the wheels toward the side of the road so the vehicle will move away from the center of the road if it moves. 4. Push the ignition switch to the LOCK position. . 1. Firmly apply the parking brake. 2. Move the selector lever to the P (Park) position. 5-24 Starting and driving - 2010 Nissan Murano | Owner's Manual - Page 319
or whenever the parking brake shoes and/or drums/rotors are replaced, in order to assure the best braking performance. This procedure is described in the vehicle service manual and can be performed by a NISSAN dealer. Starting and driving 5-25 WARNING . While driving on a slippery surface, be - 2010 Nissan Murano | Owner's Manual - Page 320
, it switches the ABS off and illuminates the ABS warning light on the instrument panel. The brake system then operates normally, but without anti-lock assistance. If the ABS warning light illuminates during the self-test or while driving, have the vehicle checked by a NISSAN dealer. Using - 2010 Nissan Murano | Owner's Manual - Page 321
various sensors to monitor driver inputs and vehicle motion. Under certain driving conditions, the VDC system helps to perform the following functions. . Controls brake pressure to reduce wheel slip on one slipping drive wheel so power is transferred to a non slipping drive wheel on the same axle - 2010 Nissan Murano | Owner's Manual - Page 322
driving onto a stable . surface. If wheels or tires other than the NISSAN recommended ones are used, the VDC system may not operate properly and the indicator may flash or both and indicator lights may illuminate. The VDC system is not a substitute for winter tires or tire chains on a snow covered - 2010 Nissan Murano | Owner's Manual - Page 323
DRAINING OF COOLANT WATER If the vehicle is to be left outside without antifreeze, drain the cooling system, including the engine block. Refill before operating the vehicle. For details, see "ENGINE COOLING SYSTEM" in the "8. Maintenance and do-it-yourself" section. All-Wheel Drive (AWD) model If - 2010 Nissan Murano | Owner's Manual - Page 324
seen ahead, brake before reaching it. Try not to brake while on the ice, and avoid any sudden steering maneuvers. Do not use cruise control on slippery for at least 10A. Plug the extension cord into a Ground Fault Interrupt (GFI) protected, grounded 110-VAC outlet. Failure to use the proper extension - 2010 Nissan Murano | Owner's Manual - Page 325
MEMO Starting and driving 5-31 - 2010 Nissan Murano | Owner's Manual - Page 326
MEMO 5-32 Starting and driving - 2010 Nissan Murano | Owner's Manual - Page 327
6 In case of emergency Flat tire ...6-2 Tire Pressure Monitoring System (TPMS)...6-2 Changing a flat tire ...6-2 Jump starting ...6-9 Push starting...6-10 If your vehicle overheats...Towing your vehicle ...Towing recommended by NISSAN ...Vehicle recovery (freeing a stuck vehicle) ...6-11 6-12 6-13 - 2010 Nissan Murano | Owner's Manual - Page 328
light still illuminates while driving after adjusting the tire pressure, a tire may be flat. If you have a flat tire, replace it with a spare tire as soon as possible. . When a spare tire is mounted or a wheel is replaced, the TPMS will not function and the low tire pressure warning light will flash - 2010 Nissan Murano | Owner's Manual - Page 329
3. Open the cargo floor board. (See "CARGO FLOOR BOX" in the "2. Instruments and controls" section.) . MCE0001A 1 Place suitable blocks * at both the front and back of the wheel diagonally opposite the flat tire to prevent the vehicle from moving when it is jacked up. Blocking wheels WARNING Be - 2010 Nissan Murano | Owner's Manual - Page 330
4. Type A: Remove the cargo floor board. Type B: Turn the clips counterclockwise and remove the cargo floor box. SCE0854 Type A Type B SCE0853 5. Type B: Open the cargo floor board. SCE0715 Type B 6-4 In case of emergency - 2010 Nissan Murano | Owner's Manual - Page 331
the tire. Removing wheel cover (if so equipped) WARNING Never use your hands to remove the wheel cover. This may cause personal injury. 1 To remove the wheel cover, use the jack rod * as illustrated. 2 Apply cloth * between the wheel and jack rod to prevent damaging the wheel and wheel cover. In - 2010 Nissan Murano | Owner's Manual - Page 332
up the vehicle and removing the damaged tire Carefully read the caution label attached to the jack body and the following instructions. WARNING . Never get under the vehicle while it is supported only by the jack. If it is necessary to work under the vehicle, support it with safety stands. Use - 2010 Nissan Murano | Owner's Manual - Page 333
, securely hold the jack lever and rod with both hands as shown above. Carefully raise the vehicle until the tire clears the ground. Remove the wheel nuts, and then remove the tire. Installing the spare tire The spare tire is designed for emergency use. (See specific instructions under the heading - 2010 Nissan Murano | Owner's Manual - Page 334
to specification at all times. It is recommended that wheel nuts be tigh- . Stowing the damaged tire and the tools 1. Securely store the damaged tire, jack and tools in the storage area. 2. Replace the cargo box. 3. Close the cargo floor board. 4. Close the lift gate. . WARNING . Always make - 2010 Nissan Murano | Owner's Manual - Page 335
must be rated at 12 volts. Use of an improperly rated battery can damage your vehicle. Whenever working on or near a battery, always wear suitable eye . . . WARNING Always follow the instructions below. Failure to do so could result in damage to the charging system and cause personal injury - 2010 Nissan Murano | Owner's Manual - Page 336
systems (lights, heater, air conditioner, etc.). 3. Remove vent caps on the battery (if so equipped). Cover the battery with a firmly wrung out moist cloth to reduce explosion hazard. 4. Connect jumper cables in the sequence as 1 2 3 4 illustrated For models with a steering wheel lock mechanism - 2010 Nissan Murano | Owner's Manual - Page 337
with the engine running. Add coolant to the reservoir tank if necessary. Have your vehicle repaired at a NISSAN dealer. CAUTION . Do not continue to drive if your vehicle overheats. Doing so could cause engine damage or a vehicle fire. To avoid the danger of being scalded, never remove the radiator - 2010 Nissan Murano | Owner's Manual - Page 338
all State (Provincial in Canada) and local regulations for towing must be followed. Incorrect towing equipment could damage your vehicle. Towing instructions are available from a NISSAN dealer. Local service operators are familiar with the applicable laws and procedures for towing. To assure proper - 2010 Nissan Murano | Owner's Manual - Page 339
SCE0439 All-Wheel Drive (AWD) models TOWING RECOMMENDED BY NISSAN All-Wheel Drive (AWD) models NISSAN recommends that towing dollies be used when towing your vehicle or place the vehicle on a flatbed truck as illustrated. CAUTION Never tow AWD models with any of the wheels on the ground as this - 2010 Nissan Murano | Owner's Manual - Page 340
the ignition switch to the LOCK position. This may damage the steering lock mechanism. . Move the selector lever to the N (Neutral) position. When towing a CVT model with the rear wheels on the ground (if you do not use towing dollies): Always release the parking brake. SCE0438 Two-Wheel Drive (2WD - 2010 Nissan Murano | Owner's Manual - Page 341
is stuck in sand, snow, mud, etc., use a tow strap or other device designed specifically for vehicle recovery. Always follow the manufacturer's instructions for the recovery device. Front: Securely install the vehicle recovery hook (stored in the cargo area) as illustrated. Make sure that the hook - 2010 Nissan Murano | Owner's Manual - Page 342
and D (Drive). Apply the accelerator as little as possible to maintain the rocking motion. Release the accelerator pedal before shifting between R and D. Do not spin the tires above 35 MPH (55 km/h). 5. If the vehicle cannot be freed after a few tries, contact a professional towing service 6-16 In - 2010 Nissan Murano | Owner's Manual - Page 343
and care Cleaning exterior ...7-2 Washing ...7-2 Waxing ...7-2 Removing spots ...7-3 Underbody ...7-3 Glass ...7-3 Aluminum alloy wheels ...7-3 Chrome parts ...7-3 Tire dressing ...7-3 Cleaning interior ...7-4 Air fresheners...7-4 Floor mats ...7-4 Seat belts ...7-5 Corrosion protection ...7-5 Most - 2010 Nissan Murano | Owner's Manual - Page 344
drain holes in the lower edge of the door are open. Spray water under the body and in the wheel wells to loosen the dirt and wash away area or protect the vehicle with a body cover. Be careful not to scratch the paint surface when putting on or removing the body cover. . . WASHING Wash dirt off - 2010 Nissan Murano | Owner's Manual - Page 345
Remove tar and oil spots, industrial dust, insects, and tree sap as quickly as possible from the paint surface to avoid lasting damage or staining. Special cleaning products are available at a NISSAN dealer or any automotive accessory stores. mage the electrical conductors, radio antenna driving - 2010 Nissan Murano | Owner's Manual - Page 346
and should be removed promptly. Do not use saddle soap, car waxes, polishes, lens covers. It may damage the lens cover. FLOOR MATS The use of NISSAN floor mats can pedal operation. Mats should be maintained with regular cleaning and replaced if they become excessively worn. AIR FRESHENERS Most air - 2010 Nissan Murano | Owner's Manual - Page 347
body underside can accelerate corrosion. Wet floor coverings will not dry completely inside the vehicle, and should be removed for drying to avoid floor panel corrosion. Floor mat positioning aid This model includes front floor mat brackets to act as floor mat positioning aid. NISSAN floor mats - 2010 Nissan Murano | Owner's Manual - Page 348
lines, brake cables, floor pan and fenders. In winter, the underbody must be cleaned periodically. For additional protection against rust and corrosion, which may be required in some areas, consult a NISSAN dealer. TO PROTECT YOUR VEHICLE FROM CORROSION ...Wash and wax your vehicle often to keep - 2010 Nissan Murano | Owner's Manual - Page 349
...8-12 Battery ...8-13 Jump starting ...8-14 Variable voltage control system (if so equipped) ...8-15 Drive belt ...8-15 Spark plugs ...Replacing spark plugs ...Air cleaner...Windshield wiper blades...Cleaning ...Replacing...Rear window wiper blade...Brakes...Self-adjusting brakes ...Brake pad - 2010 Nissan Murano | Owner's Manual - Page 350
be confident that a NISSAN dealer's service department performs the best job to meet the maintenance your "NISSAN Service and Maintenance Guide". You must refer to that guide to ensure Doors and engine hood: Check that all doors and the engine hood operate properly. Also ensure that all latches lock - 2010 Nissan Murano | Owner's Manual - Page 351
the floor mat away from the pedal. Brake pedal: Check the pedal for smooth operation. If the brake pedal suddenly goes down further than normal, the pedal feels spongy or the vehicle seems to take longer to stop, see a NISSAN dealer immediately. Keep the floor mat away from the pedal. Brakes: Check - 2010 Nissan Murano | Owner's Manual - Page 352
require frequent checks of the battery fluid level. Brake fluid level*: Make sure that the brake fluid level is between the MAX and MIN lines on the reservoir. Engine coolant level*: Check the coolant level when the engine is cold. Engine drive belts*: Make sure that the drive belts are not frayed - 2010 Nissan Murano | Owner's Manual - Page 353
the vehicle on a level surface, apply the parking brake securely and block the wheels to prevent the vehicle from moving. Move the selector lever to P (Park). Be sure the ignition switch is in the OFF or LOCK position when performing any parts replacement or repairs. If you must work with the engine - 2010 Nissan Murano | Owner's Manual - Page 354
4. 5. Power steering fluid reservoir Drive belt location Engine oil filler cap Brake fluid reservoir Air cleaner 6. 7. 8. 9. 10. 11. Fuse/fusible link holder Window washer fluid reservoir Engine coolant reservoir Radiator filler cap Engine oil dipstick Battery 8-6 Maintenance and do-it-yourself - 2010 Nissan Murano | Owner's Manual - Page 355
Demineralized water or distilled water 50% WARNING . Never remove the radiator or coolant reservoir cap when the engine is hot. Wait until the coolant, have it checked by a NISSAN dealer. . CAUTION When adding or replacing coolant, be sure to use only a Genuine NISSAN Long Life Antifreeze/Coolant - 2010 Nissan Murano | Owner's Manual - Page 356
be within the range * . If the 2 oil level is below * , remove the oil filler cap CHANGING ENGINE OIL AND FILTER Change the engine oil and filter according to the maintenance log shown in the NISSAN Service and Maintenance Guide. . Vehicle set-up 1. Park the vehicle on a level surface and apply - 2010 Nissan Murano | Owner's Manual - Page 357
attached to the jack stand saddle. CAUTION Make sure the correct lifting and support points are used to avoid vehicle damage. SDI2175 SDI2355 Engine oil and filter 1. Place a large drain pan under the drain plug A *. 2. Remove the oil filler cap B *. 3. Remove the drain plug with a wrench and - 2010 Nissan Murano | Owner's Manual - Page 358
. Perform steps 4 to 9 when the engine oil filter change is needed. 4. Remove the plastic cover over the oil filter location by removing the small plastic clips as illustrated. C 5. Loosen the oil filter * with an oil filter wrench. Remove the oil filter by turning it by hand. . . 6. Wipe the - 2010 Nissan Murano | Owner's Manual - Page 359
other than Genuine NISSAN CVT Fluid NS-2 will damage the CVT, which is not covered by the NISSAN new vehicle limited warranty... CAUTION Do not overfill. Use Genuine NISSAN PSF or equivalent. When checking or replacement is required, we recommend a NISSAN dealer for servicing. SDI2177 Check the - 2010 Nissan Murano | Owner's Manual - Page 360
manual. WINDOW WASHER FLUID WARNING . Use only new fluid from a sealed container. Old, inferior or contaminated fluid may damage the brake system. The use of improper fluids can damage the brake system and affect the vehicle's stopping ability. Clean the filler cap before removing. Brake fluid - 2010 Nissan Murano | Owner's Manual - Page 361
wear suitable eye protection and remove all jewelry. Battery posts, terminals and related accessories contain lead and lead compounds. Wash hands after handling. Keep the battery out of the reach of children. CAUTION . Do not substitute engine anti-freeze coolant for window washer solution. This - 2010 Nissan Murano | Owner's Manual - Page 362
starting, the battery may have to be replaced. Contact a NISSAN dealer. DI0137MA SDI1480C Check the fluid level in each cell. (Remove the battery cover if it overfill. 1. Remove the cell plugs A *. 2. Add distilled water up to the UPPER LEVEL 1 * line. If the side of the battery is not clear - 2010 Nissan Murano | Owner's Manual - Page 363
SYSTEM (if so equipped) DRIVE BELT or adjusted by a NISSAN dealer. 2. Have the belt condition checked regularly. CAUTION . Do not ground accessories directly to the battery terminal. Doing so will bypass the variable voltage control system and the vehicle battery may not charge completely. Use - 2010 Nissan Murano | Owner's Manual - Page 364
ignition switch are off and that the parking brake is engaged securely. CAUTION Be sure to use the correct socket to remove the spark plugs. An incorrect socket can damage the spark plugs. SDI2020 SDI2180 REPLACING SPARK PLUGS If replacement is required, see a NISSAN dealer for servicing. Pull - 2010 Nissan Murano | Owner's Manual - Page 365
backfires, you could be burned. Do not drive with the air cleaner removed, and be careful when working on the engine with the air cleaner removed. . Never pour fuel into the throttle body or attempt to start the engine with the air cleaner removed. Doing so could result in serious injury. CLEANING - 2010 Nissan Murano | Owner's Manual - Page 366
the washer nozzle * . This may cause improper windshield washer operation. If the nozzle is clogged, remove any B objects with a needle or small pin * . Be careful not to damage the in the groove. Contact a NISSAN dealer for wiper blade rubber replacement. . 8-18 Maintenance and do-it-yourself - 2010 Nissan Murano | Owner's Manual - Page 367
section of your "NISSAN Service and Maintenance Guide". SELF-ADJUSTING BRAKES Your vehicle is equipped with self-adjusting brakes. The disc-type brakes self-adjust every time the brake pedal is applied. WARNING See a NISSAN dealer for a brake system check if the brake pedal height does not return - 2010 Nissan Murano | Owner's Manual - Page 368
the fuse/fusible link holder cover by 1 pushing the tab * . 4. Remove the fuse with the fuse puller located in the passenger compartment fuse box. SDI2181 SDI1754 A 5. If the fuse is open * , replace it with a new B fuse * . Spare fuses are stored in the passenger compartment fuse box. ENGINE - 2010 Nissan Murano | Owner's Manual - Page 369
to swallow the battery and removed parts. SDI2196 PASSENGER COMPARTMENT 3. Remove the fuse with the fuse puller 2 *. 4. If the fuse is open, replace it with a new fuse. CAUTION Never use a fuse of a higher or lower amperage rating than that specified on the fuse box cover. This could damage - 2010 Nissan Murano | Owner's Manual - Page 370
the storage capacity. Make sure that the + side faces the bottom case. SDI1889 . . 4. Align the tips of the upper and lower parts, and then push them together until it is securely closed. 5. Operate the buttons to check its operation. See a NISSAN dealer if you need any assistance for replacement - 2010 Nissan Murano | Owner's Manual - Page 371
Reorient or relocate the receiving antenna. - Increase the separation between the equipment and the receiver. - Connect the equipment into an outlet on a circuit different from that to which the receiver is connected. - Consult the dealer or an experienced radio/TV technician for help. Maintenance - 2010 Nissan Murano | Owner's Manual - Page 372
high-beam) or (low-beam) Side marker light Front map light Rear personal light Front fog light (if so equipped) Step light High-mounted stop light Back-up light Rear combination light (stop/tail/turn signal/side marker light) 12. License plate light 13. Cargo light SDI2182 8-24 Maintenance and do - 2010 Nissan Murano | Owner's Manual - Page 373
to modify or disassemble. Always have your xenon headlights replaced at a NISSAN dealer. For additional information, see "HEADLIGHT AND TURN SIGNAL SWITCH" in the "2. Instruments and controls" section. If replacement is required, see a NISSAN dealer. . . . Use the same number and wattage as - 2010 Nissan Murano | Owner's Manual - Page 374
Disconnect the battery negative cable before replacing bulbs. To replace the headlight bulb, if necessary, remove the rubber cover by pulling out the two 1 clips * . A * B * High-beam bulb Low-beam bulb SDI2183 8-26 Maintenance and do-it-yourself - 2010 Nissan Murano | Owner's Manual - Page 375
light Vanity mirror light (if so equipped) Step light* High-mounted stop light* Cargo light Glove box light* Mood light* 21 LED 5 16 5 8 8 2 8 LED 8 3.4 LED W21W - W5W W16W T10 35 65 55 27/8 21 5 35 5 D2S HB3 H11 1157NA WY21W WY5W H8 WY5W Wattage (W) Bulb No. *: See a NISSAN dealer for replacement - 2010 Nissan Murano | Owner's Manual - Page 376
procedures All other lights are either type A, B, C, D, E or F. When replacing a bulb, first remove the lens and/or cover. SDI2200 Side marker light (Halogen headlight model) 1. Remove the rubber cover. (See "HEADLIGHTS" earlier in this section.) 2. Remove the bulb as illustrated. SDI1679 - 2010 Nissan Murano | Owner's Manual - Page 377
SDI2030 Front map light Cargo light SDI1500B SDI2184 Front fog light (if so equipped) SDI2031 Rear personal light Vanity mirror light SDI2032 Maintenance and do-it-yourself 8-29 - 2010 Nissan Murano | Owner's Manual - Page 378
warning light" in the "2. Instruments and controls" section, "TIRE PRESSURE MONITORING SYSTEM (TPMS)" in the "5. Starting and driving" section and "TIRE PRESSURE MONITORING SYSTEM (TPMS)" in the "6. In case of emergency" section. and Loading Information label is affixed to the driver side center - 2010 Nissan Murano | Owner's Manual - Page 379
the best balance of compact spare tire SDI2197 size (if so equipped) Tire and Loading Information label 1 * Seating capacity : The maximum num- 2 * Vehicle ber of occupants that can be seated in the vehicle. load limit: See "VEHICLE LOADING INFORMATION" in the "9. Technical and consumer - 2010 Nissan Murano | Owner's Manual - Page 380
stem. Do not press too hard or force the valve stem sideways, or air will escape. If the hissing sound of air escaping from the tire is heard while checking the pressure, reposition the gauge to eliminate this leakage. 3. Remove the gauge. 4. Read the tire pressure on the gauge stem and compare it - 2010 Nissan Murano | Owner's Manual - Page 381
is the tire's load index. It is a measurement of how much weight each tire can support. You may not find this information on all tires because it is not required by law. 7. H: Tire speed rating. You should not drive the vehicle faster than the tire speed rating. SDI1575 Example Example SDI1606 - 2010 Nissan Murano | Owner's Manual - Page 382
facing sidewall of an asymmetrical tire that has a particular side that must always face outward when mounted on a vehicle. pressure This number is the greatest amount of air pressure that should be put in the that can be carried by the tire. When replacing the tires on the vehicle, always use a - 2010 Nissan Murano | Owner's Manual - Page 383
of SNOW tires or ALL SEASON tires on all four wheels. . All-Wheel Drive (AWD) models CAUTION . Always use tires of the same type, size, brand, construction (bias, biasbelted or radial), and tread pattern on all four wheels. Failure to do so may result in a circumference difference between tires - 2010 Nissan Murano | Owner's Manual - Page 384
for the AWD model. If excessive tire wear is found, it is recommended that all four tires be replaced with tires of the same size, brand, construction and tread pattern. The tire pressure and wheel alignment should also be checked and corrected as necessary. Contact a NISSAN dealer. fenders or - 2010 Nissan Murano | Owner's Manual - Page 385
"Tire Safety Information" (Canada) in the Warranty Information Booklet. Replacing wheels and tires When replacing a tire, use the same size, tread design, speed rating and load carrying capacity as originally equipped. (See "SPECIFICATIONS" in the "9. Technical and consumer information" section for - 2010 Nissan Murano | Owner's Manual - Page 386
and/or early brake pad/ shoe wear. See "WHEELS AND TIRES" in the "9. Technical and consumer information" section of this manual for wheel off-set dimensions. . When a spare tire is mounted or a wheel is replaced, the TPMS will not function and the low tire pressure warning light will flash for - 2010 Nissan Murano | Owner's Manual - Page 387
your vehicle at speeds faster than 50 MPH (80 km/h). When driving on roads covered with snow or ice, the TEMPORARY USE ONLY spare tire should be used on the rear wheels and original tire used on the front wheels (drive wheels). Use tire chains only on the front (original) tires. Tire tread of the - 2010 Nissan Murano | Owner's Manual - Page 388
MEMO 8-40 Maintenance and do-it-yourself - 2010 Nissan Murano | Owner's Manual - Page 389
consumer information Capacities and recommended fuel/lubricants ...9-2 Fuel recommendation ...9-3 Engine oil and oil filter recommendation...9-5 Air conditioning system refrigerant and lubricant recommendations ...9-6 Specifications...9-7 Engine...9-7 Wheels and tires...9-7 Dimensions and weights - 2010 Nissan Murano | Owner's Manual - Page 390
instructed in the "8. Maintenance and do-it-yourself" section to determine the proper refill capacity. Capacity (Approximate) US measure Fuel Engine oil*2 Drain and refill With oil filter change Without oil filter change Cooling system With reservoir Reservoir Continuously Variable Transmission (CVT - 2010 Nissan Murano | Owner's Manual - Page 391
supports efforts towards cleaner air and suggests that you use reformulated gasoline when available. . CAUTION . Using a fuel other than that specified could adversely affect the emission control to run on E-85 fuel. Using E-85 fuel can damage the fuel system components and is not covered by - 2010 Nissan Murano | Owner's Manual - Page 392
knock, after-run and/or overheating, which may cause excessive fuel consumption or engine damage. If any of the above symptoms are encountered, have your vehicle checked at a NISSAN dealer. However, now and then you may notice light spark knock for a short time while accelerating or driving up hills - 2010 Nissan Murano | Owner's Manual - Page 393
is not covered by the NISSAN new vehicle limited warranty. Your engine was filled with a high quality engine oil when it was built. You do not have to change the oil before the first recommended change interval. Oil and filter change intervals depend Technical and consumer information 9-5 Oil - 2010 Nissan Murano | Owner's Manual - Page 394
vehicle. Operation under the following conditions may require more frequent oil and filter changes...repeated short distance driving at cold outside temperatures driving in dusty conditions extensive idling towing a trailer stop and go commuting system components. The refrigerant HFC-134a (R-134a - 2010 Nissan Murano | Owner's Manual - Page 395
plug Spark plug gap (Normal) Camshaft operation rpm degree/rpm Standard in (mm) in (mm) cu in (cm3) VQ35DE Gasoline, 4-cycle 6-cylinder, V-slanted at 608 3.760 6 3.205 (95.5 6 81.4) 213.45 (3,498) 1-2-3-4-5-6 No adjustment is necessary. FXE22HR-11 0.043 (1.1) Timing chain T-type Conventional WHEELS - 2010 Nissan Murano | Owner's Manual - Page 396
roof rack rail Front tread Rear tread Wheelbase Gross vehicle weight rating Gross axle weight rating Front Rear lb (kg) lb (kg) in (mm) in (mm) in (mm) in (mm) lb (kg) See the F.M.V.S.S. certification label on the driver's side lock pillar. VEHICLE IDENTIFICATION NUMBER (VIN) PLATE The vehicle - 2010 Nissan Murano | Owner's Manual - Page 397
NUMBER (chassis number) The vehicle identification number is located as shown. Remove the cover to access the number. ENGINE SERIAL NUMBER The number contains valuable vehicle information, such as: Gross Vehicle Weight Ratings (GVWR), Gross Axle Weight Rating (GAWR), month and year of manufacture, - 2010 Nissan Murano | Owner's Manual - Page 398
control information label is attached to the underside of the hood as shown. TIRE AND LOADING INFORMATION LABEL The cold tire pressure is shown on the Tire and Loading Information label affixed to the pillar as illustrated. AIR CONDITIONER SPECIFICATION LABEL The air conditioner specification label is attached - 2010 Nissan Murano | Owner's Manual - Page 399
following parts are enclosed bumper A * . Hold the license plate bracket in place. 3. Mark the center of the hole tip pen. C * with a felt- 4. Carefully drill two pilot holes using a 0.39 in (10 mm) drill bit at the marked locations . (Be sure that the drill only goes through the bumper - 2010 Nissan Murano | Owner's Manual - Page 400
. If the vehicle is used to tow a trailer, the trailer tongue weight must be included as part of the cargo load. This information is located on the Tire and Loading Information label. . Cargo capacity - permissible weight of cargo, the subtracted weight of occupants from the load limit. VEHICLE - 2010 Nissan Murano | Owner's Manual - Page 401
(5 x 70) = 300 kg.) 5. Determine the combined weight of luggage and cargo being loaded on the vehicle. That weight may not safely exceed the available cargo and luggage load capacity calculated in Step 4. STI0445 6. If your vehicle will be towing a trailer, Technical and consumer information 9-13 - 2010 Nissan Murano | Owner's Manual - Page 402
transferred to your vehicle. Consult this manual to determine how this reduces the available cargo and luggage load capacity of your vehicle. Before driving a loaded vehicle, confirm that you do not exceed the Gross Vehicle Weight Rating (GVWR) or the Gross Axle Weight Rating (GAWR) for your vehicle - 2010 Nissan Murano | Owner's Manual - Page 403
all weights below the ratings. . Your new vehicle was designed to be used primarily to carry passengers and cargo. Remember that towing a trailer places additional loads on your vehicle's engine, drivetrain, steering, braking and other systems. A NISSAN Towing Guide (U.S. only) is available on - 2010 Nissan Murano | Owner's Manual - Page 404
trailer load to exceed the value specified in the "Towing Load/Specification" chart. The total trailer load equals trailer weight plus its cargo weight. . When towing a trailer load of 1,000 lbs (454 kg) or more, trailers with a brake system MUST be used. STI0541 outside temperatures on graded - 2010 Nissan Murano | Owner's Manual - Page 405
and any other optional equipment. In addition, front or rear GAW must not exceed the Gross Axle Weight Rating (GAWR) shown on the F.M.V.S.S./C.M.V.S.S. certification label. Towing capacities are calculated assuming a base vehicle with driver and any options Technical and consumer information 9-17 - 2010 Nissan Murano | Owner's Manual - Page 406
scale with all of the passengers and cargo that are normally in the vehicle when towing a trailer. 3. Subtract the actual vehicle weight from the GVWR. The remaining amount is the available maximum tongue load. To determine the available towing capacity, use the following procedure. 1. Find the GCWR - 2010 Nissan Murano | Owner's Manual - Page 407
the available tongue weight. Always verify that available capacities are within the required ratings. TOWING LOAD/SPECIFICATION TOWING LOAD/SPECIFICATION CHART Unit: lb (kg) MODEL WEIGHT MAXIMUM TRAILER WEIGHT*1 MAXIMUM TONGUE LOAD GROSS COMBINED WEIGHT RATING RECOMMENDED EQUIPMENT*2 VQ35DE CVT - 2010 Nissan Murano | Owner's Manual - Page 408
will work with the vehicle, hitch, trailer and the trailer's brake system. Follow the instructions provided by the manufacturer for installing and using the sway control device... . Hitch ball Choose a hitch ball of the proper size and weight rating for your trailer: . The required hitch ball size - 2010 Nissan Murano | Owner's Manual - Page 409
system, a commercially available power-type module/converter must be used to provide power for all trailer lighting. This unit uses the vehicle battery as a direct power source for all WARNING Never connect a trailer brake system directly to the vehicle brake system. . Pre-towing tips . Be - 2010 Nissan Murano | Owner's Manual - Page 410
an extremely high temperature when the air conditioning system is on, turn off the air conditioner. Coolant heat can be additionally vented by opening the windows, switching the fan control to high and setting the temperature control to the HOT position. Trailer towing requires more fuel than normal - 2010 Nissan Murano | Owner's Manual - Page 411
with all four wheels on the ground (flat towing). Doing so WILL DAMAGE internal transmission parts due to lack of transmission lubrication. DO NOT tow an All-Wheel Drive (AWD) vehicle with any of the wheels on the ground. Doing so . . . . . . . . Technical and consumer information 9-23 - 2010 Nissan Murano | Owner's Manual - Page 412
on straight-ahead braking traction tests, and does not include acceleration, cornering, hydroplaning, or peak traction characteristics. Continuously Variable Transmission (CVT) All-Wheel Drive (AWD) models: Do not tow an AWD vehicle with any of the wheels on the ground. Two-Wheel Drive (2WD) models - 2010 Nissan Murano | Owner's Manual - Page 413
remedy campaign. However, NHTSA cannot become involved in individual problems between you, your dealer, or NISSAN. To contact NHTSA, you may call replacement by writing to: . Nissan North America, Inc. Consumer Affairs Department P.O. Box 685003 Franklin, TN 37068-5003 For Canada: Emission Control - 2010 Nissan Murano | Owner's Manual - Page 414
(I/M) TEST A vehicle equipped with All-Wheel Drive (AWD) should never be tested using a two wheel dynamometer (such as the dynamometers used test readiness condition. Turn the ignition switch to the ON position without starting the engine. If the Malfunction Indicator Light (MIL) comes on steady for - 2010 Nissan Murano | Owner's Manual - Page 415
pricing and availability of genuine NISSAN Owner's Manuals for this model year and prior, see a NISSAN dealer, or contact: 1-800-247-5321 In Canada: To purchase a copy of a genuine NISSAN Service Manual or Owner's Manual please contact a NISSAN dealer. For the phone number Technical and consumer - 2010 Nissan Murano | Owner's Manual - Page 416
and location of a NISSAN dealer in your area call the NISSAN Information Center at 1-800-3870122 and a bilingual NISSAN representative will assist you. Also available are genuine NISSAN Service and Owner's Manuals for older NISSAN models. Genuine NISSAN Parts may prevent or limit unnecessary excess - 2010 Nissan Murano | Owner's Manual - Page 417
button ...4-8 Instrument panel ...2-35 Bulb check/instrument panel...2-10 Bulb replacement ...8-24 C Cabin air filter ...4-30 Capacities and recommended fuel/lubricants ...9-2 Car phone or CB radio...4-74 Cargo cover ...2-45 Cargo floor box ...2-45 Cargo lights ...2-55 Catalytic converter, Three way - 2010 Nissan Murano | Owner's Manual - Page 418
...7-5 Cover, Cargo cover...2-45 Cruise control ...5-18 Cup holders ...2-41 CVT, Driving with CVT (Continuously Variable Transmission)...5-13 D Daytime running light system ...2-34 Defroster switch, Rear window and outside mirror defroster switch ...2-31 Dimensions and weights ...9-8 Display - 2010 Nissan Murano | Owner's Manual - Page 419
switch (Push-button) ...5-9 Immobilizer system...2-27 In-cabin microfilter ...4-30 Indicator Dot matrix display ...2-17 Lights ...2-14 INFO button ...4-8 Inside mirror ...3-27 Inspection/maintenance (I/M) test ...9-26 Instrument brightness control ...2-35 Instrument panel ...2-2 Intelligent - 2010 Nissan Murano | Owner's Manual - Page 420
...3-19 Light Air bag warning light ...1-58 Bulb replacement ...8-24 Cargo lights ...2-55 Fog light switch ...2-35 Headlight switch ...2-32 Headlights bulb replacement ...8-25 Indicator lights ...2-14 Interior light control switch ...2-53 Interior lights ...2-53 Map lights ...2-53 Mood lights...2-54 - 2010 Nissan Murano | Owner's Manual - Page 421
...5-16 Servicing air conditioner...4-30 SETTING button ...4-12 SHIFT "P" warning...2-19 Shift lock release, Transmission ...5-16 Shifting, CVT (Continuously Variable Transmission)...5-13 Shoulder belt height adjustment ...1-21 Small light indicator light ...2-16 Spare tire ...8-39, 9-7 Spark plugs - 2010 Nissan Murano | Owner's Manual - Page 422
...1-45 Switch Autolight switch ...2-33 Fog light switch ...2-35 Hazard warning flasher switch ...2-36 Headlight switch ...2-32 Overdrive OFF switch ...5-15 Power door lock switch ...3-6 Rear window and outside mirror defroster switch...2-31 Turn signal switch...2-35 Vehicle dynamic control (VDC - 2010 Nissan Murano | Owner's Manual - Page 423
switch ...2-36 Lights ...2-10 Tire pressure monitoring system (TPMS) ...5-3, 6-2 Warning/indicator lights and audible reminders ...2-10 Warning labels, Air bag warning labels ...1-58 Warning light Air bag warning light ...1-58, 2-14 All-wheel drive (AWD) warning light ...2-10 Anti-lock braking - 2010 Nissan Murano | Owner's Manual - Page 424
to run on E-85 fuel. Using E-85 fuel can damage the fuel system components and is not covered by the NISSAN new vehicle limited warranty. COLD TIRE PRESSURES: The label is typically located on the driver side center pillar or on the driver's door. For additional information, see "WHEELS AND - 2010 Nissan Murano | Owner's Manual - Page 425
-
 1
1 -
 2
2 -
 3
3 -
 4
4 -
 5
5 -
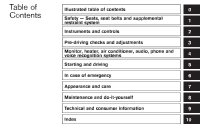 6
6 -
 7
7 -
8
-
9
-
10
-
11
-
12
-
13
-
14
-
15
-
16
-
17
-
18
-
19
-
20
-
21
-
22
-
23
-
24
-
25
-
26
-
27
-
28
-
29
-
30
-
31
-
32
-
33
-
34
-
35
-
36
-
37
-
38
-
39
-
40
-
41
-
42
-
43
-
44
-
45
-
46
-
47
-
48
-
49
-
50
-
51
-
52
-
53
-
54
-
55
-
56
-
57
-
58
-
59
-
60
-
61
-
62
-
63
-
64
-
65
-
66
-
67
-
68
-
69
-
70
-
71
-
72
-
73
-
74
-
75
-
76
-
77
-
78
-
79
-
80
-
81
-
82
-
83
-
84
-
85
-
86
-
87
-
88
-
89
-
90
-
91
-
92
-
93
-
94
-
95
-
96
-
97
-
98
-
99
-
100
-
101
-
102
-
103
-
104
-
105
-
106
-
107
-
108
-
109
-
110
-
111
-
112
-
113
-
114
-
115
-
116
-
117
-
118
-
119
-
120
-
121
-
122
-
123
-
124
-
125
-
126
-
127
-
128
-
129
-
130
-
131
-
132
-
133
-
134
-
135
-
136
-
137
-
138
-
139
-
140
-
141
-
142
-
143
-
144
-
145
-
146
-
147
-
148
-
149
-
150
-
151
-
152
-
153
-
154
-
155
-
156
-
157
-
158
-
159
-
160
-
161
-
162
-
163
-
164
-
165
-
166
-
167
-
168
-
169
-
170
-
171
-
172
-
173
-
174
-
175
-
176
-
177
-
178
-
179
-
180
-
181
-
182
-
183
-
184
-
185
-
186
-
187
-
188
-
189
-
190
-
191
-
192
-
193
-
194
-
195
-
196
-
197
-
198
-
199
-
200
-
201
-
202
-
203
-
204
-
205
-
206
-
207
-
208
-
209
-
210
-
211
-
212
-
213
-
214
-
215
-
216
-
217
-
218
-
219
-
220
-
221
-
222
-
223
-
224
-
225
-
226
-
227
-
228
-
229
-
230
-
231
-
232
-
233
-
234
-
235
-
236
-
237
-
238
-
239
-
240
-
241
-
242
-
243
-
244
-
245
-
246
-
247
-
248
-
249
-
250
-
251
-
252
-
253
-
254
-
255
-
256
-
257
-
258
-
259
-
260
-
261
-
262
-
263
-
264
-
265
-
266
-
267
-
268
-
269
-
270
-
271
-
272
-
273
-
274
-
275
-
276
-
277
-
278
-
279
-
280
-
281
-
282
-
283
-
284
-
285
-
286
-
287
-
288
-
289
-
290
-
291
-
292
-
293
-
294
-
295
-
296
-
297
-
298
-
299
-
300
-
301
-
302
-
303
-
304
-
305
-
306
-
307
-
308
-
309
-
310
-
311
-
312
-
313
-
314
-
315
-
316
-
317
-
318
-
319
-
320
-
321
-
322
-
323
-
324
-
325
-
326
-
327
-
328
-
329
-
330
-
331
-
332
-
333
-
334
-
335
-
336
-
337
-
338
-
339
-
340
-
341
-
342
-
343
-
344
-
345
-
346
-
347
-
348
-
349
-
350
-
351
-
352
-
353
-
354
-
355
-
356
-
357
-
358
-
359
-
360
-
361
-
362
-
363
-
364
-
365
-
366
-
367
-
368
-
369
-
370
-
371
-
372
-
373
-
374
-
375
-
376
-
377
-
378
-
379
-
380
-
381
-
382
-
383
-
384
-
385
-
386
-
387
-
388
-
389
-
390
-
391
-
392
-
393
-
394
-
395
-
396
-
397
-
398
-
399
-
400
-
401
-
402
-
403
-
404
-
405
-
406
-
407
-
408
-
409
-
410
-
411
-
412
-
413
-
414
-
415
-
416
-
417
-
418
-
419
-
420
-
421
-
422
-
423
-
424
-
425
 |
 |