2006 Suzuki Reno Owner's Manual - Page 148
2006 Suzuki Reno Manual

Page 148 highlights
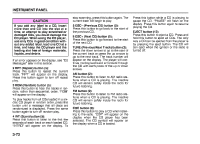
INSTRUMENT PANEL If the ignition or radio is turned off with a CD in the player, it will stay in the player. When a CD is in the player and the ignition is turned on, the radio must be turned on before the CD will start playback. When the ignition and radio are turned on, the CD will start playing where it stopped, if it was the last selected audio source. The CD player can play the smaller 3 inch (8 cm) single CDs with an adapter ring. Full-size CDs and the smaller CDs are loaded in the same manner. If playing a CD-R, the sound quality may be reduced due to CD-R quality, the method of recording, the quality of the music that has been recorded, and the way the CD-R has been handled. There may be an increase in skipping, difficulty in finding tracks, and/or difficulty in loading and ejecting. If these problems occur, check the bottom surface of the CD. If the surface of the CD is damaged, such as cracked, broken, or scratched, the CD will not play properly. If the surface of the CD is soiled, see "Cautions on Handling" for more information. If there is no apparent damage, try a known good CD. Do not add any label to a CD, it could get caught in the CD player. If a CD is recorded on a personal computer and a description label is needed, try labeling the top of the recorded CD with a marking pen instead. CAUTION If you add any label to a CD, insert more than one CD into the slot at a time, or attempt to play scratched or damaged CDs, you could damage the CD player. When using the CD player, use only CDs in good condition without any added label, load one CD at a time, and keep the CD player and the loading slot free of foreign materials, liquids, and debris. If an error appears on the display, see "CD Messages" later in this section. All of the CD functions work the same while playing an MP3/WMA, except for those listed here. See "PLAYING A CD(s)" earlier for more information. SOUND (SCROLL) button (6) (MP3/WMA mode only): Press this button for longer than two seconds. Song title or other information of a song will scroll on/off. The default is scroll on. The scroll mode can be changed only when press this button for longer than two seconds 1 DIR (Directory) button (5): Press this button to repeat the tracks in the current directory. "DIR" will appear on the display. Press this button again to repeat the tracks in all of the directories. "ALL" will appear on the display. Press this button again to turn off repeat play. SEEK (Previous/Next Folder) button (4) (in MP3/WMA mode): Press the up or down arrows to change the folder. If the CD-R doesn't have any folders, "ROOT" will flash on the display for a short time. TUNE (Previous/Next File) button (3): Press the up or down arrows to go to the first track in the previous or to go to the next folder. The player will continue moving backward or forward through the CD with each press of the up or down arrows. INFO/DISP (Information/Display) button (13): Press this button to display additional text information related to the current MP3/ WMA song, such as: Song Title, Album Title, Artist, Bit rate may appear. While information is not available, "No Info" will appear on the display. Press this button for longer than two seconds to change display mode. 3-75
-
 1
1 -
2
-
3
-
4
-
5
-
6
-
7
-
8
-
9
-
10
-
11
-
12
-
13
-
14
-
15
-
16
-
17
-
18
-
19
-
20
-
21
-
22
-
23
-
24
-
25
-
26
-
27
-
28
-
29
-
30
-
31
-
32
-
33
-
34
-
35
-
36
-
37
-
38
-
39
-
40
-
41
-
42
-
43
-
44
-
45
-
46
-
47
-
48
-
49
-
50
-
51
-
52
-
53
-
54
-
55
-
56
-
57
-
58
-
59
-
60
-
61
-
62
-
63
-
64
-
65
-
66
-
67
-
68
-
69
-
70
-
71
-
72
-
73
-
74
-
75
-
76
-
77
-
78
-
79
-
80
-
81
-
82
-
83
-
84
-
85
-
86
-
87
-
88
-
89
-
90
-
91
-
92
-
93
-
94
-
95
-
96
-
97
-
98
-
99
-
100
-
101
-
102
-
103
-
104
-
105
-
106
-
107
-
108
-
109
-
110
-
111
-
112
-
113
-
114
-
115
-
116
-
117
-
118
-
119
-
120
-
121
-
122
-
123
-
124
-
125
-
126
-
127
-
128
-
129
-
130
-
131
-
132
-
133
-
134
-
135
-
136
-
137
-
138
-
139
-
140
-
141
-
142
-
 143
143 -
 144
144 -
 145
145 -
 146
146 -
 147
147 -
 148
148 -
 149
149 -
 150
150 -
 151
151 -
 152
152 -
 153
153 -
154
-
155
-
156
-
157
-
158
-
159
-
160
-
161
-
162
-
163
-
164
-
165
-
166
-
167
-
168
-
169
-
170
-
171
-
172
-
173
-
174
-
175
-
176
-
177
-
178
-
179
-
180
-
181
-
182
-
183
-
184
-
185
-
186
-
187
-
188
-
189
-
190
-
191
-
192
-
193
-
194
-
195
-
196
-
197
-
198
-
199
-
200
-
201
-
202
-
203
-
204
-
205
-
206
-
207
-
208
-
209
-
210
-
211
-
212
-
213
-
214
-
215
-
216
-
217
-
218
-
219
-
220
-
221
-
222
-
223
-
224
-
225
-
226
-
227
-
228
-
229
-
230
-
231
-
232
-
233
-
234
-
235
-
236
-
237
-
238
-
239
-
240
-
241
-
242
-
243
-
244
-
245
-
246
-
247
-
248
-
249
-
250
-
251
-
252
-
253
-
254
-
255
-
256
 |
 |
