2009 Suzuki SX4 Owner's Manual - Page 238
2009 Suzuki SX4 Manual

Page 238 highlights
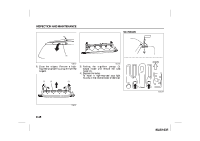
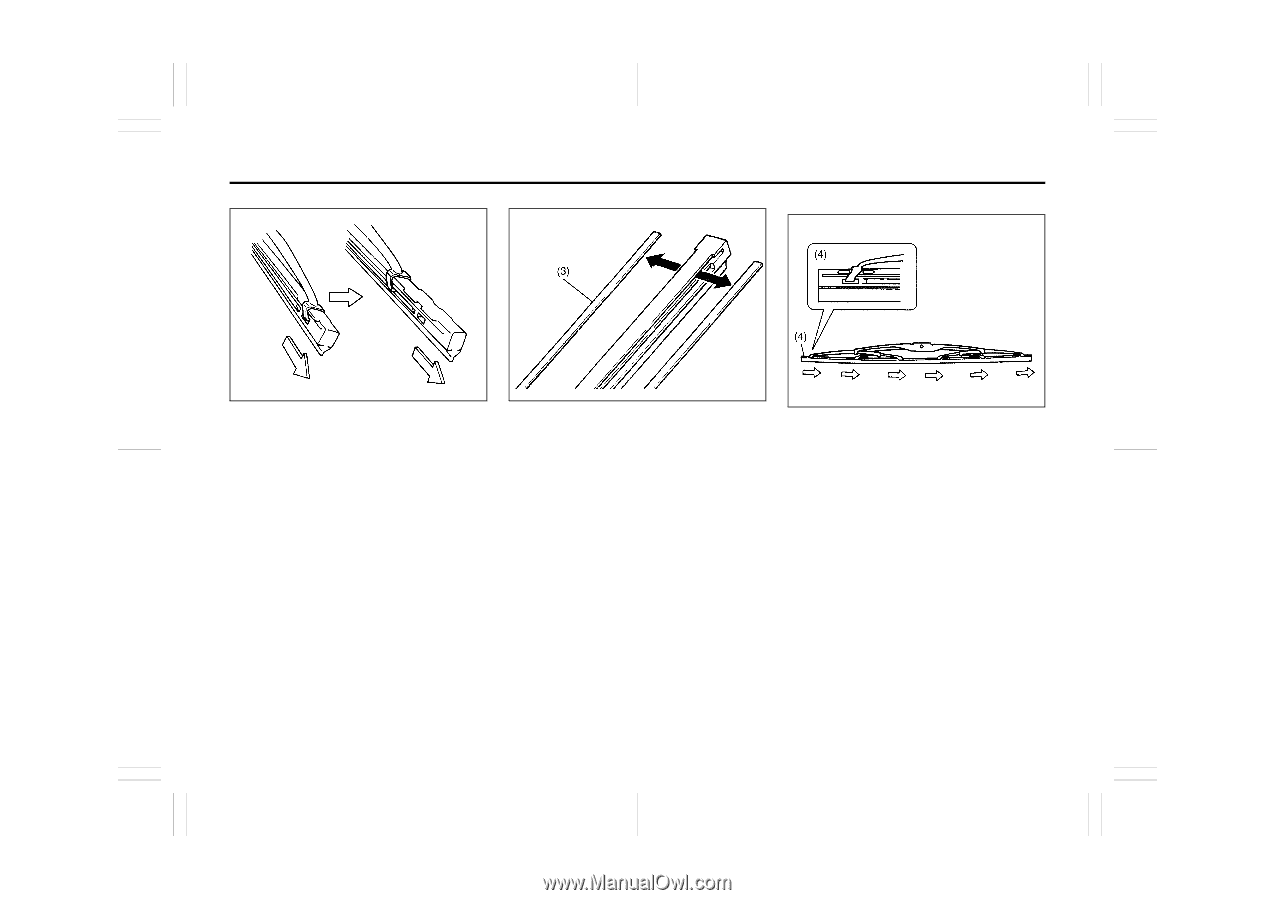
INSPECTION AND MAINTENANCE Installation 60A260 52D124 52D125 3) Pull the locked end of the wiper blade firmly to unlock the blade and slide the blade out as shown. (3) Retainer 4) If the new blade is provided without the two metal retainers, move them from the old blade to the new one. (4) Locked end 5) Install the new blade in the reverse order of removal, with the locked end positioned toward the wiper arm. Make sure the blade is properly retained by all the hooks. Grasp the blade near the locked end and pull in the direction of the arrows to lock the end into place. 6) Reinstall wiper frame to arm, making sure that the lock lever is snapped securely into the arm. 9-47 80J22-03E
-
 1
1 -
2
-
3
-
4
-
5
-
6
-
7
-
8
-
9
-
10
-
11
-
12
-
13
-
14
-
15
-
16
-
17
-
18
-
19
-
20
-
21
-
22
-
23
-
24
-
25
-
26
-
27
-
28
-
29
-
30
-
31
-
32
-
33
-
34
-
35
-
36
-
37
-
38
-
39
-
40
-
41
-
42
-
43
-
44
-
45
-
46
-
47
-
48
-
49
-
50
-
51
-
52
-
53
-
54
-
55
-
56
-
57
-
58
-
59
-
60
-
61
-
62
-
63
-
64
-
65
-
66
-
67
-
68
-
69
-
70
-
71
-
72
-
73
-
74
-
75
-
76
-
77
-
78
-
79
-
80
-
81
-
82
-
83
-
84
-
85
-
86
-
87
-
88
-
89
-
90
-
91
-
92
-
93
-
94
-
95
-
96
-
97
-
98
-
99
-
100
-
101
-
102
-
103
-
104
-
105
-
106
-
107
-
108
-
109
-
110
-
111
-
112
-
113
-
114
-
115
-
116
-
117
-
118
-
119
-
120
-
121
-
122
-
123
-
124
-
125
-
126
-
127
-
128
-
129
-
130
-
131
-
132
-
133
-
134
-
135
-
136
-
137
-
138
-
139
-
140
-
141
-
142
-
143
-
144
-
145
-
146
-
147
-
148
-
149
-
150
-
151
-
152
-
153
-
154
-
155
-
156
-
157
-
158
-
159
-
160
-
161
-
162
-
163
-
164
-
165
-
166
-
167
-
168
-
169
-
170
-
171
-
172
-
173
-
174
-
175
-
176
-
177
-
178
-
179
-
180
-
181
-
182
-
183
-
184
-
185
-
186
-
187
-
188
-
189
-
190
-
191
-
192
-
193
-
194
-
195
-
196
-
197
-
198
-
199
-
200
-
201
-
202
-
203
-
204
-
205
-
206
-
207
-
208
-
209
-
210
-
211
-
212
-
213
-
214
-
215
-
216
-
217
-
218
-
219
-
220
-
221
-
222
-
223
-
224
-
225
-
226
-
227
-
228
-
229
-
230
-
231
-
232
-
 233
233 -
 234
234 -
 235
235 -
 236
236 -
 237
237 -
 238
238 -
 239
239 -
 240
240 -
 241
241 -
 242
242 -
 243
243 -
244
-
245
-
246
-
247
-
248
-
249
-
250
-
251
-
252
-
253
-
254
-
255
-
256
-
257
-
258
-
259
-
260
-
261
-
262
-
263
-
264
-
265
-
266
-
267
-
268
-
269
-
270
-
271
-
272
-
273
-
274
-
275
-
276
-
277
-
278
-
279
 |
 |
9-47
INSPECTION AND MAINTENANCE
80J22-03E
60A260
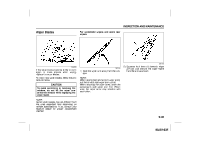
3) Pull the locked end of the wiper blade
firmly to unlock the blade and slide the
blade out as shown.
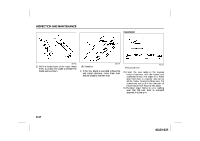
52D124
(3) Retainer
4)
If the new blade is provided without the
two metal retainers, move them from
the old blade to the new one.
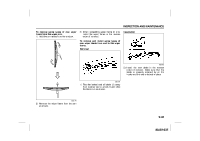
Installation
52D125
(4) Locked end
5) Install the new blade in the reverse
order of removal, with the locked end
positioned toward the wiper arm. Make
sure the blade is properly retained by
all the hooks. Grasp the blade near the
locked end and pull in the direction of
the arrows to lock the end into place.
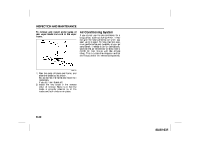
6) Reinstall wiper frame to arm, making
sure that the lock lever is snapped
securely into the arm.