Alpine CDE-W235BT Owner's Manual (english) - Page 17
Using the Front AUX Input Terminal, Option Menu Setting - firmware
 |
View all Alpine CDE-W235BT manuals
Add to My Manuals
Save this manual to your list of manuals |
Page 17 highlights
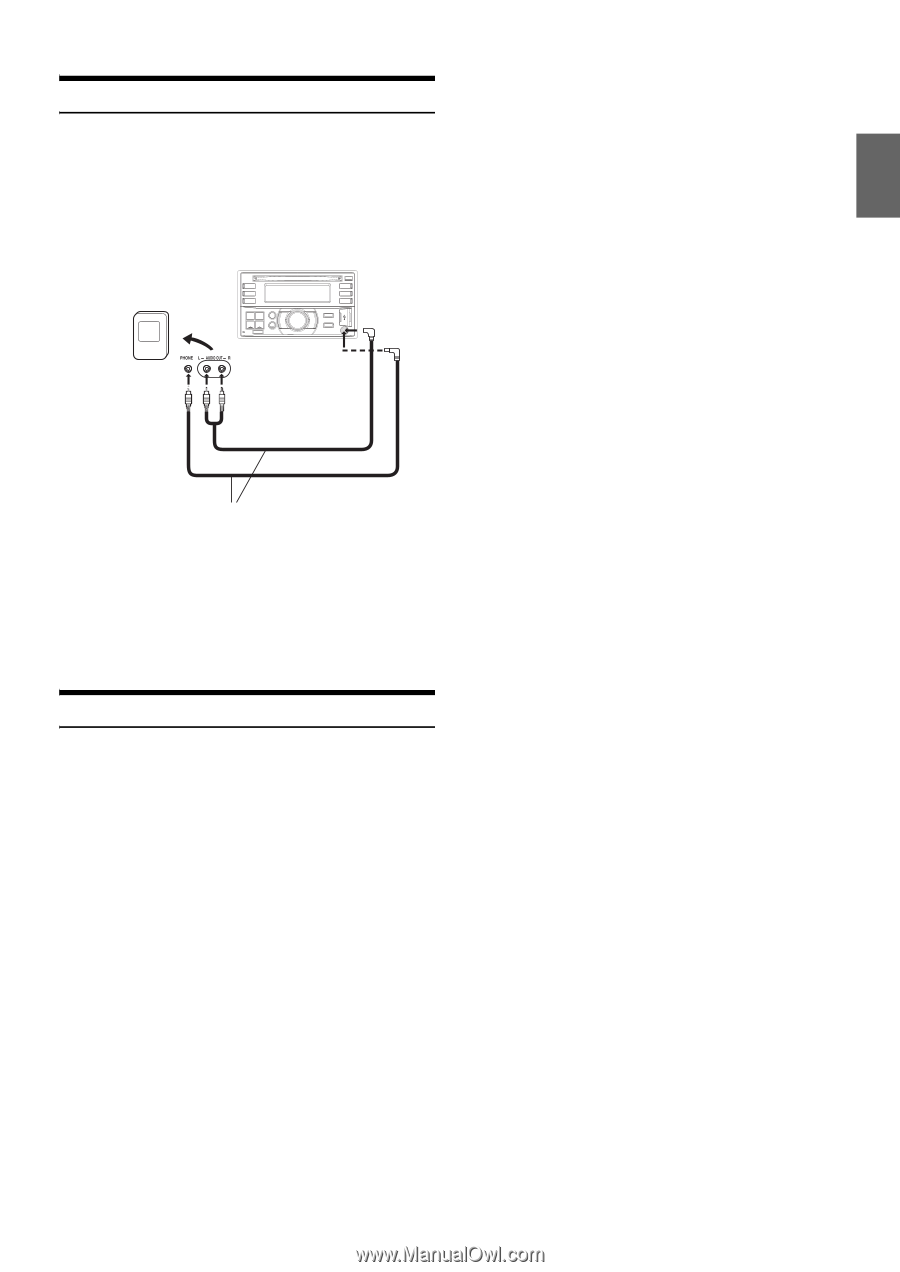
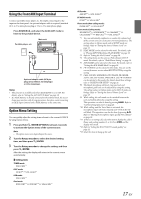
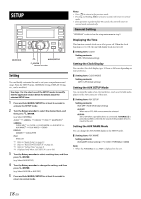
Using the Front AUX Input Terminal Connect a portable music player, etc. by simply connecting it to the input on the front panel. An optional adapter cable is required (standard RCA to 3.5ø mini-phono plug or 3.5ø to 3.5ø mini phono plug). Press SOURCE, and select the AUXILIARY mode to listen to the portable device. Portable player, etc. Main unit or Optional adapter cable (RCA pin plugs [red, white] 3.5ø miniplugs) or (3.5ø miniplugs). Notes • This function is available only when AUX SETUP is set to ON. For details, refer to "Setting the AUX SETUP Mode" on page 18. • If a Flash Memory is directly connected to the USB terminal, the size or shape may interfere with driving operations, therefore, avoid connecting an AUX input terminal and a Flash Memory at the same time. Option Menu Setting You can quickly adjust the setting items relevant to the current SOURCE by using Option Menu. 1 Press and hold ENTER/OPTION for at least 2 seconds to activate the Option menu of the current source. Note • The option menu varies depending on the source. 2 Turn the Rotary encoder to select the desired setting item, and then press ENTER. 3 Turn the Rotary encoder to change the setting, and then press ENTER. After the setting, the display will return to the current source automatically. Setting item: TUNER mode: VOL LV ADJ*1 DISC mode: CD SET*2 VOL LV ADJ*1 USB mode: VOL LV ADJ*1 iPod mode: IPOD CONT*3 IPOD SET*4 VOL LV ADJ*1 AUX mode: AUX SET*5 VOL LV ADJ*1 BT AUDIO mode: BT SET*6 VOL LV ADJ*1 Phone mode (Non-calling mode): PHONE SET*7 VOL LV ADJ*8 Phone mode (Calling mode): SPK SWITCH*9 VOICE MUTE*10 CALL WAIT*11 CALL SOUND*12 END CALL*13 VOL LV ADJ*8 *1 You can individually emphasize or weaken the volume level of the current source to create your own tonal preference. The setting values in Option mode and in SETUP mode are linkage. Refer to "Setting the Source Volume Level" on page 15. *2 PLAY MODE can be selected in this mode. For details, refer to "Playing MP3/WMA Data (PLAY MODE)" on page 19. *3 Refer to "Setting the iPod Control" on page 28. *4 The setting items are the same as iPod setting in SETUP mode. For details, refer to "iPod/iPhone Setting" on page 19. *5 AUX NAME can be selected in this mode. For details, refer to "Setting the AUX NAME Mode" on page 18. *6 FW VERSION can be selected in this mode. You can see the current firmware version about BLUETOOTH by using this setting. *7 CALL SOUND, SENDER ID, PB UPDATE, PB ORDER, AUTO ANS, SEV NAME, SPEAKER SL and FW VERSION can be selected in this mode. For details about these settings, refer to "BLUETOOTH SETUP" on page 21. *8 The Hands free phone talk level, ring tone level and microphone gain level can be adjusted by using this setting. The setting values in Option mode and in SETUP mode are linkage. Refer to "Setting the Source Volume Level" on page 15. *9 While calling, the call sound can be switched between the unit and mobile phone by using this setting. This operation can also be done by pressing BAND. Refer to "Call Switching Operation" on page 26. *10 While calling, and the Voice Mute is activated, the microphone input will mute instantly and "VOICE MUTE" will blink. This operation can also be done by pressing . Refer to "Muting the microphone input quickly (Voice Mute)" on page 26. *11 If there is a waiting call, select this item to display the caller's Name and waiting number (1 or 2). Press VIEW and the display will switch. *12 Refer to "Setting the BLUETOOTH sound quality" on page 22. *13 Select this item to hang up the call. 17-EN
-
 1
1 -
2
-
3
-
4
-
5
-
6
-
7
-
8
-
9
-
10
-
11
-
 12
12 -
 13
13 -
 14
14 -
 15
15 -
 16
16 -
 17
17 -
 18
18 -
 19
19 -
 20
20 -
 21
21 -
 22
22 -
23
-
24
-
25
-
26
-
27
-
28
-
29
-
30
-
31
-
32
-
33
-
34
-
35
-
36
-
37
-
38
-
39
-
40
 |
 |