Alpine CDE-W235BT Owner's Manual (english) - Page 18
Setup - set time
 |
View all Alpine CDE-W235BT manuals
Add to My Manuals
Save this manual to your list of manuals |
Page 18 highlights
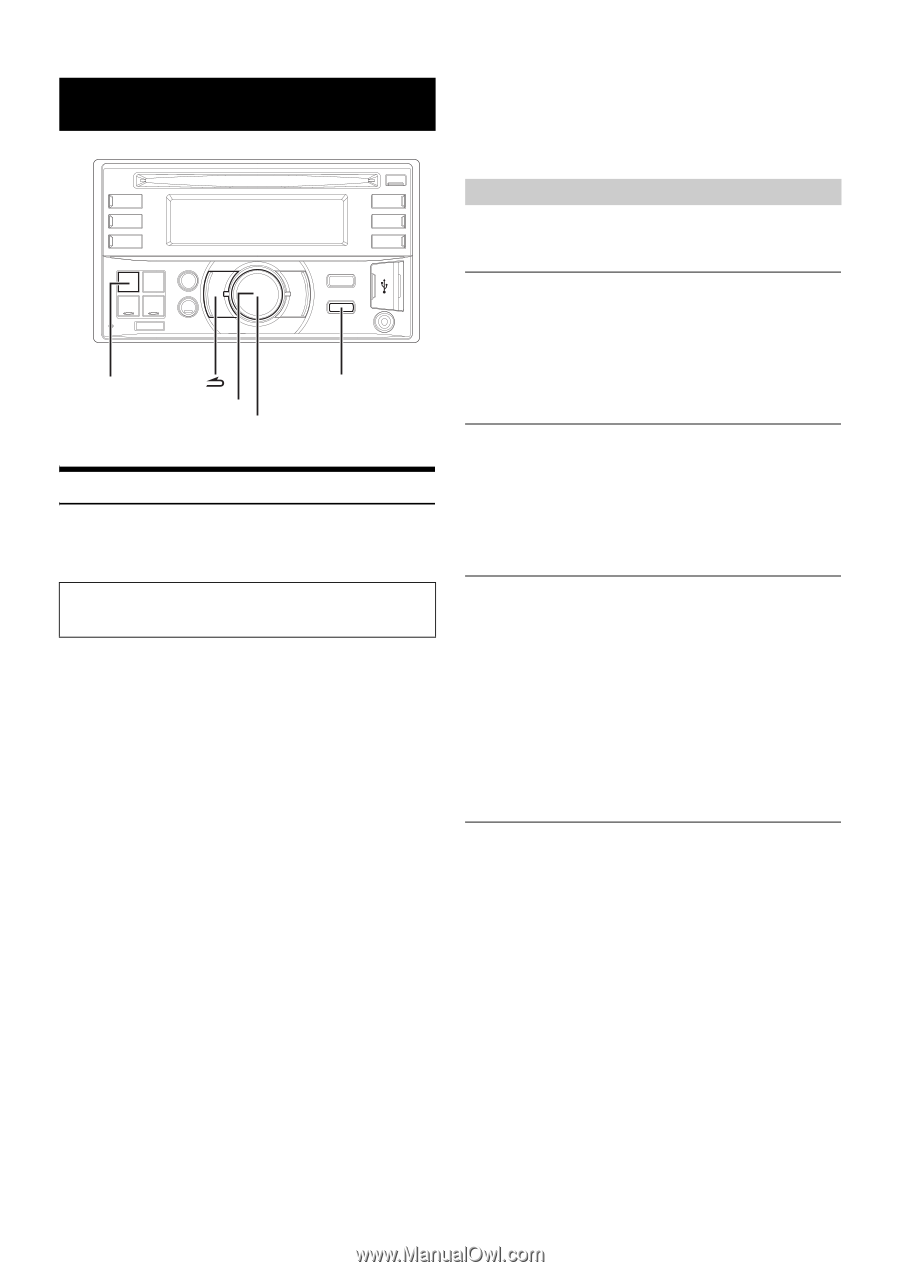
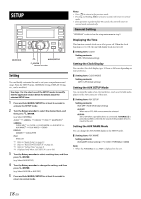
SETUP SOURCE/ AUDIO/SETUP /ENTER Rotary encoder Setting You can flexibly customize the unit to suit your own preferences and usage. From the SETUP menu, GENERAL Setting, DISPLAY Setting, etc., can be modified. Use steps 1 to 5 to select one of the SETUP modes to modify. See the applicable section below for details about the selected SETUP item. 1 Press and hold AUDIOSETUP for at least 2 seconds to activate the SETUP mode. 2 Turn the Rotary encoder to select the desired item, and then press ENTER. (e.g. Select GENERAL) AUDIO*1 GENERAL DISPLAY IPOD BLUETOOTH*2 GENERAL: CLOCK ADJ*3 CLOCK CLOCK MODE AUX SETUP AUX NAME*4 PLAY MODE DEMO DISPLAY: DIMMER SCROLLTYPE iPod: IPOD LIST *1 Refer to "Audio Setup" on page 13. *2 Refer to "BLUETOOTH SETUP" on page 21. *3 Refer to "Setting Time" on page 8. *4 Displayed only when AUX SETUP is set to ON. 3 Turn the Rotary encoder to select a setting item, and then press ENTER. (e.g. Select AUX SETUP) 4 Turn the Rotary encoder to change the setting, and then press ENTER. (e.g. Select AUX ON or AUX OFF) 5 Press and hold AUDIOSETUP for at least 2 seconds to return to normal mode. Notes • Press to return to the previous mode. • Pressing and holding for at least 2 seconds will return to normal mode. • If no operation is performed for 60 seconds, the unit will return to normal mode automatically. General Setting "GENERAL" is selected on the setup main menu in step 2. Displaying the Time This function controls clock on or off at power off. When the clock function is set to ON, the unit will display clock at power off. Setting item: CLOCK Setting contents: OFF / ON (Initial setting) Setting the Clock Display You can select the clock display type, 12-hour or 24-hour, depending on your preference. Setting item: CLOCK MODE Setting contents: 24H / 12H (Initial setting) Setting the AUX SETUP Mode You can input the audio of an external device, (such as a Portable audio player) to the AUX connector of this unit. Setting item: AUX SETUP Setting contents: AUX OFF / AUX ON (Initial setting) AUX OFF: When set to OFF, AUX source cannot be selected. AUX ON: Set to ON when a portable device is connected. If SOURCE is pressed and AUX is selected, the sound of the portable device is input to the unit. Setting the AUX NAME Mode You can change the AUX NAME display in the SETUP mode. Setting item: AUX NAME Setting contents: AUXILIARY (Initial setting) / TV / DVD / PORTABLE / GAME Note • When the PORTABLE is set, PMD is displayed on the unit. 18-EN
-
 1
1 -
2
-
3
-
4
-
5
-
6
-
7
-
8
-
9
-
10
-
11
-
12
-
 13
13 -
 14
14 -
 15
15 -
 16
16 -
 17
17 -
 18
18 -
 19
19 -
 20
20 -
 21
21 -
 22
22 -
 23
23 -
24
-
25
-
26
-
27
-
28
-
29
-
30
-
31
-
32
-
33
-
34
-
35
-
36
-
37
-
38
-
39
-
40
 |
 |