Amana AGP200VDW Installation Instruction - Page 14
Complete Conversion
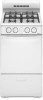 |
UPC - 883049214153
View all Amana AGP200VDW manuals
Add to My Manuals
Save this manual to your list of manuals |
Page 14 highlights
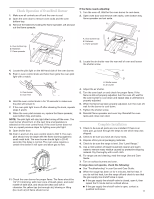
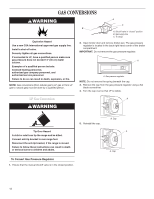
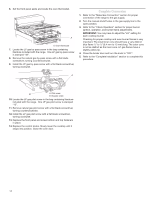
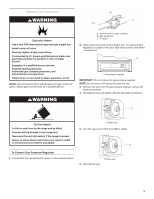
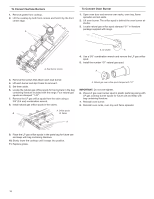
6. Set the front panel aside and locate the oven thermostat. A A. Oven thermostat 7. Locate the LP gas by-pass screw in the bag containing literature included with the range. One LP gas by-pass screw is stamped "48". 8. Remove the natural gas by-pass screw with a flat blade screwdriver, turning counterclockwise. 9. Install the LP gas by-pass screw with a flat blade screwdriver, turning clockwise. Complete Conversion 1. Refer to the "Make Gas Connection" section for proper connection of the range to the gas supply. 2. Turn the manual shutoff valve in the gas supply line to the open position. 3. Refer to the "Check Operation" section for proper burner ignition, operation, and burner flame adjustments. IMPORTANT: You may have to adjust the "LO" setting for each cooktop burner. Checking for proper cooktop and oven burner flames is very important. The small inner cone should have a very distinct blue flame ¹⁄₄" to ¹⁄₂" (6.4 mm to 13 mm) long. The outer cone is not as distinct as the inner cone. LP gas flames have a slightly yellow tip. 4. Close the broiler door and turn the knob to "OFF". 5. Refer to the "Complete Installation" section to complete this procedure. A B A. Pilot screw B. By-pass screw 10. Locate the LP gas pilot screw in the bag containing literature included with the range. One LP gas pilot screw is stamped "15". 11. Remove natural gas pilot screw with a flat blade screwdriver, turning counterclockwise. 12. Install the LP gas pilot screw with a flat blade screwdriver, turning clockwise. 13. Replace the front panel and screw bottom and top fasteners in place. 14. Replace the control knobs. Slowly lower the cooktop until it snaps into position. Close the oven door. 14
-
 1
1 -
2
-
3
-
4
-
5
-
6
-
7
-
8
-
 9
9 -
 10
10 -
 11
11 -
 12
12 -
 13
13 -
 14
14 -
 15
15 -
 16
16 -
 17
17 -
 18
18 -
 19
19 -
20
-
21
-
22
-
23
-
24
-
25
-
26
-
27
-
28
-
29
-
30
-
31
-
32
 |
 |
