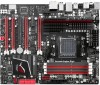
Asus CROSSHAIR V FORMULA User Manual - Page 92
DCT1 Information, GPU.DIMM Post, DIGI + VRM/Power Control, CPU Load-line Calibration [Auto], CPU/NB - specs
 |
View all Asus CROSSHAIR V FORMULA manuals
Add to My Manuals
Save this manual to your list of manuals |
Page 92 highlights
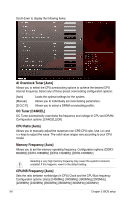
Processor ODT [Auto] Configuration options: [Auto] [240 ohms +/- 20%] [120 ohms +/- 20%] [60 ohms +/- 20%] DCT1 Information: CKE drive strength [Auto] Configuration options: [Auto] [1x] [1.25x] [1.5x] [2x] CS/ODT drive strength [Auto] Configuration options: [Auto] [1x] [1.25x] [1.5x] [2x] ADDR/CMD drive strength [Auto] Configuration options: [Auto] [1x] [1.25x] [1.5x] [2x] MEMCLK drive strength [Auto] Configuration options: [Auto] [0.75x] [1x] [1.25x] [1.5x] Data drive strength [Auto] Configuration options: [Auto] [0.75x] [1x] [1.25x] [1.5x] DQS drive strength [Auto] Configuration options: [Auto] [0.75x] [1x] [1.25x] [1.5x] Processor ODT [Auto] Configuration options: [Auto] [240 ohms +/- 20%] [120 ohms +/- 20%] [60 ohms +/- 20%] GPU.DIMM Post The sub-items in this menu display the status of the installed VGA cards and memory. The field shows N/A if there's no device installed on that slot. DIGI + VRM/Power Control CPU Load-line Calibration [Auto] Load-line is defined by AMD CPU spec and affects CPU voltage. The CPU working voltage will decrease proportionally to CPU loading. Higher Load-line calibration would get higher voltage and better overclocking performance, but increase the CPU and VRM thermal. This item allows you to adjust the voltage range from the following percentages to boost the system performance: 0% (Regular), 25% (Medium), 50% (High), 75% (Ultra High) and 100% (Extreme). Configuration options: [Auto] [Regular] [Medium] [High] [Ultra High] [Extreme] The actual performance boost may vary depending on your CPU specifiation. CPU/NB Load Line Calibration [Auto] Allows you to select the CPU/NB Load-Line mode. Configuration options: [Auto] [Regular] [High] [Extreme] 3-8 Chapter 3: BIOS setup
-
 1
1 -
2
-
3
-
4
-
5
-
6
-
7
-
8
-
9
-
10
-
11
-
12
-
13
-
14
-
15
-
16
-
17
-
18
-
19
-
20
-
21
-
22
-
23
-
24
-
25
-
26
-
27
-
28
-
29
-
30
-
31
-
32
-
33
-
34
-
35
-
36
-
37
-
38
-
39
-
40
-
41
-
42
-
43
-
44
-
45
-
46
-
47
-
48
-
49
-
50
-
51
-
52
-
53
-
54
-
55
-
56
-
57
-
58
-
59
-
60
-
61
-
62
-
63
-
64
-
65
-
66
-
67
-
68
-
69
-
70
-
71
-
72
-
73
-
74
-
75
-
76
-
77
-
78
-
79
-
80
-
81
-
82
-
83
-
84
-
85
-
86
-
 87
87 -
 88
88 -
 89
89 -
 90
90 -
 91
91 -
 92
92 -
 93
93 -
 94
94 -
 95
95 -
 96
96 -
 97
97 -
98
-
99
-
100
-
101
-
102
-
103
-
104
-
105
-
106
-
107
-
108
-
109
-
110
-
111
-
112
-
113
-
114
-
115
-
116
-
117
-
118
-
119
-
120
-
121
-
122
-
123
-
124
-
125
-
126
-
127
-
128
-
129
-
130
-
131
-
132
-
133
-
134
-
135
-
136
-
137
-
138
-
139
-
140
-
141
-
142
-
143
-
144
-
145
-
146
-
147
-
148
-
149
-
150
-
151
-
152
-
153
-
154
-
155
-
156
-
157
-
158
-
159
-
160
-
161
-
162
-
163
-
164
-
165
-
166
-
167
-
168
-
169
-
170
-
171
-
172
-
173
-
174
-
175
-
176
-
177
-
178
-
179
-
180
-
181
-
182
-
183
-
184
-
185
-
186
-
187
-
188
-
189
-
190
-
191
-
192
-
193
 |
 |
