Asus RS100-E5 User Guide - Page 27
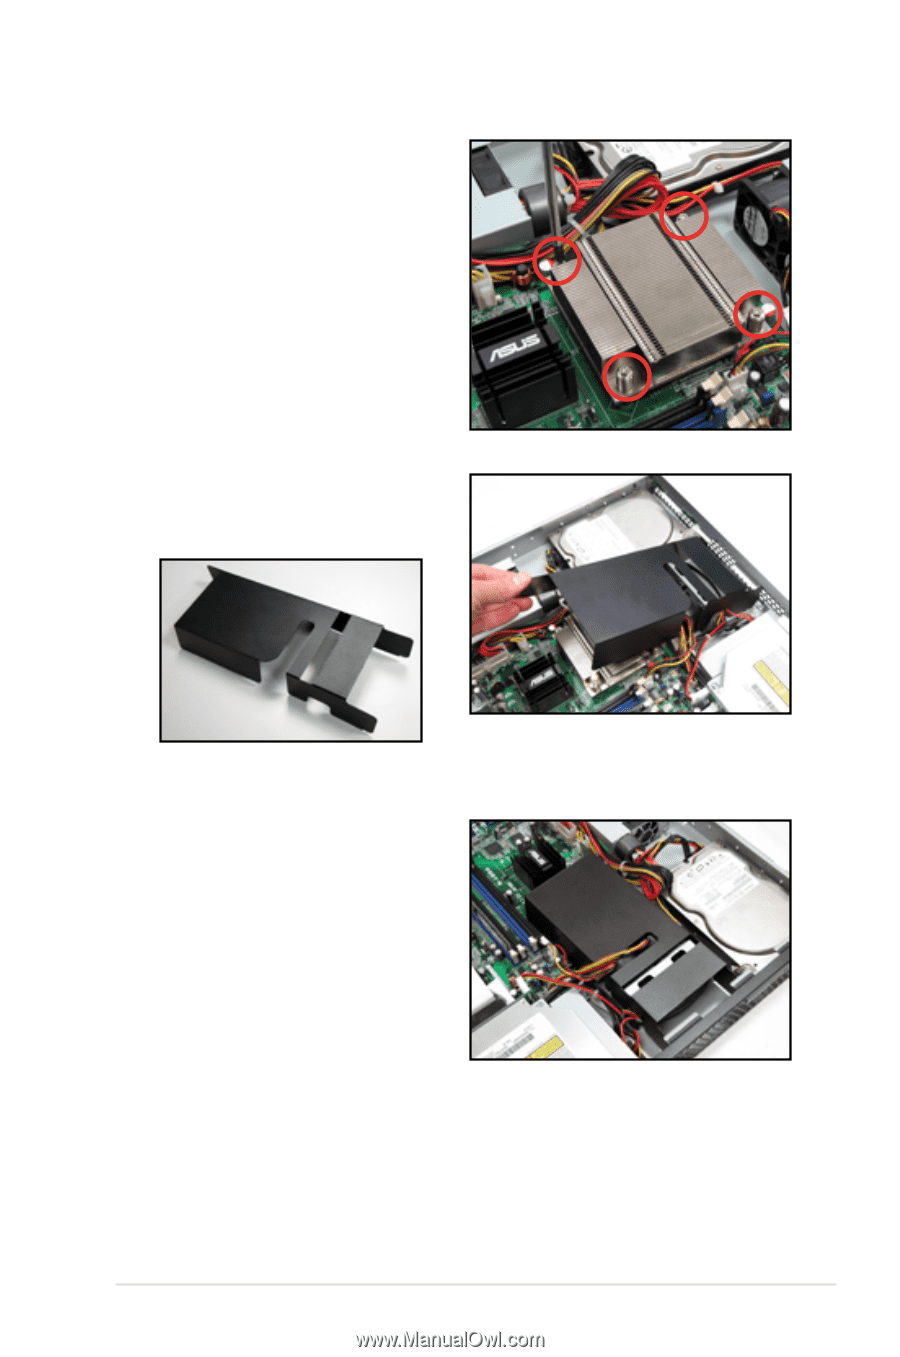
Tighten the screws., the linear airflow between
 |
UPC - 610839665518
View all Asus RS100-E5 manuals
Add to My Manuals
Save this manual to your list of manuals |
Page 27 highlights
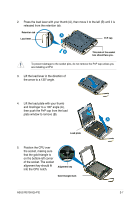
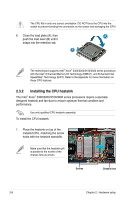
2. Tighten the screws. 3. Peel the adhesive cover of the heatsink plastic cover and evenly attach to heatsink. Heatsink plastic cover The heatsink plastic cover ensures the linear airflow between the heatsink and chassis fans. ASUS RS100-E5-PI2 2-9
-
 1
1 -
2
-
3
-
4
-
5
-
6
-
7
-
8
-
9
-
10
-
11
-
12
-
13
-
14
-
15
-
16
-
17
-
18
-
19
-
20
-
21
-
 22
22 -
 23
23 -
 24
24 -
 25
25 -
 26
26 -
 27
27 -
 28
28 -
 29
29 -
 30
30 -
 31
31 -
 32
32 -
33
-
34
-
35
-
36
-
37
-
38
-
39
-
40
-
41
-
42
-
43
-
44
-
45
-
46
-
47
-
48
-
49
-
50
-
51
-
52
-
53
-
54
-
55
-
56
-
57
-
58
-
59
-
60
-
61
-
62
-
63
-
64
-
65
-
66
-
67
-
68
-
69
-
70
-
71
-
72
-
73
-
74
-
75
-
76
-
77
-
78
-
79
-
80
-
81
-
82
-
83
-
84
-
85
-
86
-
87
-
88
-
89
-
90
-
91
-
92
-
93
-
94
-
95
-
96
-
97
-
98
-
99
-
100
-
101
-
102
-
103
-
104
-
105
-
106
-
107
-
108
-
109
-
110
-
111
-
112
-
113
-
114
-
115
-
116
-
117
-
118
-
119
-
120
-
121
-
122
-
123
-
124
-
125
-
126
-
127
-
128
-
129
-
130
-
131
-
132
-
133
-
134
-
135
-
136
-
137
-
138
-
139
-
140
-
141
-
142
-
143
-
144
-
145
-
146
-
147
-
148
 |
 |
2-9
ASUS RS100-E5-PI2
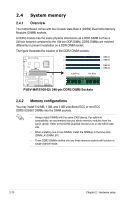
2.
Tighten the screws.
3.
Peel the adhesive cover of the
heatsink plastic cover and evenly
attach to heatsink.
Heatsink plastic cover
The heatsink plastic cover ensures
the linear airflow between the
heatsink and chassis fans.