Biostar IDEQ 200A iDEQ 200A user's manual - Page 55
Completing, Installation
 |
View all Biostar IDEQ 200A manuals
Add to My Manuals
Save this manual to your list of manuals |
Page 55 highlights
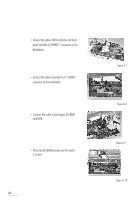
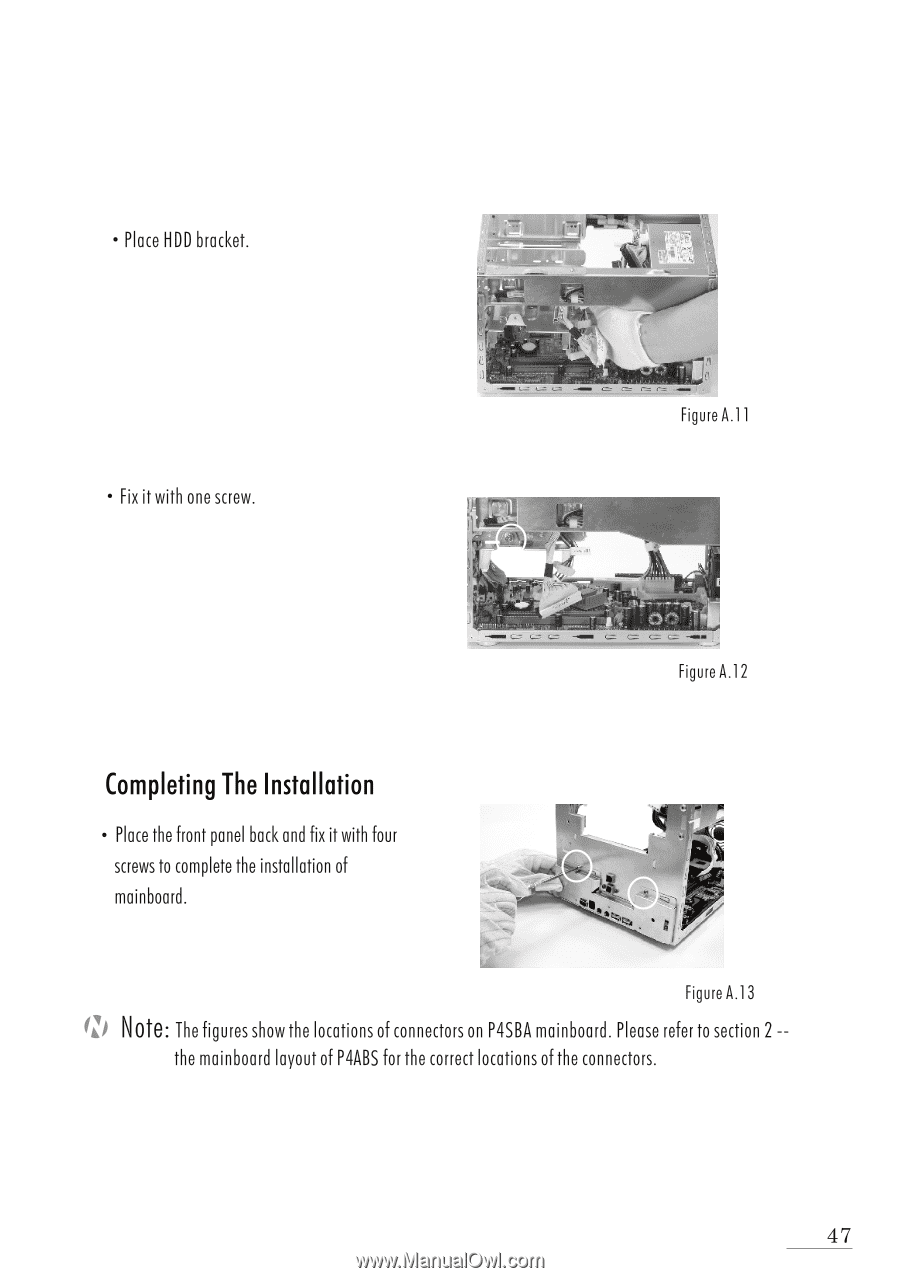
• Place HDD bracket. • Fix it with one screw. Figure A.11 - Figure A.12 Completing The Installation • Place the front panel back and fix it with four screws to complete the installation of mainboard. Figure A.13 Note: The figures show the locations of connectors on P4SBA mainboard. Please refer to section 2 -- the mainboard layout of P4ABS for the correct locations of the connectors. 47
-
 1
1 -
2
-
3
-
4
-
5
-
6
-
7
-
8
-
9
-
10
-
11
-
12
-
13
-
14
-
15
-
16
-
17
-
18
-
19
-
20
-
21
-
22
-
23
-
24
-
25
-
26
-
27
-
28
-
29
-
30
-
31
-
32
-
33
-
34
-
35
-
36
-
37
-
38
-
39
-
40
-
41
-
42
-
43
-
44
-
45
-
46
-
47
-
48
-
49
-
 50
50 -
 51
51 -
 52
52 -
 53
53 -
 54
54 -
 55
55 -
 56
56
 |
 |
•
Place
HDD
bracket.
•
Fix
it
with
one
screw.
Completing
The
Installation
•
Place
the
front
panel
back
and
fix
it
with
four
screws
to
complete
the
installation
of
mainboard.
Figure
A.11
-
Figure
A.12
Figure
A.13
Note:
The
figures
show
the
locations
of
connectors
on
P4SBA
mainboard.
Please
refer
to
section
2
--
the
mainboard
layout
of
P4ABS
for
the
correct
locations
of
the
connectors.
47