Bosch WTVC5330US Installation Instructions - Page 4
Customer, Service - dryer
 |
UPC - 825225874416
View all Bosch WTVC5330US manuals
Add to My Manuals
Save this manual to your list of manuals |
Page 4 highlights
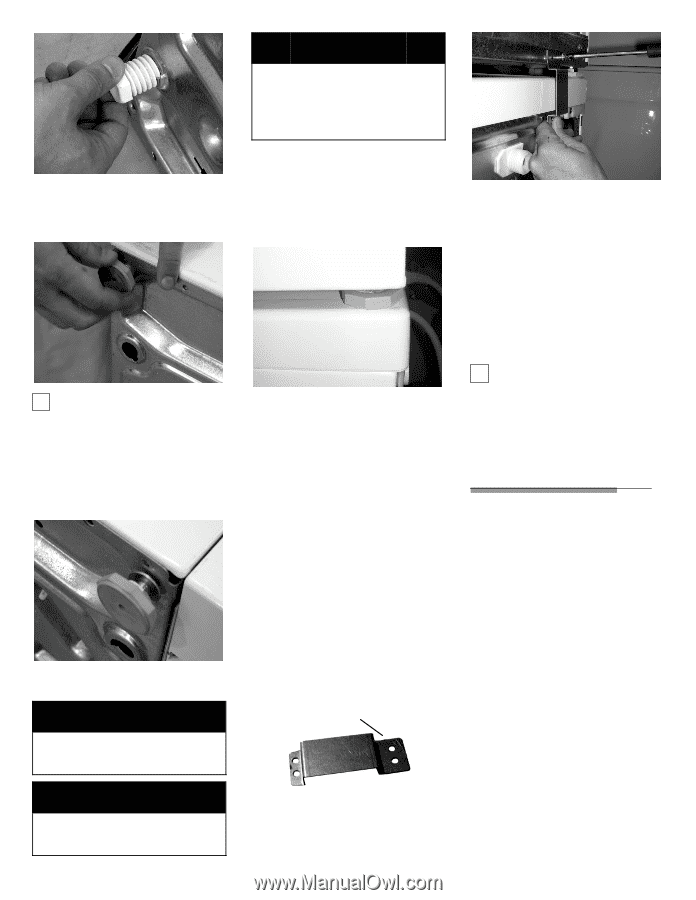
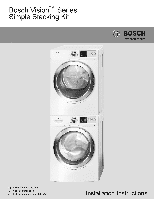
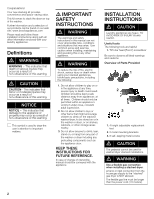
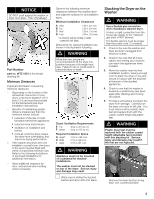
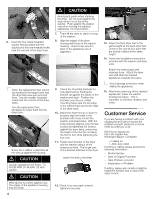
6. Insert the four metal threaded washer feet (provided with the stacking kit) into the threaded holes near the corners of the dryer base. i Note: the replacement feet cannot be installed in the larger holes that the dryer feet were just removed from. Use the smaller, threaded holes near the corners of the dryer base. Turn the replacement feet clockwise to screw them into the dryer base. Screw the 4 rubber coated feet all the way up against the housing. d CAUTION Laundry appliances are heavy. TO AVOID RISK OF INJURY Lift with caution. d CAUTION Wear gloves to protect against cuts. The edges of the appliance housing may be sharp. 4 d CAUTION Avoid pinch points when stacking the dryer. Do not push against the dryer when it is on top of the washer. Push against the washer only when moving the stacked appliances into final position. 7. Team lift the dryer to stack it on top of the washer. 8. Align the edges of the dryer housing with those of the washer housing. Check to be sure the back of the appliances are in alignment. 9. Check the mounting brackets for hole alignment by holding the bracket up against the backs of the washer and dryer. Position the brackets over the pre-drilled mounting holes near the top edge of the washer back and lower edge of the dryer back. 10.. Adjust the dryer feet up or down to properly align the holes in the brackets with those in both the washer and dryer backs. With the holes properly aligned, lock the feet in place by tightening the locknut against the dryer base, preserving the height of the foot (do not allow the foot to turn while tightening the lock nut). 11. Fasten each bracket to the dryer and the washer using 4 of the screws provided. The longer part of the bracket attaches to the dryer. attach this end to the dryer 12. Check to be sure each screw is tightened securely. 13. Adjust the front dryer feet to the same height as the back dryer feet. Check to be sure all four dryer feet are locked in place at the same height. 14. Follow the installation instructions provided with the washer and dryer units. Attach the water supply and drainage hose. Attach the dryer vent and slide the stacked appliances carefully into place. i Avoid damage to the floor when sliding the appliances. 15. After final positioning of the stacked appliances, follow the washer leveling procedure. This is important to minimize vibration and noise. Customer Service If you are having a problem with your stacking kit and cannot resolve the problem yourself, please let us know either by writing to us at: BSH Home Appliances 5551 Mc Fadden Ave. Huntington Beach, CA 92649 or calling us: 1-800-944-2904 If writing or calling, please provide the following information: - Model Number - Date of Original Purchase - Date Problem occurred - Explanation of Problem If writing, please also include a daytime telephone number and a copy of the sales invoice.
-
 1
1 -
 2
2 -
 3
3 -
 4
4 -
 5
5 -
 6
6 -
 7
7 -
 8
8 -
 9
9 -
 10
10 -
11
-
12
 |
 |