Bose Lifestyle 38 Series IV Installation guide - Page 13
Connecting Jewel Cube, speakers, Connecting array speakers, Connect the speaker cables to the speakers - white
 |
View all Bose Lifestyle 38 Series IV manuals
Add to My Manuals
Save this manual to your list of manuals |
Page 13 highlights
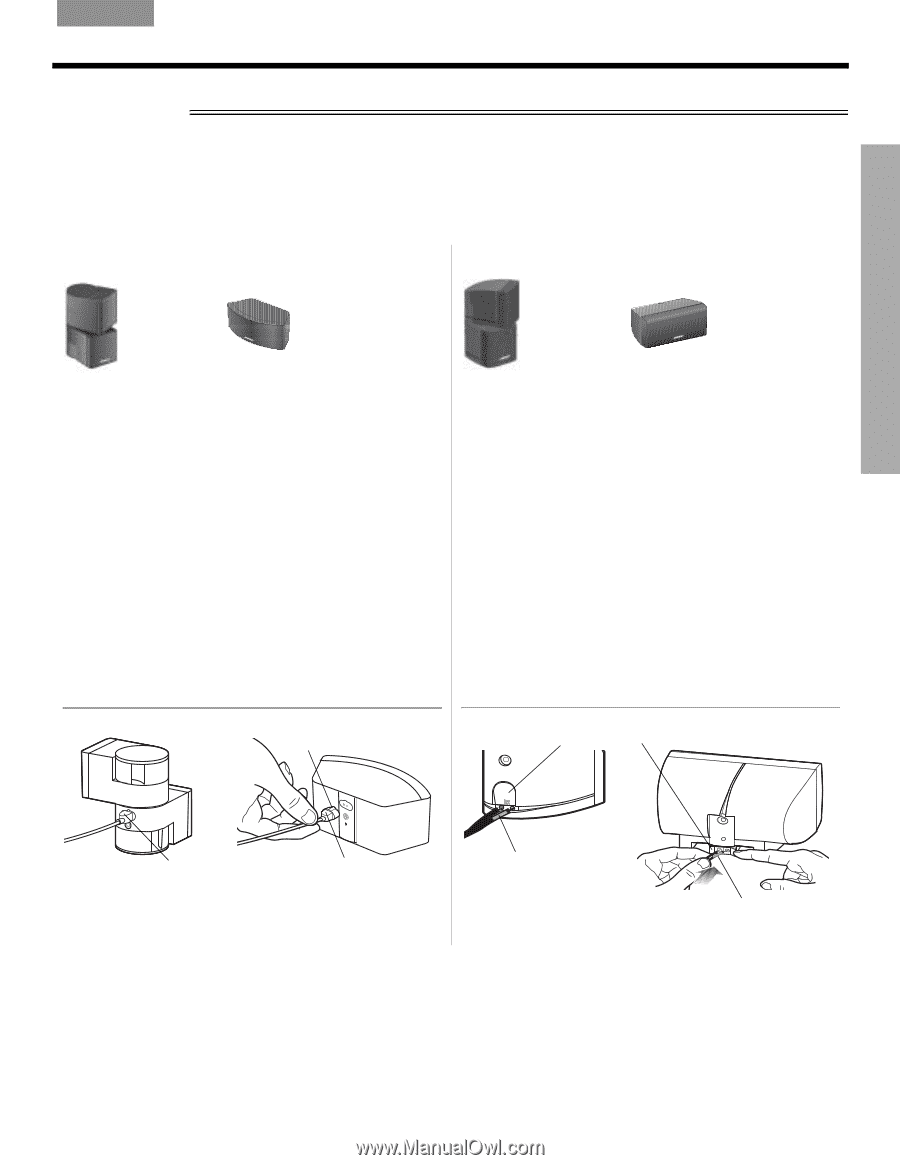
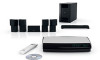
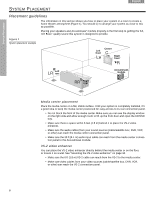
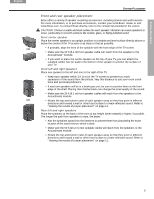
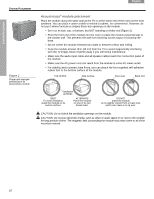
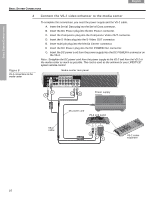
BASIC SYSTEM CONNECTIONS English DEsepuatsñcohl FItralniaçnaois Nederlands Svenska BASIC SYSTEM CONNECTIONS 1 Connect the speaker cables to the speakers The speakers you have are one of the two types shown here. They differ in how the cables connect to them. Before you start, route the cables around your room. To make the rear speaker cables reach each of the rear speakers, you can unzip the cables by simply pulling them apart. Follow the instructions for the type of speakers you have. Connecting Jewel Cube® speakers Connecting array speakers Front and rear left, right speakers Front center speaker Front and rear left, right speakers Front center speaker The cables for these speakers have a customized plug that fits into the connector only one way (Figure 4). The cables for these speakers have wire ends that connect to red and white connection terminals (Figure 5). A. Notice the marking on each cable plug and match it to the speaker in that location: • Front speaker cable plugs are marked L (left), R (right), and C (center). • Rear speaker cable plugs are marked LR (left rear) and RR (right rear). A. Notice the marking on the red collar on the speaker cable and match it to the speaker in that location: • Front speaker cables are marked L (left), R (right), and C (center). • Rear speaker cables are marked LR (left rear) and RR (right rear). B. Orient the plug with its small knob up, so the plug slips easily into a notch on top of the connector (Figure 4). C. Insert the plug fully into the connector on the rear of its respective speaker. For example, the plug marked L connects to the speaker at the left front of your room. B. Press the terminal tab to insert each wire into the proper connector. Be sure to match the red-collared wire to the red speaker connection terminal to maintain proper + and - polarity. Figure 4 Jewel Cube speaker connections Knob Figure 5 Array speaker connections Terminal tab Plug label: R, L, RR, or LR Plug label: C Wire label: L, R, LR, or RR Wire label: C 13
-
 1
1 -
2
-
3
-
4
-
5
-
6
-
7
-
 8
8 -
 9
9 -
 10
10 -
 11
11 -
 12
12 -
 13
13 -
 14
14 -
 15
15 -
 16
16 -
 17
17 -
 18
18 -
19
-
20
-
21
-
22
-
23
-
24
-
25
-
26
-
27
-
28
-
29
-
30
-
31
-
32
-
33
-
34
-
35
-
36
-
37
-
38
-
39
-
40
-
41
-
42
-
43
-
44
-
45
-
46
-
47
-
48
-
49
-
50
-
51
-
52
-
53
-
54
-
55
-
56
-
57
-
58
-
59
-
60
-
61
-
62
-
63
-
64
-
65
-
66
-
67
-
68
-
69
-
70
-
71
-
72
-
73
-
74
-
75
-
76
-
77
-
78
-
79
-
80
-
81
-
82
-
83
-
84
-
85
-
86
-
87
-
88
-
89
-
90
-
91
-
92
-
93
-
94
-
95
-
96
-
97
-
98
-
99
-
100
-
101
-
102
-
103
-
104
-
105
-
106
-
107
-
108
-
109
-
110
-
111
-
112
-
113
 |
 |