Bose Lifestyle 38 Series IV Installation guide - Page 3

Contents, Ntroduction, Ystem, Lacement, Onnections, Peration - speakers

Page 3 highlights

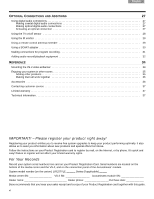
English DEsepuatsñcohl FItralniaçnaois Nederlands Svenska CONTENTS INTRODUCTION 5 SYSTEM PLACEMENT 8 BASIC SYSTEM CONNECTIONS 12 FIRST TIME OPERATION 23 OPTIONAL CONNECTIONS AND ADDITIONS 27 REFERENCE 34 INTRODUCTION 5 Welcome 5 Purpose of this guide 5 Additional setup help 5 Unpacking the carton 6 SYSTEM PLACEMENT 8 Placement guidelines 8 Media center placement 8 VS-2 video enhancer 8 Front and rear speaker placement 9 Acoustimass® module placement 10 Hearing the results of proper placement 11 BASIC SYSTEM CONNECTIONS 12 1 Connect the speaker cables to the speakers 13 2 Connect the speaker cables to the module 14 3 Connect the media center to the module 15 4 Connect the VS-2 video enhancer to the media center 16 5 Connect your TV to the VS-2 17 6 Connect video source outputs to VS-2 video inputs 18 7 Connect audio source outputs to media center audio inputs 19 8 Connect AM and FM antennas to the media center 20 9 Connect the system to power 21 10 Install the remote control batteries 22 FIRST-TIME OPERATION 23 1 Prepare your TV 24 2 Open the ADAPTiQ® audio calibration system carton 24 3 Play Disc 1 25 4 Play Disc 2 - ADAPTiQ® audio calibration system 25 5 Disconnect the ADAPTiQ® headset 26 3

  • 1
  • 2
  • 3
  • 4
  • 5
  • 6
  • 7
  • 8
  • 9
  • 10
  • 11
  • 12
  • 13
  • 14
  • 15
  • 16
  • 17
  • 18
  • 19
  • 20
  • 21
  • 22
  • 23
  • 24
  • 25
  • 26
  • 27
  • 28
  • 29
  • 30
  • 31
  • 32
  • 33
  • 34
  • 35
  • 36
  • 37
  • 38
  • 39
  • 40
  • 41
  • 42
  • 43
  • 44
  • 45
  • 46
  • 47
  • 48
  • 49
  • 50
  • 51
  • 52
  • 53
  • 54
  • 55
  • 56
  • 57
  • 58
  • 59
  • 60
  • 61
  • 62
  • 63
  • 64
  • 65
  • 66
  • 67
  • 68
  • 69
  • 70
  • 71
  • 72
  • 73
  • 74
  • 75
  • 76
  • 77
  • 78
  • 79
  • 80
  • 81
  • 82
  • 83
  • 84
  • 85
  • 86
  • 87
  • 88
  • 89
  • 90
  • 91
  • 92
  • 93
  • 94
  • 95
  • 96
  • 97
  • 98
  • 99
  • 100
  • 101
  • 102
  • 103
  • 104
  • 105
  • 106
  • 107
  • 108
  • 109
  • 110
  • 111
  • 112
  • 113

3
C
ONTENTS
Italiano
Svenska
Deutsch
Nederlands
English
Français
Español
I
NTRODUCTION
5
Welcome
. . . . . . . . . . . . . . . . . . . . . . . . . . . . . . . . . . . . . . . . . . . . . . . . . . . . . . . . . . . . . . . . . . . . . . . . . . . . . . . . . . .
5
Purpose of this guide . . . . . . . . . . . . . . . . . . . . . . . . . . . . . . . . . . . . . . . . . . . . . . . . . . . . . . . . . . . . . . . . . . . . . . . . . .
5
Additional setup help . . . . . . . . . . . . . . . . . . . . . . . . . . . . . . . . . . . . . . . . . . . . . . . . . . . . . . . . . . . . . . . . . . . . . . . . . .
5
Unpacking the carton . . . . . . . . . . . . . . . . . . . . . . . . . . . . . . . . . . . . . . . . . . . . . . . . . . . . . . . . . . . . . . . . . . . . . . . . . .
6
S
YSTEM
P
LACEMENT
8
Placement guidelines . . . . . . . . . . . . . . . . . . . . . . . . . . . . . . . . . . . . . . . . . . . . . . . . . . . . . . . . . . . . . . . . . . . . . . . . . .
8
Media center placement
. . . . . . . . . . . . . . . . . . . . . . . . . . . . . . . . . . . . . . . . . . . . . . . . . . . . . . . . . . . . . . . . . . . .
8
VS-2 video enhancer . . . . . . . . . . . . . . . . . . . . . . . . . . . . . . . . . . . . . . . . . . . . . . . . . . . . . . . . . . . . . . . . . . . . . . .
8
Front and rear speaker placement
. . . . . . . . . . . . . . . . . . . . . . . . . . . . . . . . . . . . . . . . . . . . . . . . . . . . . . . . . . . .
9
Acoustimass
®
module placement
. . . . . . . . . . . . . . . . . . . . . . . . . . . . . . . . . . . . . . . . . . . . . . . . . . . . . . . . . . . . .
10
Hearing the results of proper placement . . . . . . . . . . . . . . . . . . . . . . . . . . . . . . . . . . . . . . . . . . . . . . . . . . . . . . . . . . .
11
B
ASIC
S
YSTEM
C
ONNECTIONS
12
1
Connect the speaker cables to the speakers
. . . . . . . . . . . . . . . . . . . . . . . . . . . . . . . . . . . . . . . . . . . . . . . . . . . .
13
2
Connect the speaker cables to the module . . . . . . . . . . . . . . . . . . . . . . . . . . . . . . . . . . . . . . . . . . . . . . . . . . . . . .
14
3
Connect the media center to the module
. . . . . . . . . . . . . . . . . . . . . . . . . . . . . . . . . . . . . . . . . . . . . . . . . . . . . . .
15
4
Connect the VS-2 video enhancer to the media center
. . . . . . . . . . . . . . . . . . . . . . . . . . . . . . . . . . . . . . . . . . . .
16
5
Connect your TV to the VS-2 . . . . . . . . . . . . . . . . . . . . . . . . . . . . . . . . . . . . . . . . . . . . . . . . . . . . . . . . . . . . . . . . .
17
6
Connect video source outputs to VS-2 video inputs . . . . . . . . . . . . . . . . . . . . . . . . . . . . . . . . . . . . . . . . . . . . . . .
18
7
Connect audio source outputs to media center audio inputs . . . . . . . . . . . . . . . . . . . . . . . . . . . . . . . . . . . . . . . .
19
8
Connect AM and FM antennas to the media center . . . . . . . . . . . . . . . . . . . . . . . . . . . . . . . . . . . . . . . . . . . . . . .
20
9
Connect the system to power . . . . . . . . . . . . . . . . . . . . . . . . . . . . . . . . . . . . . . . . . . . . . . . . . . . . . . . . . . . . . . . .
21
10
Install the remote control batteries
. . . . . . . . . . . . . . . . . . . . . . . . . . . . . . . . . . . . . . . . . . . . . . . . . . . . . . . . . . . .
22
F
IRST
-T
IME
O
PERATION
23
1
Prepare your TV . . . . . . . . . . . . . . . . . . . . . . . . . . . . . . . . . . . . . . . . . . . . . . . . . . . . . . . . . . . . . . . . . . . . . . . . . . .
24
2
Open the ADAPTiQ
®
audio calibration system carton . . . . . . . . . . . . . . . . . . . . . . . . . . . . . . . . . . . . . . . . . . . . . .
24
3
Play Disc 1 . . . . . . . . . . . . . . . . . . . . . . . . . . . . . . . . . . . . . . . . . . . . . . . . . . . . . . . . . . . . . . . . . . . . . . . . . . . . . . .
25
4
Play Disc 2 – ADAPTiQ
®
audio calibration system
. . . . . . . . . . . . . . . . . . . . . . . . . . . . . . . . . . . . . . . . . . . . . . . .
25
5
Disconnect the ADAPTiQ
®
headset.
. . . . . . . . . . . . . . . . . . . . . . . . . . . . . . . . . . . . . . . . . . . . . . . . . . . . . . . . . . .
26
5
8
12
23
27
34
I
NTRODUCTION
S
YSTEM
P
LACEMENT
B
ASIC
S
YSTEM
C
ONNECTIONS
F
IRST
T
IME
O
PERATION
O
PTIONAL
C
ONNECTIONS
AND
A
DDITIONS
R
EFERENCE