Brother International CP60X Sewing Guide - Page 18
Overcasting Stitches, Using overcasting foot “G”
 |
View all Brother International CP60X manuals
Add to My Manuals
Save this manual to your list of manuals |
Page 18 highlights
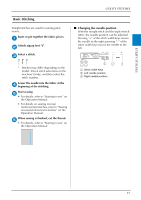
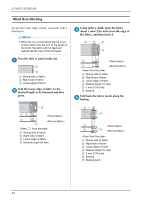
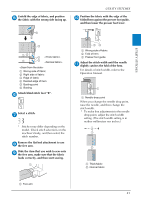
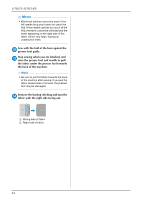
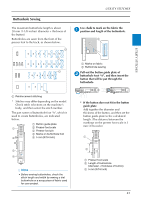
UTILITY STITCHES Overcasting Stitches Sew overcasting stitches along the edges of cut fabric to prevent them from fraying. ■ Using overcasting foot "G" Attach overcasting foot "G". a G Select a stitch. b * Stitches may differ depending on the model. Check stitch selections on the machine's body, and then select the stitch number. CAUTION • When using overcasting foot "G", be sure to select a stitch that can be used with overcasting foot "G". If you sew with the incorrect stitch, the needle may hit the presser foot, bending the needle or damaging the presser foot. Position the fabric with the edge of the c fabric against the presser foot guide, and then lower the presser foot lever. Rotate the handwheel toward you d (counterclockwise). Check that the needle does not touch the presser foot. 1 The needle should not touch the presser foot center bar. Sew with the edge of the fabric against e the presser foot guide. 1 1 Needle drop point CAUTION • Be sure to pull the fabric backward after finished sewing. If you pull the fabric toward side or forward, the presser foot pin may be damaged. • If thread is tangled on the presser foot, remove the entangled thread, and then raise the presser foot lever to remove the presser foot. If the presser foot is raised while entangled with thread, the presser foot may be damaged. Stop sewing when you are finished, and f raise the presser foot and needle to pull the fabric under the presser foot towards the back of the machine. a 1 Presser foot guide 18
-
 1
1 -
2
-
3
-
4
-
5
-
6
-
7
-
8
-
9
-
10
-
11
-
12
-
 13
13 -
 14
14 -
 15
15 -
 16
16 -
 17
17 -
 18
18 -
 19
19 -
 20
20 -
 21
21 -
 22
22 -
 23
23 -
24
-
25
-
26
-
27
-
28
-
29
-
30
-
31
-
32
-
33
-
34
-
35
-
36
-
37
-
38
-
39
-
40
-
41
-
42
-
43
-
44
-
45
-
46
-
47
-
48
 |
 |
