Brother International Innov-is 500D Users Manual - English - Page 141
slot. If the embroidery unit is attached
 |
View all Brother International Innov-is 500D manuals
Add to My Manuals
Save this manual to your list of manuals |
Page 141 highlights
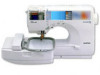
SE-BrotherE_sgml.book Page 135 Monday, June 30, 2003 3:44 PM Open the cover of the embroidery unit conc nector slot, which is on the left side of the sew- ing machine arm. Pull the cover open toward you and then push it all the way back into the slot. 1 Slide the embroidery unit onto the sewing e machine arm. Push it in until it clicks and stops. 1 2 2 a Embroidery unit connector slot b Cover X The embroidery unit is attached. Turn on the sewing machine. f 4 X A message will be displayed on the LCD. Be sure that no objects or hands are near the g embroidery unit and touch on the LCD. CAUTION ● Push the cover all the way back into the slot. If the embroidery unit is attached without the cover being pushed all the way in, it could be the cause of malfunctions. Remove the embroidery unit cover. d Open the tabs on the side of the cover and lift it up to remove it. • When an animation is displayed on the LCD, the message above will be displayed if you touch the LCD with your finger. X The embroidery unit carriage moves to its initial position. 1 a Carriage Attaching the embroidery unit 135
-
 1
1 -
2
-
3
-
4
-
5
-
6
-
7
-
8
-
9
-
10
-
11
-
12
-
13
-
14
-
15
-
16
-
17
-
18
-
19
-
20
-
21
-
22
-
23
-
24
-
25
-
26
-
27
-
28
-
29
-
30
-
31
-
32
-
33
-
34
-
35
-
36
-
37
-
38
-
39
-
40
-
41
-
42
-
43
-
44
-
45
-
46
-
47
-
48
-
49
-
50
-
51
-
52
-
53
-
54
-
55
-
56
-
57
-
58
-
59
-
60
-
61
-
62
-
63
-
64
-
65
-
66
-
67
-
68
-
69
-
70
-
71
-
72
-
73
-
74
-
75
-
76
-
77
-
78
-
79
-
80
-
81
-
82
-
83
-
84
-
85
-
86
-
87
-
88
-
89
-
90
-
91
-
92
-
93
-
94
-
95
-
96
-
97
-
98
-
99
-
100
-
101
-
102
-
103
-
104
-
105
-
106
-
107
-
108
-
109
-
110
-
111
-
112
-
113
-
114
-
115
-
116
-
117
-
118
-
119
-
120
-
121
-
122
-
123
-
124
-
125
-
126
-
127
-
128
-
129
-
130
-
131
-
132
-
133
-
134
-
135
-
 136
136 -
 137
137 -
 138
138 -
 139
139 -
 140
140 -
 141
141 -
 142
142 -
 143
143 -
 144
144 -
 145
145 -
 146
146 -
147
-
148
-
149
-
150
-
151
-
152
-
153
-
154
-
155
-
156
-
157
-
158
-
159
-
160
-
161
-
162
-
163
-
164
-
165
-
166
-
167
-
168
-
169
-
170
-
171
-
172
-
173
-
174
-
175
-
176
-
177
-
178
-
179
-
180
-
181
-
182
-
183
 |
 |
