Canon FAXPHONE L75 Software User's Guide for FAXPHONE L75
Canon FAXPHONE L75 Manual
 |
View all Canon FAXPHONE L75 manuals
Add to My Manuals
Save this manual to your list of manuals |
Canon FAXPHONE L75 manual content summary:
- Canon FAXPHONE L75 | Software User's Guide for FAXPHONE L75 - Page 1
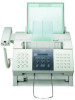
Canon FAXPHONE L75 Canon FAXPHONE L75 Printer Driver for Windows Software User's Guide - Canon FAXPHONE L75 | Software User's Guide for FAXPHONE L75 - Page 2
, Inc. All rights reserved. This manual may not be reproduced in any form, in whole or part, without the prior written consent of Canon, Inc. Trademark Acknowledgments Canon is a registered trademark of Canon, Inc. Microsoft and Windows are registered trademarks of Microsoft Corporation. Pentium - Canon FAXPHONE L75 | Software User's Guide for FAXPHONE L75 - Page 3
Guide 1-4 Other User Assistance 1-5 Chapter 2 Installing the Printer Driver 2-1 Before You Begin the Installation: a Checklist 2-2 Installing the Software 2-3 Setting the Default Printer 2-6 Sharing the Printer Installation 2-6 Setting Up Your Printer for Sharing 2-7 Installing the Printer - Canon FAXPHONE L75 | Software User's Guide for FAXPHONE L75 - Page 4
Not Printing Correctly 4-4 Paper Is Not Loading Correctly 4-6 The Print Quality Is Not Satisfactory 4-6 Appendix A Sharing Your Printer Cross-Platform in Windows 2000/XP A-1 Appendix B Installing from a Local or Network Drive B-1 Installing the Software B-1 Glossary ...G-1 Index ...I-1 iv - Canon FAXPHONE L75 | Software User's Guide for FAXPHONE L75 - Page 5
of the Canon FAXPHONE L75 (also referred to in this guide as the printer) and its accompanying printer driver software. Contents of this chapter: ❏ Printer Driver: an Overview 1-2 ❏ System Requirements 1-2 ❏ About This Guide 1-4 • Conventions Used in This Guide 1-4 ❏ Other User Assistance - Canon FAXPHONE L75 | Software User's Guide for FAXPHONE L75 - Page 6
of paper ❏ User-defined print profiles for storing and using print preferences. System Requirements 1 To successfully install and operate your printer and printer driver, your system must meet the following minimum requirements: ❏ Windows Operating System Microsoft Windows 98, Windows Me, Windows - Canon FAXPHONE L75 | Software User's Guide for FAXPHONE L75 - Page 7
is ensured when using a system installed with Windows 98/Me or Windows 2000/XP by the computer manufacturer. For assistance in resolving the support of a USB port on your system, contact the technical support department with your PC manufacturer, for a possible change of setting or an upgrade to - Canon FAXPHONE L75 | Software User's Guide for FAXPHONE L75 - Page 8
.... -or...the Microsoft Windows User's Guide.... Text in quotation marks Used to refer to the title of a section within the guide. For example: ...the "Installing the Software" section.... Click, double-click Use of the word click or double-click provides instructions for selecting or choosing - Canon FAXPHONE L75 | Software User's Guide for FAXPHONE L75 - Page 9
about a window or dialog box and step-by-step instructions for performing tasks. ❏ Canon FAXPHONE L75 User's Guide This guide offers detailed information on how to set up and operate your printer. It includes initial setup procedures, daily maintenance, and troubleshooting. Chapter 1 Introduction - Canon FAXPHONE L75 | Software User's Guide for FAXPHONE L75 - Page 10
1-6 Introduction Chapter 1 - Canon FAXPHONE L75 | Software User's Guide for FAXPHONE L75 - Page 11
Begin the Installation: a Checklist 2-2 ❏ Installing the Software 2-3 ❏ Setting the Default Printer 2-6 ❏ Sharing the Printer Installation 2-6 • Setting Up Your Printer for Sharing 2-7 • Installing the Printer Driver on a Client System 2-8 ❏ Removing the Printer Driver 2-9 ❏ Changing the Port - Canon FAXPHONE L75 | Software User's Guide for FAXPHONE L75 - Page 12
ensure that the software installs properly. To install the printer driver if you are using Windows 2000/XP, you must log on as Administrator or have Administrator privileges. If you do not have Administrator privileges, ask your system administrator to install the printer driver software on your PC - Canon FAXPHONE L75 | Software User's Guide for FAXPHONE L75 - Page 13
Installing the Printer Driver If your current printer purchase is replacing a MultiPASS printer, you must remove the MultiPASS software installed on your system before installing the new printer. For instructions on removing the MultiPASS software, see the software user's guide that came with your - Canon FAXPHONE L75 | Software User's Guide for FAXPHONE L75 - Page 14
. • Make sure you click Next or OK on the current dialog box. • Be sure to wait for Windows to complete each setup step. If you hear the computer working, wait until it is done. 5. When prompted, connect your printer cable to the port on your computer. 2-4 Installing the Printer Driver Chapter 2 - Canon FAXPHONE L75 | Software User's Guide for FAXPHONE L75 - Page 15
6. The system displays messages indicating that the driver for your printer is being installed. For Windows 98/Me: Wait for the system to complete the installation of the printer driver. For Windows 2000/XP: See Step 7. 7. For Windows 2000/XP: When the Found New Hardware Wizard appears during - Canon FAXPHONE L75 | Software User's Guide for FAXPHONE L75 - Page 16
system. Setting the Default Printer 2 When you install the printer driver software, the system automatically sets the printer as the default printer. If necessary, however, follow these instructions to set the default printer. To set the default printer: 1. On the Windows desktop, click Start - Canon FAXPHONE L75 | Software User's Guide for FAXPHONE L75 - Page 17
Windows 98/Me or Windows 2000/XP When a document is printed by the client system on a shared printer, any printing messages (status or error messages) display on the server system. Setting Up Your Printer for Sharing 2 Before the client systems can be installed with the printer driver software - Canon FAXPHONE L75 | Software User's Guide for FAXPHONE L75 - Page 18
Windows XP, in the Printers and Faxes window, click Add a printer). 3. Follow the on-screen instructions. Install the printer driver as a network printer, based on the name assigned to the shared printer. You cannot install the printer driver on a client system that has MultiPASS software installed - Canon FAXPHONE L75 | Software User's Guide for FAXPHONE L75 - Page 19
Properties dialog box (in Windows XP, the Add or Remove Programs dialog box), click Canon FAXPHONE L75, and then click the Add/Remove button (Windows 98/Me) or the Change/Remove button (Windows 2000/XP). 4. Follow the on-screen instructions. 5. After the printer driver has been removed, restart - Canon FAXPHONE L75 | Software User's Guide for FAXPHONE L75 - Page 20
2-10 Installing the Printer Driver Chapter 2 - Canon FAXPHONE L75 | Software User's Guide for FAXPHONE L75 - Page 21
3-18 ❏ Editing a Print Profile 3-19 • Changing Information About a Print Profile 3-20 • Adjusting the Display Order 3-20 • Exporting a Print Profile 3-21 • Importing a Print Profile 3-22 • Deleting a Print Profile 3-23 ❏ Displaying Printer Driver Information 3-23 ❏ Defining Default Print - Canon FAXPHONE L75 | Software User's Guide for FAXPHONE L75 - Page 22
that supports printing, such as Word for Windows. Predefined printer settings are initially installed, enabling you to print immediately. These settings determine what your documents look like when printed. For example, they define such settings as the paper size and page orientation. Instructions - Canon FAXPHONE L75 | Software User's Guide for FAXPHONE L75 - Page 23
can save the settings as a print profile and reuse the profile as needed. The following instructions summarize the general procedures for changing printer settings, based on your version of Windows. For detailed information on specific print settings, see the sections that immediately follow these - Canon FAXPHONE L75 | Software User's Guide for FAXPHONE L75 - Page 24
any changes, click Cancel. To define print settings (Windows 2000/XP): 1. On the Windows desktop, click Start, point to Settings, and then click Printers (in Windows XP, click Start, and then click Printers and Faxes). 2. In the Printers window (in Windows XP, the Printers and Faxes window), right - Canon FAXPHONE L75 | Software User's Guide for FAXPHONE L75 - Page 25
settings, click Restore Defaults. To close the dialog box without accepting any changes or printing the document, click Cancel. Viewing a Summary of Print tabs, you can view a summary of the current settings at any time. To view a summary of print settings: On Page Setup or Quality tab, click - Canon FAXPHONE L75 | Software User's Guide for FAXPHONE L75 - Page 26
(Windows 2000/XP). ❏ Page Size Click the size of the page you want to use for your printed document. Usually, the page size specified here is the page size you specified when you created your document in the Windows application. If you want to define a custom size, see the "Defining a Custom Paper - Canon FAXPHONE L75 | Software User's Guide for FAXPHONE L75 - Page 27
on whether you are using Windows 98/Me or Windows 2000/XP. Defining a Custom Paper Size (Windows 98/Me) Follow these instructions to define a custom paper size if you are using Windows 98/Me. To define a custom paper size: 1. On the Page Setup tab, click Custom Paper Size. Chapter 3 Printing 3-7 - Canon FAXPHONE L75 | Software User's Guide for FAXPHONE L75 - Page 28
To cancel the changed settings, click Cancel. Your custom-sized paper is now available in the Page Size and Output Size boxes on the Page Setup tab. Defining a Custom Paper Size (Windows 2000/XP) Follow these instructions to define a custom paper size if you are using Windows 2000/XP. 3-8 Printing - Canon FAXPHONE L75 | Software User's Guide for FAXPHONE L75 - Page 29
.56 cm). The height must be greater than the width. When setting the printer area margins: The margins must be set as follows (if you set the custom greater than 8.35 inches (21.20 cm), you must calculate the left and right printer area margins as follows: [width] minus 8.19 inches (20.80 cm) divided - Canon FAXPHONE L75 | Software User's Guide for FAXPHONE L75 - Page 30
setting in your printer driver. To define a custom form on your system: 1. On the Windows desktop, click Start, point to Settings, and then click Printers (in Windows XP, click Start, and then click Printers and Faxes). 2. In the Printers window (in Windows XP, the Printers and Faxes window), on the - Canon FAXPHONE L75 | Software User's Guide for FAXPHONE L75 - Page 31
the dialog box. To assign the custom form in your printer driver: 1. In the Printers window (in Windows XP, Printers and Faxes window), right-click the printer icon. 2. On the displayed menu, click Properties. Printing 3. In the Printer Properties dialog box, click the Select Forms tab. 4. In the - Canon FAXPHONE L75 | Software User's Guide for FAXPHONE L75 - Page 32
6. In the Change Forms dialog box, in the Available Forms list, click the custom-sized form to want to assign. You can click the preferred unit of measure for reviewing the size of the selected form. 7. Click OK. 3-12 Printing Chapter 3 - Canon FAXPHONE L75 | Software User's Guide for FAXPHONE L75 - Page 33
The custom-sized form becomes available in your printer driver and can be selected in the Page Size a graphic illustration provides a preview of the overlay image. The overlay image file must be available in Windows bitmap (.bmp) or metafile (.wmf) format. To define a print overlay: 1. On the Page - Canon FAXPHONE L75 | Software User's Guide for FAXPHONE L75 - Page 34
name for the image that you want to use, and then click OK (in Windows XP, click Open). 3. Under Overlay Placement, click whether you want the image in desired position of your background image, from the left and top edges of the paper. 6. In the Size boxes, type or click the height and width of the - Canon FAXPHONE L75 | Software User's Guide for FAXPHONE L75 - Page 35
your overlay settings, click OK. To return the position and size settings to their original values, click Restore Defaults. To cancel your changed settings, click Cancel. Defining Quality Print Settings 3 Quality print settings determine the following print results, as defined on the Quality tab - Canon FAXPHONE L75 | Software User's Guide for FAXPHONE L75 - Page 36
of your image. The lower the contrast, the smaller the difference between the darker and lighter parts of the image. Conserving Toner When Printing 3 You can conserve the amount of toner that is used when printing a document. For example, if you are printing a draft copy of a report, you may - Canon FAXPHONE L75 | Software User's Guide for FAXPHONE L75 - Page 37
Printing 2. In the More Options dialog box, click Toner Saver. 3. To save your setting, click OK. To return the setting to its default value, click Restore Defaults. To cancel your changed setting, click Cancel. Adding a Print Profile 3 After you define the settings on the Page Setup and Quality - Canon FAXPHONE L75 | Software User's Guide for FAXPHONE L75 - Page 38
2. In the Add Profile dialog box, enter a name for the new print profile in the Name box. 3. In the Icon box, click an icon to associate your new print profile. 4. In the Comment box, type an internal description of the print profile. 5. To review the print settings that will be saved as a print - Canon FAXPHONE L75 | Software User's Guide for FAXPHONE L75 - Page 39
profiles, you can edit a print profile to accomplish one of the following: ❏ Change information about a print profile (name, icon, or comments) ❏ Adjust the display or Quality tab, click Edit. Printing For further instructions, see the corresponding sections that follow. Chapter 3 Printing 3-19 - Canon FAXPHONE L75 | Software User's Guide for FAXPHONE L75 - Page 40
a print profile: 1. In the Edit Profile dialog box, in the Profile List box, click the print profile that you want to edit. 2. Enter your changes for the name, icon, and comments. 3. To save the profile, click OK. To cancel your settings, click Cancel. Adjusting the Display Order 3 The print - Canon FAXPHONE L75 | Software User's Guide for FAXPHONE L75 - Page 41
the Profile List box, click the custom print profile that you want to export, and then click Export. This is the Windows 98/Me dialog box screen. This is the Windows 2000/XP dialog box screen. 2. In the Save As dialog box, type or click the path and file name. 3. Click OK (in - Canon FAXPHONE L75 | Software User's Guide for FAXPHONE L75 - Page 42
the print profile again. To retrieve a print profile from a file: 1. In the Edit Profile dialog box, click Import. This is the Windows 98/Me dialog box screen. This is the Windows 2000/XP dialog box screen. 2. In the Open dialog box, type or click the path and file name for the print profile - Canon FAXPHONE L75 | Software User's Guide for FAXPHONE L75 - Page 43
, to change the default print settings. To set the default printer settings: 1. On the Windows desktop, click Start, point to Settings, and then click Printers (in Windows XP, click Start, and then click Printers and Faxes). 2. In the Printers window (in Windows XP, the Printers and Faxes window - Canon FAXPHONE L75 | Software User's Guide for FAXPHONE L75 - Page 44
4. In the Properties dialog box (Windows 98/Me), Printing Preferences dialog box (Windows 2000), Properties dialog box or Printing Preferences dialog box (Windows XP), on the Page Setup and Quality tabs, specify your changes and click OK. 3-24 Printing Chapter 3 - Canon FAXPHONE L75 | Software User's Guide for FAXPHONE L75 - Page 45
Chapter 4 4Frequently Asked Questions Contents of this chapter: ❏ Printer Cannot Be Initialized 4-2 ❏ Installation Is Displaying Unexpected Behavior 4-2 ❏ Documents Are Not Printing Correctly 4-4 ❏ Paper Is Not Loading Correctly 4-6 ❏ The Print Quality Is Not Satisfactory 4-6 Frequently Asked - Canon FAXPHONE L75 | Software User's Guide for FAXPHONE L75 - Page 46
port in the Printer Properties dialog box. Check both ends of the printer cable to be sure that it is securely fastened. Installation Is Displaying Unexpected Behavior. 4 ❏ For Windows 2000/XP: Are you not able to complete the installation of the printer driver? During the installation, you may - Canon FAXPHONE L75 | Software User's Guide for FAXPHONE L75 - Page 47
Device Manager, and restart the installation process. To resolve this situation: 1. Click No in the dialog box prompting you to connect your cable, and exit the setup. 2. Remove the device from the Windows Device Manager. The device may appear listed as Canon FAXPHONE L75 or Unknown Device. To - Canon FAXPHONE L75 | Software User's Guide for FAXPHONE L75 - Page 48
the port. 4. Start the installation process again. For instructions, see Chapter 2, "Installing the Printer Driver." Documents Are Not Printing Correctly. 4 ❏ Is the operation panel blank? You might have a power problem. Check that the power cord is plugged securely into the printer, and that your - Canon FAXPHONE L75 | Software User's Guide for FAXPHONE L75 - Page 49
Programs (in Windows XP, display All Programs) in the Start menu on the Windows desktop. If the Canon FAXPHONE L75 item does not appear, you need to complete the printer driver installation. To do so, insert the installation disk into your disk drive. Follow the on-screen instructions to complete - Canon FAXPHONE L75 | Software User's Guide for FAXPHONE L75 - Page 50
. Paper Is Not Loading Correctly. 4 ❏ Does paper not load into the printer? The multi-purpose tray might contain too many sheets or paper might not be inserted all the way into the multi-purpose tray. ❏ Does paper not feed through one sheet at a time? Be sure to fan the stack of paper before - Canon FAXPHONE L75 | Software User's Guide for FAXPHONE L75 - Page 51
change the TONER SUPPLY LOW setting on the printer from RX TO MEMORY to KEEP PRINTING. (Even if the toner cartridge is out of toner, the document will not be stored in memory.) ❏ Do vertical white streaks appear? Vertical white streaks may appear when the error message REPLACE CARTRIDGE is displayed - Canon FAXPHONE L75 | Software User's Guide for FAXPHONE L75 - Page 52
4-8 Frequently Asked Questions Chapter 4 - Canon FAXPHONE L75 | Software User's Guide for FAXPHONE L75 - Page 53
the on-screen instructions: • When prompted in the Additional Drivers dialog box, click the environment you want to support on your Intel Pentium system: Windows 98. • When prompted to insert your Windows 2000/XP disk in your disk drive, insert the printer driver installation disk instead. Sharing - Canon FAXPHONE L75 | Software User's Guide for FAXPHONE L75 - Page 54
• When prompted for an .inf file, browse your printer driver installation disk for the following folder: \WinBJ\A\Disk1 A- 2 Sharing Your Printer Cross-Platform in Windows 2000/XP Appendix A - Canon FAXPHONE L75 | Software User's Guide for FAXPHONE L75 - Page 55
you do not connect the printer cable. To install the software: 1. On the Windows desktop, click Start, and then click Run. 2. In the Run dialog box, browse to the drive and folder where the printer driver software is located. In the folder containing the printer driver software, locate the following - Canon FAXPHONE L75 | Software User's Guide for FAXPHONE L75 - Page 56
When prompted, connect your printer cable to the port on your computer. 6. The system displays messages indicating that the driver for your printer is being installed. For Windows 98/Me: Wait for the system to complete the installation of the printer driver. B- 2 Installing from a Local or Network - Canon FAXPHONE L75 | Software User's Guide for FAXPHONE L75 - Page 57
from a Local or Network Drive For Windows XP • Select Install the software automatically (Recommended). When prompted, browse to the drive and folder where the printer driver software is located. In the folder containing the printer driver software, locate the following folder, and click - Canon FAXPHONE L75 | Software User's Guide for FAXPHONE L75 - Page 58
finished, if prompted, restart Windows. The installation program determines whether Windows needs to be restarted on your system. If you want to remove the printer driver software from your system, see the "Removing the Printer Driver" section in Chapter 2. B- 4 Installing from a Local or Network - Canon FAXPHONE L75 | Software User's Guide for FAXPHONE L75 - Page 59
Software prepared for a specific function or set of functions. Examples of an application program include word processing programs. Developers who make application programs include drivers that support different types of printers. automatic feed Method by which paper can be fed into the printer - Canon FAXPHONE L75 | Software User's Guide for FAXPHONE L75 - Page 60
F form A custom paper size, with width and height dimensions defined by the user. G graphic A written, printed, or rectangular sheet of paper. This is the print mode often used for wide tables of data or graphic images. Compare with portrait orientation. local printer A printer that is connected - Canon FAXPHONE L75 | Software User's Guide for FAXPHONE L75 - Page 61
the narrower dimension of a rectangular sheet of paper. This is the print mode typical of most letters, reports, and other such documents. Compare with landscape orientation. printer driver Software that sends printing instructions to a printer. The printer driver keeps track of the attributes of - Canon FAXPHONE L75 | Software User's Guide for FAXPHONE L75 - Page 62
S scaling Enlarging or reducing the printed image. U USB Universal Serial Bus. A connectivity specification for attaching peripherals to computers. It eliminates the need to install cards into dedicated computer slots and reconfigure the system. G- 4 Glossary - Canon FAXPHONE L75 | Software User's Guide for FAXPHONE L75 - Page 63
printer driver information 3-23 B brightness setting 3-16 C cable system requirement 1-3 change port overview 2-9 computer processor system requirement 1-2 conserve toner setting 3-16 contrast setting 3-16 conventions used in this guide 1-4 cross-platform sharing the printer with Windows 2000/XP - Canon FAXPHONE L75 | Software User's Guide for FAXPHONE L75 - Page 64
defining 3-6 page size setting 3-6 paper size defining a custom size (Win2000/XP) 3-8 defining a custom size (Win98/Me) 3-7 setting a custom size for printing 3-7 Point and Print installing a shared printer 2-6 port changing from one USB to another 2-9 changing, overview 2-9 portrait setting the - Canon FAXPHONE L75 | Software User's Guide for FAXPHONE L75 - Page 65
S save toner setting 3-16 share the printer cross-platform in Windows 2000/XP, overview A-1 setting up to share 2-7 setup overview 2-6 system requirements described 1-2 T toner saving 3-16 U USB port changing from one to another 2-9 connecting when installing the software 2-3 V view printer settings - Canon FAXPHONE L75 | Software User's Guide for FAXPHONE L75 - Page 66
I- 4 Index
-
 1
1 -
 2
2 -
 3
3 -
 4
4 -
 5
5 -
 6
6 -
 7
7 -
8
-
9
-
10
-
11
-
12
-
13
-
14
-
15
-
16
-
17
-
18
-
19
-
20
-
21
-
22
-
23
-
24
-
25
-
26
-
27
-
28
-
29
-
30
-
31
-
32
-
33
-
34
-
35
-
36
-
37
-
38
-
39
-
40
-
41
-
42
-
43
-
44
-
45
-
46
-
47
-
48
-
49
-
50
-
51
-
52
-
53
-
54
-
55
-
56
-
57
-
58
-
59
-
60
-
61
-
62
-
63
-
64
-
65
-
66
 |
 |

Canon FAXPHONE L75
Canon FAXPHONE L75
Printer Driver
for Windows
Software User’s Guide