Canon FAXPHONE L75 Software User's Guide for FAXPHONE L75 - Page 27
Defining a Custom Paper Size, Defining a Custom Paper Size Windows 98/Me
 |
View all Canon FAXPHONE L75 manuals
Add to My Manuals
Save this manual to your list of manuals |
Page 27 highlights
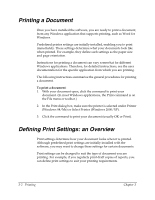
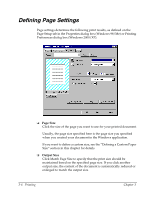
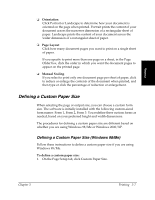
Printing ❏ Orientation Click Portrait or Landscape to determine how your document is oriented on the page when printed. Portrait prints the content of your document across the narrower dimension of a rectangular sheet of paper. Landscape prints the content of your document across the wider dimension of a rectangular sheet of paper. ❏ Page Layout Click how many document pages you want to print on a single sheet of paper. If you specify to print more than one page on a sheet, in the Page Order box, click the order in which you want the document pages to appear on the printed page. ❏ Manual Scaling If you select to print only one document page per sheet of paper, click to reduce or enlarge the contents of the document when printed, and then type or click the percentage of reduction or enlargement. Defining a Custom Paper Size 3 When selecting the page or output size, you can choose a custom form size. The software is initially installed with the following custom-sized form names: Form 1, Form 2, Form 3. You redefine these custom forms as needed, based on your preferred height and width dimensions. The procedures for defining a custom paper size are different based on whether you are using Windows 98/Me or Windows 2000/XP. Defining a Custom Paper Size (Windows 98/Me) Follow these instructions to define a custom paper size if you are using Windows 98/Me. To define a custom paper size: 1. On the Page Setup tab, click Custom Paper Size. Chapter 3 Printing 3-7
-
 1
1 -
2
-
3
-
4
-
5
-
6
-
7
-
8
-
9
-
10
-
11
-
12
-
13
-
14
-
15
-
16
-
17
-
18
-
19
-
20
-
21
-
 22
22 -
 23
23 -
 24
24 -
 25
25 -
 26
26 -
 27
27 -
 28
28 -
 29
29 -
 30
30 -
 31
31 -
 32
32 -
33
-
34
-
35
-
36
-
37
-
38
-
39
-
40
-
41
-
42
-
43
-
44
-
45
-
46
-
47
-
48
-
49
-
50
-
51
-
52
-
53
-
54
-
55
-
56
-
57
-
58
-
59
-
60
-
61
-
62
-
63
-
64
-
65
-
66
 |
 |