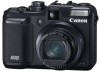
Canon G10 PowerShot G10 Camera User Guide - Page 12
Preparations - a battery
 |
UPC - 013803100082
View all Canon G10 manuals
Add to My Manuals
Save this manual to your list of manuals |
Page 12 highlights
Getting Started 10 Preparations Preparations Charging the Battery 1. Insert the battery until it clicks into the battery charger. Align the symbols. 2. Plug the battery charger (CB-2LZ) into a power outlet, or attach the power cord to the battery charger (CB-2LZE) and plug it into a power outlet. Charge Indicator (Upper) Charging: lights orange 3. Remove the battery after charging is complete. Charging takes approximately 2 hours 20 minutes. Charge Indicator (Lower) Charging Complete: lights green To protect the battery and prolong its life, do not charge it for longer than 24 hours continuously.
-
 1
1 -
2
-
3
-
4
-
5
-
6
-
 7
7 -
 8
8 -
 9
9 -
 10
10 -
 11
11 -
 12
12 -
 13
13 -
 14
14 -
 15
15 -
 16
16 -
 17
17 -
18
-
19
-
20
-
21
-
22
-
23
-
24
-
25
-
26
-
27
-
28
-
29
-
30
-
31
-
32
-
33
-
34
-
35
-
36
-
37
-
38
-
39
-
40
-
41
-
42
-
43
-
44
-
45
-
46
-
47
-
48
-
49
-
50
-
51
-
52
-
53
-
54
-
55
-
56
-
57
-
58
-
59
-
60
-
61
-
62
-
63
-
64
-
65
-
66
-
67
-
68
-
69
-
70
-
71
-
72
-
73
-
74
-
75
-
76
-
77
-
78
-
79
-
80
-
81
-
82
-
83
-
84
-
85
-
86
-
87
-
88
-
89
-
90
-
91
-
92
-
93
-
94
-
95
-
96
-
97
-
98
-
99
-
100
-
101
-
102
-
103
-
104
-
105
-
106
-
107
-
108
-
109
-
110
-
111
-
112
-
113
-
114
-
115
-
116
-
117
-
118
-
119
-
120
-
121
-
122
-
123
-
124
-
125
-
126
-
127
-
128
-
129
-
130
-
131
-
132
-
133
-
134
-
135
-
136
-
137
-
138
-
139
-
140
-
141
-
142
-
143
-
144
-
145
-
146
-
147
-
148
-
149
-
150
-
151
-
152
-
153
-
154
-
155
-
156
-
157
-
158
-
159
-
160
-
161
-
162
-
163
-
164
-
165
-
166
-
167
-
168
-
169
-
170
-
171
-
172
-
173
-
174
-
175
-
176
-
177
-
178
-
179
-
180
-
181
-
182
-
183
-
184
-
185
-
186
-
187
-
188
-
189
-
190
-
191
-
192
-
193
-
194
-
195
-
196
-
197
-
198
-
199
-
200
-
201
-
202
-
203
-
204
-
205
-
206
-
207
-
208
-
209
-
210
-
211
-
212
-
213
-
214
-
215
-
216
-
217
-
218
-
219
-
220
-
221
-
222
-
223
-
224
-
225
-
226
-
227
-
228
-
229
-
230
-
231
-
232
-
233
-
234
-
235
-
236
-
237
-
238
-
239
-
240
-
241
-
242
-
243
-
244
-
245
-
246
-
247
-
248
-
249
-
250
-
251
-
252
-
253
-
254
-
255
-
256
-
257
-
258
-
259
-
260
-
261
-
262
-
263
-
264
-
265
-
266
-
267
-
268
-
269
-
270
-
271
-
272
-
273
-
274
-
275
-
276
-
277
-
278
-
279
-
280
-
281
-
282
-
283
-
284
-
285
-
286
-
287
-
288
-
289
-
290
-
291
-
292
-
293
-
294
-
295
-
296
-
297
-
298
-
299
-
300
-
301
-
302
-
303
-
304
-
305
-
306
-
307
-
308
 |
 |

Preparations
10
Getting Started
Preparations
1.
Insert the battery until it clicks into the battery charger.
2.
Plug the battery charger (CB-2LZ) into a power outlet,
or attach the power cord to the battery charger
(CB-2LZE) and plug it into a power outlet.
3.
Remove the battery after charging is complete.
Charging takes approximately 2 hours 20 minutes.
Charging the Battery
To protect the battery and prolong its life, do not charge it for
longer than 24 hours continuously.
Align the
S
symbols.
Charge Indicator (Upper)
Charging: lights orange
Charge Indicator (Lower)
Charging Complete:
lights green