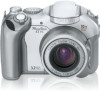
Canon PowerShot S1 IS PowerShot S1 IS Camera User Guide - Page 94
Press the SET button., Press the shutter button.
 |
View all Canon PowerShot S1 IS manuals
Add to My Manuals
Save this manual to your list of manuals |
Page 94 highlights
4 Press the SET button. z The camera exits the menu screen and Int. appears at the lower right of the LCD monitor (or viewfinder). 5 Press the shutter button. z The first image is shot and the interval shooting session starts. z Once the set number of shots is taken the camera automatically powers down regardless of the power saving function settings. z If the below operations are accessed while the interval shooting is in process, the interval shooting session will be canceled. - Turning the mode dial while the camera is waiting to shoot the next image - Pressing the shutter button halfway while the camera is waiting to shoot the next image - Opening the CF card slot cover or the battery cover - Switching to Playback mode - Turning off the power zOnce the interval shooting session is started, all operation buttons become inactive. zThe lens stays extended until the next image is shot. zImages are not displayed on the LCD monitor (or viewfinder) right after being shot. zInterval shooting is not available when the date and time are not set. zContinuous shooting and self-timer shooting are not available. zAEB mode and the Focus-BKT mode settings cannot be set. 92 6. Shooting-Advanced Functions
-
 1
1 -
2
-
3
-
4
-
5
-
6
-
7
-
8
-
9
-
10
-
11
-
12
-
13
-
14
-
15
-
16
-
17
-
18
-
19
-
20
-
21
-
22
-
23
-
24
-
25
-
26
-
27
-
28
-
29
-
30
-
31
-
32
-
33
-
34
-
35
-
36
-
37
-
38
-
39
-
40
-
41
-
42
-
43
-
44
-
45
-
46
-
47
-
48
-
49
-
50
-
51
-
52
-
53
-
54
-
55
-
56
-
57
-
58
-
59
-
60
-
61
-
62
-
63
-
64
-
65
-
66
-
67
-
68
-
69
-
70
-
71
-
72
-
73
-
74
-
75
-
76
-
77
-
78
-
79
-
80
-
81
-
82
-
83
-
84
-
85
-
86
-
87
-
88
-
 89
89 -
 90
90 -
 91
91 -
 92
92 -
 93
93 -
 94
94 -
 95
95 -
 96
96 -
 97
97 -
 98
98 -
 99
99 -
100
-
101
-
102
-
103
-
104
-
105
-
106
-
107
-
108
-
109
-
110
-
111
-
112
-
113
-
114
-
115
-
116
-
117
-
118
-
119
-
120
-
121
-
122
-
123
-
124
-
125
-
126
-
127
-
128
-
129
-
130
-
131
-
132
-
133
-
134
-
135
-
136
-
137
-
138
-
139
-
140
-
141
-
142
-
143
-
144
-
145
-
146
-
147
-
148
-
149
-
150
-
151
-
152
-
153
-
154
-
155
-
156
-
157
-
158
-
159
-
160
-
161
-
162
-
163
-
164
-
165
-
166
-
167
 |
 |
