Canon SELPHY CP800 SELPHY CP800 Printer User Guide - Page 18
Printing With the Date Date, Getting the Best Results With Auto Correction Image Optimize - photo paper for
 |
View all Canon SELPHY CP800 manuals
Add to My Manuals
Save this manual to your list of manuals |
Page 18 highlights
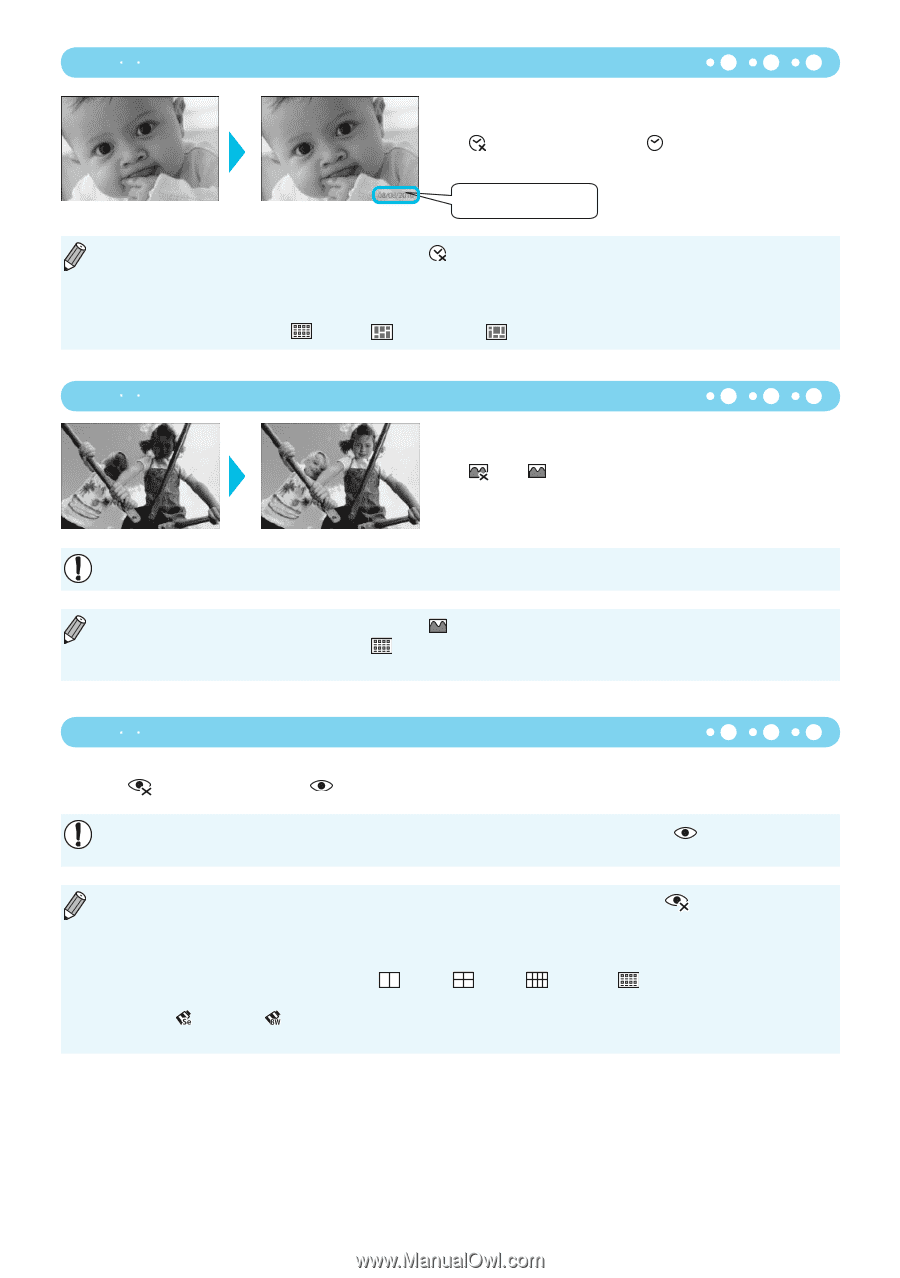
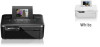
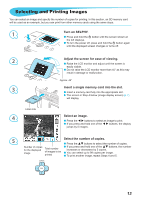
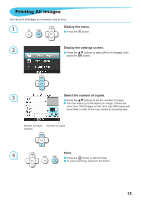
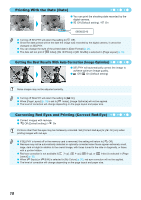
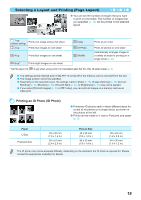
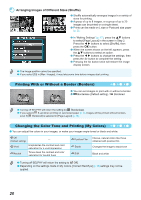
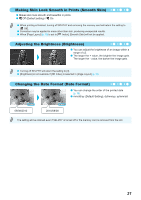
Printing With the Date (Date) You can print the shooting date recorded by the digital camera. Off (Default setting) / On 08/08/2010 Turning off SELPHY will return the setting to [ Off]. Since the date printed will be the date the image was recorded by the digital camera, it cannot be changed on SELPHY. You can change the style of the printed date in [Date Format] (p. 21). The date will not print if [ Index], [ ID Photo] or [ Shuffle] is selected in [Page Layout] (p. 19). Getting the Best Results With Auto Correction (Image Optimize) SELPHY will automatically correct the image to achieve optimum image quality. Off / On (Default setting) Some images may not be adjusted correctly. Turning off SELPHY will return the setting to [ On]. When [Page Layout] (p. 19) is set to [ Index], [Image Optimize] will not be applied. The level of correction will change depending on the page layout and paper size. Correcting Red Eyes and Printing (Correct Red-Eye) Correct images with red-eye. Off (Default setting) / On Portions other than the eyes may be mistakenly corrected. Set [Correct Red-Eye] to [ On] only when printing images with red-eye. If SELPHY is turned off or the memory card is removed, the setting will return to [ Off]. Red-eye may not be automatically detected or optimally corrected when faces appear extremely small, large, dark or bright in relation to the overall image, with faces turned to the side or diagonally, or faces with a portion hidden. Red-eye correction is not available if [ 2-up], [ 4-up], [ 8-up], or [ Index] is selected in [Page Layout] (p. 19). When [ Sepia] or [ B/W] is selected in [My Colors] (p. 20), red-eye correction will not be applied. The level of correction will change depending on the page layout and paper size. 18
-
 1
1 -
2
-
3
-
4
-
5
-
6
-
7
-
8
-
9
-
10
-
11
-
12
-
 13
13 -
 14
14 -
 15
15 -
 16
16 -
 17
17 -
 18
18 -
 19
19 -
 20
20 -
 21
21 -
 22
22 -
 23
23 -
24
-
25
-
26
-
27
-
28
-
29
-
30
-
31
-
32
-
33
-
34
-
35
-
36
 |
 |