Canon VB-M740E Camera Management Tool User Manual - Page 17
Manually Adding a Camera, Adding of Cameras Connected After This Tool Launches
 |
View all Canon VB-M740E manuals
Add to My Manuals
Save this manual to your list of manuals |
Page 17 highlights
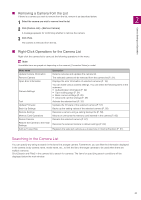
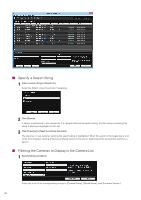
Note If a camera is not detected, even though it is connected to the same network, click again to perform detection. 2 Adding of Cameras Connected After This Tool Launches Cameras connected to the network after this tool launches, are automatically detected by this tool. When a camera is detected, on the toolbar is displayed in green. In addition, hovering the mouse pointer over the button displays the number of detected cameras. Camera Settings and Operation You can add the automatically recognized camera to the list as described below. 1 Click on the toolbar. A message dialog box appears for confirming whether to add the detected camera. 2 Click [Yes]. The camera is added to the list. If multiple cameras were automatically detected, all of them are added to the list. If the detected camera is added, an error message appears when the number of cameras exceeds the maximum of 64 on the camera list. If a camera could not be added to the list because the maximum number was exceeded, will remain green. When you carry out , the detection status is cleared and the button changes back to . Manually Adding a Camera A camera connected to a different network segment can be added to the camera list manually. 1 Click [Camera List] > [Add Camera]. The [Add Camera] dialog box appears. 2 Enter each item. (1) (2) (3) (4) (5) (1) [IPv4 Address] Enter the IP address of the camera. (2) [Admin User Name] The default administrator user name for the camera is "root". This cannot be changed. (3) [Administrator Password] Enter the administrator password for the camera. If this is left blank, the common password is applied. 17
-
 1
1 -
2
-
3
-
4
-
5
-
6
-
7
-
8
-
9
-
10
-
11
-
 12
12 -
 13
13 -
 14
14 -
 15
15 -
 16
16 -
 17
17 -
 18
18 -
 19
19 -
 20
20 -
 21
21 -
 22
22 -
23
-
24
-
25
-
26
-
27
-
28
-
29
-
30
-
31
-
32
-
33
-
34
-
35
-
36
-
37
-
38
-
39
-
40
-
41
-
42
-
43
-
44
-
45
-
46
-
47
-
48
-
49
-
50
-
51
-
52
-
53
-
54
-
55
-
56
-
57
-
58
-
59
-
60
-
61
-
62
-
63
-
64
-
65
-
66
-
67
-
68
-
69
-
70
-
71
-
72
 |
 |
