Canon imagePROGRAF TM-300 Guide for Media Configuration Tool - Page 114
Calibration Target
 |
View all Canon imagePROGRAF TM-300 manuals
Add to My Manuals
Save this manual to your list of manuals |
Page 114 highlights
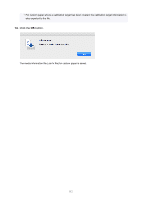
• If the amount of ink used is too much, wrinkles may appear and the ink may bleed in the printed material. Furthermore, if the amount of ink used is too little, color production may be poor and lines may become scratched. In this case, change the ink usage on the Advanced Paper Settings sheet in the Edit Custom Paper dialog box. • If horizontal stripes with different color tones appear in the printed material, adjust the paper feed on the Paper Feed Adjustment sheet in the Edit Custom Paper dialog box. If paper feed adjustment has already been executed, execute paper feed fine tuning from the printer control panel and fine tune the amount of paper feed. Note • For details on paper feed fine tuning, search for and refer to the "Fine-Tuning Paper Feed Amount" page from the home page of the Online Manual for your model. • If horizontal stripes appear even after performing paper feed fine tuning , search for and refer to the "Banding in different colors occurs" page from the home page of the Online Manual for your model. • If you cannot obtain sufficiently high print quality, change the ink usage or change the media type used as the basis for the custom paper. • If you use glossy photo paper or glossy paper, select a paper that uses photo ink for black ink as the paper used as the basis for the custom paper. The types of black ink used are displayed on the right side of each media type in the Create Custom Paper dialog box. Note • For details on print quality problems, search for and refer to the "Print Results Are Unsatisfactory" or "Problems with the printing quality" pages from the home page of the Online Manual for your model. • If custom paper created with PRO-4000S/PRO-6000S is loaded as PRO-4100S/PRO-6100S, or if custom paper created with PRO-4100S/PRO-6100S is loaded as PRO-4000S/PRO-6000S, settable functions may differ and the product quality of may be low. • On the main screen, select the custom paper to check, and then select the Edit Media Information menu > Simple Paper Reference to check the model that created the custom paper. You can check the custom paper in Model Used, which appears in the Settings list on the Simple Paper Reference screen. Calibration Target • To increase the precision of the calibration target, we recommend executing Common Calibration using Canon genuine paper or Canon feed confirmed paper in advance. 114
-
 1
1 -
2
-
3
-
4
-
5
-
6
-
7
-
8
-
9
-
10
-
11
-
12
-
13
-
14
-
15
-
16
-
17
-
18
-
19
-
20
-
21
-
22
-
23
-
24
-
25
-
26
-
27
-
28
-
29
-
30
-
31
-
32
-
33
-
34
-
35
-
36
-
37
-
38
-
39
-
40
-
41
-
42
-
43
-
44
-
45
-
46
-
47
-
48
-
49
-
50
-
51
-
52
-
53
-
54
-
55
-
56
-
57
-
58
-
59
-
60
-
61
-
62
-
63
-
64
-
65
-
66
-
67
-
68
-
69
-
70
-
71
-
72
-
73
-
74
-
75
-
76
-
77
-
78
-
79
-
80
-
81
-
82
-
83
-
84
-
85
-
86
-
87
-
88
-
89
-
90
-
91
-
92
-
93
-
94
-
95
-
96
-
97
-
98
-
99
-
100
-
101
-
102
-
103
-
104
-
105
-
106
-
107
-
108
-
 109
109 -
 110
110 -
 111
111 -
 112
112 -
 113
113 -
 114
114 -
 115
115 -
 116
116 -
 117
117 -
 118
118 -
 119
119 -
120
-
121
-
122
-
123
-
124
-
125
-
126
-
127
-
128
-
129
-
130
 |
 |
