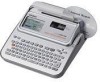
Casio CW-L300 User Guide
Casio CW-L300 - Disc Title Printer B/W Thermal Transfer Manual
 |
UPC - 079767168582
View all Casio CW-L300 manuals
Add to My Manuals
Save this manual to your list of manuals |
Casio CW-L300 manual content summary:
- Casio CW-L300 | User Guide - Page 1
E CW-L300 User's Guide • We recommend that you print on a disc* before you record anything on it. Printing on a disc that already has data recorded on it can cause the data to become corrupted. • Note that CASIO COMPUTER CO., LTD. shall not be held liable for any loss or corruption of data on discs - Casio CW-L300 | User Guide - Page 2
the instructions, may and on, the user is encouraged to try CW-L300 Declaration of Conformity Model Number: CW-L300 Trade Name: CASIO COMPUTER CO., LTD. Responsible party: CASIO, INC. Address: 570 MT.PLEASANT AVENUE, DOVER, NEW JERSEY 07801 Telephone number: 201-361-5400 This device complies with Part - Casio CW-L300 | User Guide - Page 3
or entity that may arise through the use of this printer. • Reproduction of this manual in any form, either in part or its entirety, is forbidden without the express permission of CASIO COMPUTER CO., LTD. • The contents of the manual are subject to change without notice. • Windows is a registered - Casio CW-L300 | User Guide - Page 4
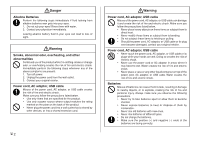
may become wet. Water creates the risk of fire and electric shock. • Never place a vase or any other liquid container on top of the power cord, AC adaptor, or USB cable. Water creates the risk of fire and electric shock. Batteries Misuse of batteries can cause them to leak, resulting in damage - Casio CW-L300 | User Guide - Page 5
deformation of the container to which the label is affixed. Caution Power cord, AC adaptor, USB cable Misuse of the power cord, AC adaptor, or USB cable can damage it Plug in the power cord into the wall outlet as far as it will go. • Plug in the USB cable into the computer and the printer as far as - Casio CW-L300 | User Guide - Page 6
objects near the head. These items become very hot, and touching them creates the risk of burn injury. Auto Cutter While the printer is turned on or printing, never touch the printer head or the area where the tape passes. Unexpected operation of the cutter creates the risk of personal injury. E 4 - Casio CW-L300 | User Guide - Page 7
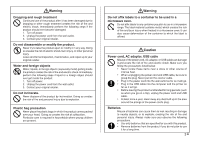
. Use the printer in an area that is not exposed to bright light. • You cannot perform disc label printing and tape label printing at the same time. Contents Safety Precautions 1 Operating Precautions 5 Part 1 - DISC Mode 8 Disc Printing Terms 8 DISC Mode 8 Creating Disc Label Data 8 Creating - Casio CW-L300 | User Guide - Page 8
Tape Label 36 Supported Barcode Types 36 Barcode Specifications 37 Using Tape Labels 38 Tape Cut Modes 38 Types of Tape Cuts 38 Cut Modes 38 Cut Modes and Margins 40 Part 3 - Inputting and Editing Label 47 User Characters 47 To recall a user character 49 To delete a user character 49 Part - Casio CW-L300 | User Guide - Page 9
Part 6 - Configuring the Printer Setup 55 Demo Printing 55 Reference 57 Power Requirements 57 Caring for the Printer 58 Troubleshooting 59 DISC Mode 60 TAPE Mode 61 Error Messages 63 Illustrations 68 Symbols, Dingbats, and Special Characters 68 Frames 69 Disc Label Formats 70 Numbering - Casio CW-L300 | User Guide - Page 10
• Connect the AC adaptor or load batteries (page 7 of the Startup Guide). • Load an ink ribbon cassette (page 11 of the Startup Guide). • If you plan to print a disc case label, load a tape cartridge (page 13 of the Startup Guide). General Flow for Creating a Disc Label Select the DISC Mode (page - Casio CW-L300 | User Guide - Page 11
explains how to specify the print area and select a label format for creating new disc printing data. • For information about printing data that you have previously saved to memory, see page 54. Example ■ To create a new disc label 1. Press to turn on the printer. • A LAST DATA icon will also - Casio CW-L300 | User Guide - Page 12
logos. Have the printer automatically select text Disc Label Formats" on page 70 for details about all the label formats that are available. 6. Use and to scroll through the available label print the label (page 20 of the Startup Guide) or to save the label (page 54). • You can also exit your label - Casio CW-L300 | User Guide - Page 13
Inserting a Logo Into a Label When creating a label using a LOGO format (LOGO 1 through LOGO 4), you can insert one of the printer's 10 built-in logos into the graphic block of the format. Output Samples The following shows examples of labels that use logos. LOGO 1 Built-in Logos LOGO 2 LOGO 3 - Casio CW-L300 | User Guide - Page 14
Size Printed Size ×2 6mm (1⁄4") ×2 6mm (1⁄4") ×2 6mm (1⁄4") ×2 6mm (1⁄4") ×1 3mm (1⁄8") To input text into an AUTO format label 1. Perform steps 1 through 5 of the procedure under "To create a new disc label" on page 9. 2. On the label format selection screen, use and label formats - Casio CW-L300 | User Guide - Page 15
depends on what those two characters are. Specifying Text Alignment You can select any one of the following four text alignments for your label text. Centering With uniform spacing, all characters are separated by the same amount of space. To turn proportional spacing on and off 1. While - Casio CW-L300 | User Guide - Page 16
to print a tape label that can be affixed to the case of a disc. Creating and Printing a Disc Case Label Important! • When printing a disc case label, use 24mm or 18mm wide tape only. ■ To print a disc case label 1. Press to turn on the printer. 2. Use the procedures under "Creating Disc Label Data - Casio CW-L300 | User Guide - Page 17
. 5. Use and to select TAPE, and then press SET. • Pressing and DISC and TAPE. toggles the selection on the above screen between 6. Use and to select the label area data you want to print first, and then press SET. To print this data: Upper label area Lower label area Select this option: AREA - Casio CW-L300 | User Guide - Page 18
Part 2 - TAPE Mode Creating a Tape Label The following are the general steps when preparing data for printing a tape label. Getting Ready • Connect the AC adaptor or load batteries (page 7 of the Startup Guide). • Load a tape cartridge (page 13 of the Startup Guide). Select the TAPE Mode (page 16 - Casio CW-L300 | User Guide - Page 19
sure that the tape cartridge has enough tape left to finish the print operation. If the tape cartridge runs out of tape during a print operation, press ESC to cancel the print operation. ■ To create and print sequentially numbered tape labels Example 1. Press the to turn on the printer. 2. Use and - Casio CW-L300 | User Guide - Page 20
. Important! • Make sure that cut tape does not pile up in the area around the tape outlet. Tape building up around the tape outlet can cause the outlet to become blocked, causing a tape jam and malfunction of the printer. • For information about saving tape label data, see page 54. Controlling the - Casio CW-L300 | User Guide - Page 21
the sections into the final label. ➜ Large label printed using two pieces of tape Arranging the printed labels produces the large label. Important! • You must have a tape cartridge that is 12mm wide or wider loaded in the printer to perform this operation. Example Big (printed on two pieces of - Casio CW-L300 | User Guide - Page 22
Creating and Printing a Tape Label with a Logo Your printer comes with 10 built-in logos that you can incorporate into your tape labels quickly and easily. Built-in Logos Combine the tapes to create the large label. • If you use the above procedure to print on 18mm or 24mm tape, the tapes that are - Casio CW-L300 | User Guide - Page 23
■ To create and print a label with a logo 1. Press to turn on the printer. 2. Use and to select TAPE, and then press SET. • You can also press TAPE to enter the TAPE Mode. 3. Use and to select NEW, and then press SET. 4. Use the cursor keys to select • This enters the Logo Mode. , and then press - Casio CW-L300 | User Guide - Page 24
Creating and Printing an Original (Free Design) Tape Label This section describes what you can do with the Free Design mode of the printer, which lets you design your own tape labels. All of the following sections whose titles start with "FREE DESIGN:" indicate features and functions that are - Casio CW-L300 | User Guide - Page 25
tape label layout. • See page 24 of the Startup Guide for information about printing the label. • For information about saving tape label data, see page 54. FREE DESIGN: Using Multiple Lines in a Tape Label the printed label will be adjusted by the printer automatically in accordance with the tape - Casio CW-L300 | User Guide - Page 26
the width of the tape loaded in the printer is not compatible with the number of lines in the label you are creating. If this happens, reduce the number of lines or use a different width tape. • See page 24 of the Startup Guide for information about printing the label. • For information about saving - Casio CW-L300 | User Guide - Page 27
. 5. Use and to select ONE BLOCK, and then press SET. • Selecting ALL BLOCKS applies your settings to all of the blocks that make up the tape label. 6. Use and to select the setting you want to change, and and to change the currently selected setting. When this setting is selected: DIRECTION ALIGN - Casio CW-L300 | User Guide - Page 28
you perform the steps under "To configure block form settings" on page 25, the label form settings in step 4 of this procedure will appear when you press SET (or • NORMAL: Prints the tape normally. • MIRROR: Prints the tape in mirror image onto special optionally available iron transfer tape. • ON: - Casio CW-L300 | User Guide - Page 29
setting makes it possible to print consecutive labels one after another. • The auto tape cut operation is not performed when NONE is selected for the margins. To cut the tape, press FUNCTION and then CUT. FREE DESIGN: Controlling the Length of a Tape Label Tape label length is normally adjusted in - Casio CW-L300 | User Guide - Page 30
will change in accordance with your setting as described below. [11.6cm] Label can be printed as-is. ➜ 10. Press SET. ➜ ➜ (9.6cm] Text is condensed horizontally, and label is printed as-is. 5.4cm] Block length is printed longer than specified length value. E 28 Fixed Block Length and the - Casio CW-L300 | User Guide - Page 31
setting as described below. [20.6cm] 20.5cm] ➜ ➜ Label can be printed as specified. Label will be printed but the tape length will be longer than specified. FREE DESIGN: Aligning Tape Label Text This section explains how to align tape label text within a block and how to align blocks within - Casio CW-L300 | User Guide - Page 32
LEFT EQUAL CENTER RIGHT Important! • The block alignment setting is applied only when FIX is selected for the T-LENGTH setting. ■ To align blocks within a tape label 1. In the Free Design Mode, input the text you want, and divide it into blocks as required. • See page 22 for information about blocks - Casio CW-L300 | User Guide - Page 33
the setting between EQUAL, CENTER, RIGHT, and LEFT. FREE DESIGN: Changing the Size of Tape Label Text Normally when you print, the printer automatically selects the optimum character size in accordance with the tape width and the number of text lines (Auto Fit). You can also use the procedures in - Casio CW-L300 | User Guide - Page 34
printer to indicate that the text to the right of it will be adjusted automatically. • The character size mark and auto fit mark appear on the display only. They are not printed in the label to be set by the printer automatically in accordance with the width of the tape being used and the number - Casio CW-L300 | User Guide - Page 35
- 1 × 1 2 × 2* D 1 × 1 - 1 × 1 ∗ Smaller when the label includes a frame. 9mm Wide - - - - Important! • The size of text lines cannot be tape. • The size of text lines cannot be specified if there are four or more lines of text. • The size of text lines cannot be specified if the label - Casio CW-L300 | User Guide - Page 36
(page 32) E 34 Small Font • The printer has a Small Font setting, which it may select the format you are using) and the tape width. An indicator appears next to the [SMALL Label format indicator Small Font • Note the following about the Small Font. - Font settings are not applied (everything is printed - Casio CW-L300 | User Guide - Page 37
FREE DESIGN: Using Frames The printer comes with a selection of built-in frames that you can use in your tape labels. See page 69 for a list of frames that are available. Example 18mm wide tape, Frame Number 55 ■ To add a frame to a tape label 1. In the Free Design Mode, input the text you want. - Casio CW-L300 | User Guide - Page 38
Creating a Barcode Tape Label Your printer lets you create and print tape labels with barcodes. Supported Barcode Types ■ EAN EAN-13 EAN-8 UPC-A UPC-E ■ ITF ITF ■ CODE39 ■ CODABAR (NW-7) Important! • Use a 12mm or wider tape cartridge when printing barcodes. • You can input up to 60 characters of - Casio CW-L300 | User Guide - Page 39
digit Alpha (first, last only)*9 A to D *1 The check digit is automatically calculated in accordance with input data. For EAN-13, EAN-8, and UPC-A, and when are insufficient digits. The printer will not allow input of too many digits. *5 An error message appears and printing is impossible if an - Casio CW-L300 | User Guide - Page 40
of tapes listed below. When printing on this type of tape: Always use this tape cut mode setting: • Iron transfer tape • Magnetic tape • Reflective tape FULL CUT UNCUT Types of Tape Cuts There are two types of tape cuts, half cut and full cut. ■ Half cut With half cut, only the label part is - Casio CW-L300 | User Guide - Page 41
UNCUT is selected, the printer does not perform any cut operation between labels. • This setting is best when you want to print labels without spaces between them, which saves label tape. • Be sure to select UNCUT when printing on magnetic tape and reflective tape. After printing is complete, press - Casio CW-L300 | User Guide - Page 42
type (full or half) and margin length are affected by the tape cut mode and margin settings. Cut Mode CONT HALF CUT Cut Timing Margin Trimming of Cutting excess at between beginning each label of label Cutting after printing is complete FULL+HALF CUT FULL CUT Trimming of Cutting excess at - Casio CW-L300 | User Guide - Page 43
Part 3 - Inputting and Editing Label Text This section describes everything you need to know To input alpha-numeric characters Example: ABXYZ 1234567890 1. Input the characters by typing them on the printer's keyboard. • To input the uppercase letters, you can use either SHIFT or CAPS. With SHIFT - Casio CW-L300 | User Guide - Page 44
About the CODE key The CODE key makes it possible to input punctuation needed for a number of different languages. The following shows the key operations you should use for each of the characters formed using the CODE key. ■ CAPS on Key Operation CODE U CODE O CODE P CODE A CODE J CODE K CODE L - Casio CW-L300 | User Guide - Page 45
Inputting Illustrations Your printer gives you a choice of 124 illustrations that you can use in your labels. To input illustrations 1. With the cursor at the location where you want to input an illustration, press ILLUST to display the ILLUST menu. 2. Use the - Casio CW-L300 | User Guide - Page 46
(Free Design) 1. Press FUNCTION and then BS (CLS). 2. Use and to select PART, and then press SET. 3. Use and to move the cursor to the first character and then press SET. Text Editing You can set up the label printer so it either inserts new input between existing characters, or overwrites existing - Casio CW-L300 | User Guide - Page 47
Using Phrase Memory Phrase memory provides storage of nine phrases you can recall and input into your labels. Initially, phrase memory records 1 through 8 are preset with often-used label phrases. You can use these as they are or replace them with your own text. The following are the initial - Casio CW-L300 | User Guide - Page 48
When you save input text in phrase memory • If the text includes character size marks, new line marks, block marks and so on, these characters are saved as spaces. • If the text includes 49 characters or more, the first 49 characters are saved as input text. 6. Use and to select the phrase memory - Casio CW-L300 | User Guide - Page 49
the screen is blank or if the cursor is located where there is no character, performing the above step will take you directly to the User Character Drawing Screen. In this case, skip step 3, and go directly to step 4. 2. Use and to select MAKE and then press SET. 3. Use and to - Casio CW-L300 | User Guide - Page 50
, press SET to store the character. E 48 ■ To create a user character using an existing character 1. Input the character or symbol you want to your new character and locate the cursor under the character. 2. Press FUNCTION and then USER CHR. 3. Use and to select MAKE and then press SET. 4. Use and - Casio CW-L300 | User Guide - Page 51
character you want to recall and then press SET. To delete a user character 1. Press FUNCTION and then USER CHR. 2. Use and to select DELETE and then press SET. 3. Use the cursor keys to select the user character you want to delete and then press SET. 4. In response to the confirmation message that - Casio CW-L300 | User Guide - Page 52
you create a new label. The current font setting is indicated by the pointer along the right side of the display. SMALL FONT When printing on a disc, SMALL FONT is used for printing when the character size is 2mm, regardless of the current font setting. In the case of tape printing, SMALL FONT is - Casio CW-L300 | User Guide - Page 53
and then • The default font you specified will be used first for all new labels. When inputting text, you can use the procedure above to change the font to To apply the font setting to this text: All of the text in the label All of the text in the current block (Free Design Mode only) All of - Casio CW-L300 | User Guide - Page 54
to this text: Select this option: All of the text in the label ALL All of the text in the current block (Free Design Mode text. • Note that STYLE menu text attributes cannot be applied to illustrations or user characters. ■ To apply STYLE menu text attributes 1. Input the text whose attributes - Casio CW-L300 | User Guide - Page 55
Using EFFECT Menu Attributes The EFFECT menu lets you apply the text attributes shown below to label text in the Free Design Mode. Examples SHADING UNDERLINE BOX(CHARACTER) BOX(TEXT) ■ To apply EFFECT menu text attributes 1. Input the text whose attributes you - Casio CW-L300 | User Guide - Page 56
. 6. Press SET to display the label. • Now you can print the label or make any changes you want in it. To delete a label 1. Press to turn on the printer. 2. Use and to select DISC or TAPE, and then press SET. • You can also press DISC or TAPE to enter the DISC or the TAPE Mode. 3. Use and to select - Casio CW-L300 | User Guide - Page 57
save it in memory (page 54) before performing a demo print. ■ To perform disc demo printing 1. Make sure an ink ribbon cassette is loaded in the printer. • See page 11 of the Startup Guide for information about loading ink ribbon cassettes. 2. If the printer is on, press to turn it off. 3. Press to - Casio CW-L300 | User Guide - Page 58
print area of the disc. 13. After printing is complete, use and to select EXIT, and then press SET. 14. In response to the confirmation message that appears, press SET. ■ To perform tape demo printing 1. Make sure a tape cartridge is loaded in the printer. • See page 13 for the Startup Guide - Casio CW-L300 | User Guide - Page 59
the proper directions. Battery Life Disc Label Printing • Printing of approximately 150 discs* Normal temperature (20˚C (68˚F)), one printing per disc. Label Tape Printing • Printing of approximately two 18mm tape cartridges under standard printing conditions* * When printing text or graphics that - Casio CW-L300 | User Guide - Page 60
is a tape cartridge or ink ribbon cassette adaptor loaded in the printer, remove it. 2. Load the cleaning tape into the printer. 3. Press to turn on the printer. 4. Press FUNCTION and then FEED to feed the tape one or two times. • For details about using the cleaning tape, see the instructions that - Casio CW-L300 | User Guide - Page 61
troubleshooting tables below whenever you start to have problems with the printer or application. If you can't find the solution to your problem below, contact your original retailer or your nearest authorized CASIO service center. Symptom Nothing appears on the display when I press . The printing - Casio CW-L300 | User Guide - Page 62
lever inside the cassette case (Startup Guide, page 4) to its original position before trying to print again. If you are still unable to remove the disc from the printer, contact your retailer or your nearest CASIO service center. Use the bundled AC adaptor to power the printer, or replace the - Casio CW-L300 | User Guide - Page 63
the printer. Printing will not start. The disc is not positioned correctly in the printer. Recommended Action A disc cannot be inserted into the printer while a tape cartridge is loaded. Remove the tape cartridge and replace it with an ink ribbon cassette. (Startup Guide, page 11) Remove the disc - Casio CW-L300 | User Guide - Page 64
Recommended Action Change to AC adaptor power or load a fresh set of batteries (supplied by you). (page 57) Remove the tape cartridge. After making sure that the ink ribbon is not broken, take up all the slack. Reload the tape cartridge into the printer. (Startup Guide, page 13) Important! • Always - Casio CW-L300 | User Guide - Page 65
printer without initializing its memory first. ➜ Initialize printer Guide, page 8 46 36 17 Message INPUT A VALUE! LABEL LONGER THAN SETTING SET/ESC LENGTH OF PRINT IS TOO LONG! LINK ERROR! CHECK ALL CONNECTIONS! LOAD A TAPE CARTRIDGE Cause and Action • You are trying to print numbering labels - Casio CW-L300 | User Guide - Page 66
not have the required number of digits. ➜ Re-input the correct number of digits. • There is not enough ink ribbon left to perform the current print job. ➜ After printing finishes, replace the ink ribbon cassette before starting the next print. See page: 45 Startup Guide, pages 20 and 24 36 Startup - Casio CW-L300 | User Guide - Page 67
ERROR! CHECK THE TAPE CARTRIDGE! Cause and Action • The tape became jammed during printing. ➜ Turn off the printer and remove the tape cartridge. Next, remove the jammed tape. • There is something stuck in the auto tape cutter. ➜ Turn off the printer and remove the tape cartridge. Next, remove - Casio CW-L300 | User Guide - Page 68
. • The label you are trying to print or recall is not compatible with the currently loaded tape cartridge. ➜ Turn off the printer and replace the tape cartridge. • You replaced the tape cartridge in the TAPE mode. ➜ Turn off the printer and replace the tape cartridge. • An ink ribbon cassette is - Casio CW-L300 | User Guide - Page 69
the allowable number of lines. ➜ Decrease the number of lines or change to a wider tape. • You are trying to print a label that has more than the allowable number of lines. ➜ Decrease the number of lines or change to a wider tape. See page: 47 47 35 23 Message TOO SHORT TO CUT! SET/ESC Cause - Casio CW-L300 | User Guide - Page 70
Illustrations ● NUMBER Symbols, Dingbats, and Special Characters ● SYMBOL ● GREEK, RUSSIAN ● DINGBAT E 68 - Casio CW-L300 | User Guide - Page 71
Frames 69 E - Casio CW-L300 | User Guide - Page 72
Disc Label Formats Type Number FORMAT 1 2 3 4 5 6 7 Format 8 9 10 E 70 Input Item Vertical Size Maximum (mm/inch) Number TITLE 12/1⁄2" 12 TITLE 9/3⁄8" 16 TITLE1 6/1⁄4" 24 TITLE2 6/1⁄4" 24 TITLE 9/3⁄8" 16 COMMENT 3/1⁄8" 49 COMMENT 3/1⁄8" 49 TITLE 9/3⁄8" 16 TITLE 6/1⁄4" - Casio CW-L300 | User Guide - Page 73
Type Number AUTO 1 2 Format Input Item Vertical Size Maximum (mm/inch) Number TITLE 15~3/9⁄16"~1⁄8" 49 TITLE1 6~3/1⁄4"~1⁄8" 49 TITLE2 6~3/1⁄4"~1⁄8" 49 Numbering Formats Number 1 2 3 4 5 6 Format Input Item Tape Width (mm) 24 18 12 9 6 NUMBER COMMENT, NUMBER NUMBER, COMMENT COMMENT1, - Casio CW-L300 | User Guide - Page 74
Width and the Number of Lines and Character Sizes Supported Tape Widths The number of print lines and the vertical character size depends on the tape width and format being used. Tape Width (mm) User's 6 9 12 18, 24 Guide page Maximum Normal 1 line 1 line 2 lines 4 lines 23 Number Font - Casio CW-L300 | User Guide - Page 75
Enlarged Label Printing Tape Widths and Character Sizes Tape Width (mm) 2 Pieces 3 Pieces 4 Pieces 6, 9 12 18 24 × 24/15/16" 30/13/16" 30/13/16" × 36/1 7/16" 45/13/4" 45/13/4" × 48/17/8" 60/23/8" 60/23/8" (mm/inch) ∗ Printing on 18mm or 24mm tape creates blank margins along the bottom - Casio CW-L300 | User Guide - Page 76
(at 20°C (68° F)) Replacement requires charged maintenance by CASIO service center. Power Consumption : 15W Auto Power Off : Approximately six minutes after last key operation • Auto Power Off disabled under AC adaptor power and when printer is connected to a computer. Dimensions : 88 (H) × 215 - Casio CW-L300 | User Guide - Page 77
CASIO Europe GmbH Bornbarch 10, 22848 Norderstedt, Germany - Casio CW-L300 | User Guide - Page 78
CASIO COMPUTER CO., LTD. 6-2, Hon-machi 1-chome Shibuya-ku, Tokyo 151-8543, Japan MO0504-B Printed in China/Imprimé en Chine
-
 1
1 -
 2
2 -
 3
3 -
 4
4 -
 5
5 -
 6
6 -
 7
7 -
8
-
9
-
10
-
11
-
12
-
13
-
14
-
15
-
16
-
17
-
18
-
19
-
20
-
21
-
22
-
23
-
24
-
25
-
26
-
27
-
28
-
29
-
30
-
31
-
32
-
33
-
34
-
35
-
36
-
37
-
38
-
39
-
40
-
41
-
42
-
43
-
44
-
45
-
46
-
47
-
48
-
49
-
50
-
51
-
52
-
53
-
54
-
55
-
56
-
57
-
58
-
59
-
60
-
61
-
62
-
63
-
64
-
65
-
66
-
67
-
68
-
69
-
70
-
71
-
72
-
73
-
74
-
75
-
76
-
77
-
78
 |
 |
E
CW-L300
User’s Guide
•
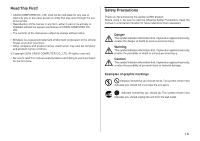
We recommend that you print on a disc* before you record anything
on it. Printing on a disc that already has data recorded on it can
cause the data to become corrupted.
•
Note that CASIO COMPUTER CO., LTD. shall not be held liable for
any loss or corruption of data on discs arising through the use of this
printer.
* CD-R, CD-RW, DVD-R, etc.
Be sure to read the Safety Precautions contained in this manual before trying
to use the printer for the first time, and always keep this manual on hand for
future reference.
RJA514733-10