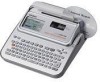
Casio CW-L300 User Guide - Page 10
Part 1 - DISC Mode - ribbon
 |
UPC - 079767168582
View all Casio CW-L300 manuals
Add to My Manuals
Save this manual to your list of manuals |
Page 10 highlights
Part 1 - DISC Mode Disc Printing Terms The following defines a few disc printing terms that are used in this part of the manual. ■ Print Surface This is the side of the disc that the printer will print on. Some discs may have manufacturer logos or other information pre-printed on this side. ■ Print Data This is the text, illustrations,and all other items that the printer will print onto the print surface of the disc. SPEECH Print data CONTEST Print surface ■ Print Areas These are the areas on the disc where the printer prints. The printer can print in two print areas: an upper print area and a lower printer area. Upper print area (AREA A) E 8 Lower print area (AREA B) Height: 16mm (5/8") Width: 74mm (2 15/16") DISC Mode Creating Disc Label Data The following are the general steps when preparing data for disc labeling. After inputting the required data, you can then use it to print directly onto the disc, or for output on a tape that you can affix to the disc case. Getting Ready • Connect the AC adaptor or load batteries (page 7 of the Startup Guide). • Load an ink ribbon cassette (page 11 of the Startup Guide). • If you plan to print a disc case label, load a tape cartridge (page 13 of the Startup Guide). General Flow for Creating a Disc Label Select the DISC Mode (page 9). 1. To create a new label from scratch, select NEW on the initial screen (page 9). To edit an existing label, select STORED DATA (page 54). 2. Select the print pattern you want to use (page 9). To edit the label data you were working on the last time you were using the printer, select LAST DATA (page 10 of the Startup Guide). 3. Select the format you want to use (page 10). 4. Input the text you want (page 41). 5. Select the text attributes you want. • Specify the font (page 50), select the style (page 52), and specify the text alignment (page 14). Print the label (page 20 of the Startup Guide) and store it in memory (page 54), if you want.
-
 1
1 -
2
-
3
-
4
-
 5
5 -
 6
6 -
 7
7 -
 8
8 -
 9
9 -
 10
10 -
 11
11 -
 12
12 -
 13
13 -
 14
14 -
 15
15 -
16
-
17
-
18
-
19
-
20
-
21
-
22
-
23
-
24
-
25
-
26
-
27
-
28
-
29
-
30
-
31
-
32
-
33
-
34
-
35
-
36
-
37
-
38
-
39
-
40
-
41
-
42
-
43
-
44
-
45
-
46
-
47
-
48
-
49
-
50
-
51
-
52
-
53
-
54
-
55
-
56
-
57
-
58
-
59
-
60
-
61
-
62
-
63
-
64
-
65
-
66
-
67
-
68
-
69
-
70
-
71
-
72
-
73
-
74
-
75
-
76
-
77
-
78
 |
 |
