Casio TE-3000S User's Manual - Page 11
Mount the cash register., Plug the cash register into a wall, outlet., Insert the mode key marked, - supplies
 |
View all Casio TE-3000S manuals
Add to My Manuals
Save this manual to your list of manuals |
Page 11 highlights
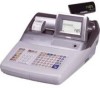
5. Mount the cash register. 1. Screw in 2 fixing screws bottom side of the register. 2. Stick rubber plate on the each corner of the 2 bottom side of the register. 3. Mount the cash register on the top of the drawer, ensuring that the feet on the bottom of the cash register go into the holes on the 1 drawer. 2 2 1 2 Getting Started 6. Plug the cash register into a wall outlet. Be sure to check the sticker on the side of the cash register to make sure that its voltage matches that of the power supply in your area. The printer will operate for a few seconds. Please do not pass the power cable under the drawer. 7. Insert the mode key marked "OW" into the mode switch. OW REG2 REG1 OFF RF PGM X1 Z1 X2/Z2 TE-3000S User's Manual 11 E
-
 1
1 -
2
-
3
-
4
-
5
-
 6
6 -
 7
7 -
 8
8 -
 9
9 -
 10
10 -
 11
11 -
 12
12 -
 13
13 -
 14
14 -
 15
15 -
 16
16 -
17
-
18
-
19
-
20
-
21
-
22
-
23
-
24
-
25
-
26
-
27
-
28
-
29
-
30
-
31
-
32
-
33
-
34
-
35
-
36
-
37
-
38
-
39
-
40
-
41
-
42
-
43
-
44
-
45
-
46
-
47
-
48
-
49
-
50
-
51
-
52
-
53
-
54
-
55
-
56
-
57
-
58
-
59
-
60
-
61
-
62
-
63
-
64
-
65
-
66
-
67
-
68
-
69
-
70
-
71
-
72
-
73
-
74
-
75
-
76
-
77
-
78
-
79
-
80
-
81
-
82
-
83
-
84
-
85
-
86
-
87
-
88
-
89
-
90
-
91
-
92
-
93
-
94
-
95
-
96
-
97
-
98
-
99
-
100
-
101
-
102
-
103
-
104
-
105
-
106
-
107
-
108
-
109
-
110
-
111
-
112
-
113
-
114
-
115
-
116
-
117
-
118
-
119
-
120
 |
 |

Getting Started
TE-3000S User’s Manual
11
E
Mount the cash register.
1.
Screw in 2 fixing screws bottom side of the
register.
2.
Stick rubber plate on the each corner of the
bottom side of the register.
3.
Mount the cash register on the top of the
drawer, ensuring that the feet on the bottom of
the cash register go into the holes on the
drawer.
Plug the cash register into a wall
outlet.
Be sure to check the sticker on the side of the cash
register to make sure that its voltage matches that of
the power supply in your area. The printer will
operate for a few seconds. Please do not pass the
power cable under the drawer.
Insert the mode key marked
“OW” into the mode switch.
5.
6.
7.
X1
Z1
X2/Z2
REG2
REG1
OFF
RF
PGM
OW
2
2
2
2
1
1