Clifford IntelliGuard 950 Owners Guide
Clifford IntelliGuard 950 Manual
 |
View all Clifford IntelliGuard 950 manuals
Add to My Manuals
Save this manual to your list of manuals |
Clifford IntelliGuard 950 manual content summary:
- Clifford IntelliGuard 950 | Owners Guide - Page 1
Intelliguard 950 Owner's Guide - Clifford IntelliGuard 950 | Owners Guide - Page 2
the unit has been damaged by accident, unreasonable use, neglect, improper service, installation or other causes not arising out of defects in materials or construction. SHALL BE STRICTLY LIMITED TO THE AUTHORISED DIRECTED DEALER'S PURCHASE PRICE OF THE UNIT. DIRECTED SHALL NOT BE RESPONSIBLE FOR ANY - Clifford IntelliGuard 950 | Owners Guide - Page 3
company name and address z Type of alarm installed z Year, make, model and colour of the vehicle z Vehicle registration number z Vehicle identification number z All security options installed on the vehicle trademarks and copyrights Bitwriter®, Clifford®, Code-Hopping™, Directed®, Doubleguard®, ESP - Clifford IntelliGuard 950 | Owners Guide - Page 4
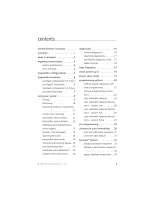
options 20 cliffnet wizard installation software programming 21 manual programming instructions 22 user selectable features . . . . .23 user selectable features descriptions - column one 24 user selectable features descriptions - column two 25 user selectable features descriptions - column - Clifford IntelliGuard 950 | Owners Guide - Page 5
blackjax* off warning indicator 35 system sensors and adjustments 35 glossary of terms 36 security & convenience expansions 38 health check 39 2 - Clifford IntelliGuard 950 | Owners Guide - Page 6
included z Intelliguard 950 Security trouble-free operation. In order to maximise the use of this system, please review this owner's guide carefully prior to using your system. You can print additional or replacement copies of this owner's guide by accessing the Clifford website at www.clifford - Clifford IntelliGuard 950 | Owners Guide - Page 7
Clifford Intelliguard 950 system is designed to be installed in any petrol or common rail diesel vehicle with a 12-volt battery. note: The Installation Certificate must be completed by your installer at the authorised dealer. Other than the remote controls, this system has no user-serviceable parts - Clifford IntelliGuard 950 | Owners Guide - Page 8
transmitter configurations Your Intelliguard 950 system has a 5-button and 4-button remote control. Your system Output Button note: This manual describes the features and accessories that are included with your system along with information about compatible Clifford accessories that are not - Clifford IntelliGuard 950 | Owners Guide - Page 9
standard configuration, but may also be customised using the CliffNet Wizard PC program. The buttons in all of the instructions in this manual correspond to a standard configuration transmitter. standard configuration for 5-button Radar2 transmitter Button The arming and disarming functions are - Clifford IntelliGuard 950 | Owners Guide - Page 10
twice, then These buttons disable the sensors. Button Button twice, then Button These buttons enter safe start mode for manual transmission vehicles and activate Autostart mode. (Requires optional Intellistart* accessory.) standard configuration for 4-button OEM Transmitter Button The arming - Clifford IntelliGuard 950 | Owners Guide - Page 11
buttons activate Accessory output C. and Buttons These buttons disable the sensors. and Buttons These buttons enter safe start mode for manual transmission vehicles and activate Autostart mode. (Requires optional Intellistart* accessory.) * This feature/accessory is not evaluated by Thatcham - Clifford IntelliGuard 950 | Owners Guide - Page 12
your system The buttons used in the instructions in this manual correspond to the standard transmitter configuration. If hear more than two chirps when arming, refer to the Diagnostics section of this guide. These extra chirps confirm a malfunction autobypass. The security system also can be - Clifford IntelliGuard 950 | Owners Guide - Page 13
z The Ultrasecure Immobilisation circuits prevent the vehicle from being started. z Installed sensors if tripped will trigger the system. The trig- gered sequence is Silencing section of this guide.) However, if the alarm completes the full trigger cycle when disarmed you will hear three chirps. - Clifford IntelliGuard 950 | Owners Guide - Page 14
sure to check with the installer for the location of the PlainView 2 Valet switch. Please refer to the Disarm/Valet Mode section of this guide for instructions to enter the pin permanently, please refer to the User-Selectable Features section of this guide. © 2004 directed electronics, inc. 11 - Clifford IntelliGuard 950 | Owners Guide - Page 15
transmitter sensor disable To temporarily disable a sensor input, arm the system, press twice and then . The lights will flash four times and all warn away trigger zones one, two, three, and eight are bypassed. Press the buttons again; the lights flash four times and both warn away and full - Clifford IntelliGuard 950 | Owners Guide - Page 16
auxiliary channel bypass Alarm sensor input zones one, two, three, and eight will be Mode: 1. Turn the ignition on. 2. Enter PIN code (the factory setting is written on the back of this manual). Your pin code has 4 digits. To enter a digit, you press and release the button of the plainview 2 - Clifford IntelliGuard 950 | Owners Guide - Page 17
Valet mode. transmitter valet mode The operations described in this section refer to transmitter buttons. Remember, the buttons used in all the instructions in this guide correspond to a Standard Configuration transmitter. This may not be how your transmitter is set up. To enter Valet Mode, press - Clifford IntelliGuard 950 | Owners Guide - Page 18
arm the system. low battery warning When the transmitter battery is low, the siren will generate a lowpitched tone when the alarm is disarmed. automatic noise abatement Alarm sounding is limited to ten 30-second siren duration cycles to meet European criteria and local noise pollution laws. © 2004 - Clifford IntelliGuard 950 | Owners Guide - Page 19
is armed/disarmed using the transmitter or the ignition is turned on. For more information, please refer to the Table of Zones section of this guide. diagnostics The microprocessor at the heart of your security system is constantly monitoring all of the switches and sensors that are connected to it - Clifford IntelliGuard 950 | Owners Guide - Page 20
Zones section). The system will retain this information in its memory. Refer to the Multiple Event Total Recall section of this guide. arm/disarm diagnostic chart Action Arm Arm Chirps 2 4 Light Flashes 2 4 Arm 2 (5 sec.) 4 2 (5 sec.) 4 Arm 2 (10 sec.) 4 2 (10 sec.) 4 Disarm 3 3 Disarm - Clifford IntelliGuard 950 | Owners Guide - Page 21
a specific input. The standard input assignments are listed below, along with spaces to write in any optional sensors or switches you have had installed. If the Warning Zone response is triggered, the LED will not report it. Zone - Number of LED Flashes 1 2 3 4 5 6 7 8 9 10 Description Dealer - Clifford IntelliGuard 950 | Owners Guide - Page 22
recall the stored state from memory. This means if the unit is in Valet Mode and the battery is disconnected for any reason, such as servicing the car, when the battery is reconnected the unit will still be in Valet Mode. This applies to all states of the system including arm - Clifford IntelliGuard 950 | Owners Guide - Page 23
Programming options control what your system does during normal operation, and require few or no additional parts. However, some may require additional installation labour. Following is a list of the program settings, with the factory settings in bold: z Active arming (only with the transmitter) or - Clifford IntelliGuard 950 | Owners Guide - Page 24
installation software programming Cliffnet Wizard provides access to all available system features and some that are not available when manually need for programming grids and lengthy programming sequences. For a complete guide to system programming using the Cliffnet Wizard refer to the Cliffnet - Clifford IntelliGuard 950 | Owners Guide - Page 25
manual programming instructions It is a good idea to document changes by taking note of all feature changes made in programming mode. To enter the User the button. You have now entered the feature selection position of the User Selectable Features grid. 4. Column select - Press the same number of - Clifford IntelliGuard 950 | Owners Guide - Page 26
Refer to the Feature Descriptions sections of this guide for important notes and descriptions of the system switch. The siren will chirp three times to indicate programming mode has been exited. user selectable features First Press Then Press Add new remote (autolearn)*** Change PIN code New - Clifford IntelliGuard 950 | Owners Guide - Page 27
user selectable features descriptions - column one add new remote (auto learn) Auto-learn new five-button Radar2 remote controls to the system in the standard button - Clifford IntelliGuard 950 | Owners Guide - Page 28
and labour may be required. user selectable features descriptions - column two change PIN code This feature allows you to change your personal PIN code. For more information, please refer to the PIN Programming section of this guide. remote valet on/off z On: The alarm can be put into valet mode - Clifford IntelliGuard 950 | Owners Guide - Page 29
it will not trigger for 15 seconds after a door is opened allowing the user to enter the vehicle and disarm the system via the PlainView 2 Valet switch. z All system settings (except PIN and remote programming) in the User Programming grid will be reset to their default factory setting as indicated - Clifford IntelliGuard 950 | Owners Guide - Page 30
when triggered. z Off: The system cannot enter BlackJax mode. user selectable features descriptions - column three The features in this column pertain the remaining channels. To program the following channels use the instructions above for programming the arm/disarm button except you only need - Clifford IntelliGuard 950 | Owners Guide - Page 31
accessory b output The transmitter channel programmed into this feature will activate the accessory output. silent mode The transmitter channel programmed into this feature will arm/disarm the system, but the siren will not chirp. remote valet The transmitter channel programmed into this feature - Clifford IntelliGuard 950 | Owners Guide - Page 32
digits; each digit can be from 0-9. note: A PIN code cannot begin with a zero. Programming Procedure 1. Enter the feature location in the installer programming grid. 2. Immediately press and release switch. of the PlainView 2 Valet 3. Select each digit by pressing 1-9 times, and then press to - Clifford IntelliGuard 950 | Owners Guide - Page 33
d. Press and release two times, and then press once. You will hear two chirps. 4. Wait for two siren chirps after a five second pause or five seconds after the last digit has been entered if using less than four digit code number. 5. Turn off the ignition; the siren will chirp three times. 6. The - Clifford IntelliGuard 950 | Owners Guide - Page 34
disarm auto-immobilisation when active, follow any of the sequences listed below. z Turn ignition on and press the arm/disarm button. z Arm the alarm and then disarm the alarm. z Turn the ignition on and enter the system valet/PIN code. one-time valet feature This feature allows the system to be put - Clifford IntelliGuard 950 | Owners Guide - Page 35
blackjax* feature Clifford's exclusive BlackJax feature provides a safe and effective means of recovering your vehicle after a carjacking by monitoring the door input, brakes, and engine speed. Simply get - Clifford IntelliGuard 950 | Owners Guide - Page 36
3. Press and release brake pedal. a. System sees the brake pedal pressed. b. System then begins monitoring the engine speed. c. System sees the engine speed at two times idle. BlackJax* begins 20 second countdown. 4. After a 20 second countdown: a. 5 siren chirps as reminder to enter PIN code. b. - Clifford IntelliGuard 950 | Owners Guide - Page 37
blackjax* deactivation sequence To deactivate BlackJax turn the key on and then enter the PIN code at any time. bypass blackjax temporarily This feature allows you to easily bypass BlackJax activation when another person drives your vehicle that should not know your PIN code. (IE: valet parking, - Clifford IntelliGuard 950 | Owners Guide - Page 38
the LED will flash 10 times as warning that the BlackJax has been temporarily bypassed. system sensors and adjustments Your system was installed with a Tilt/Motion sensor and one of 3 different sensor configuration options. Either, Digital Dual Zone proximity sensor, Ultrasonic sensor, or Glass - Clifford IntelliGuard 950 | Owners Guide - Page 39
with proprietary acoustic software to determine if the glass has been struck. For sensitivity adjustments for all sensors, please return to your installing Clifford dealer. glossary of terms Control Unit: The "brain" of your system. Usually hidden underneath the dash area of the vehicle. It houses - Clifford IntelliGuard 950 | Owners Guide - Page 40
installed in the engine compartment of the vehicle. It is responsible for generating the "chirps" you hear, as well as the sound you hear while the alarm is triggered. The siren has it's own built-in back-up battery, so even if a thief were to cut all the wires the siren would - Clifford IntelliGuard 950 | Owners Guide - Page 41
require the vehicle's engine to be left running after a long journey. This system is able to perform this function safely and securely by leaving the alarm and Ultrasecure Immobiliser armed while the turbo timer is active. (An optional relay will be required.) 38 - Clifford IntelliGuard 950 | Owners Guide - Page 42
recommends you return to your installing Clifford dealer to have your system checked for correct operation. The first check is due one year after the installation date and at yearly intervals thereafter. note: There may be a small charge incurred for this service. © 2004 directed electronics, inc - Clifford IntelliGuard 950 | Owners Guide - Page 43
OE, specification is subject to change without notice. Some vehicles require optional parts/wiring and a few are incompatible with some features. Directed® is committed to delivering world-class quality products and services that excite and delight our customers. Directed Electronics UK office Unit
-
 1
1 -
 2
2 -
 3
3 -
 4
4 -
 5
5 -
 6
6 -
 7
7 -
8
-
9
-
10
-
11
-
12
-
13
-
14
-
15
-
16
-
17
-
18
-
19
-
20
-
21
-
22
-
23
-
24
-
25
-
26
-
27
-
28
-
29
-
30
-
31
-
32
-
33
-
34
-
35
-
36
-
37
-
38
-
39
-
40
-
41
-
42
-
43
 |
 |

Intelliguard 950
Owner’s Guide