Cobra XRS 9965 XRS9965_70G_MANL - Page 10
EasySet Menu - with gps
 |
View all Cobra XRS 9965 manuals
Add to My Manuals
Save this manual to your list of manuals |
Page 10 highlights
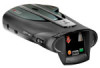
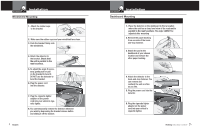
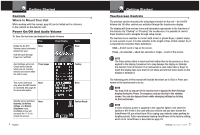
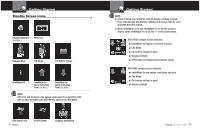
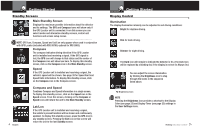
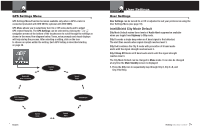
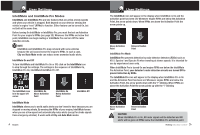
Your Detector EasySet Menu EasySet Menu Intro Operation Customer Assistance Warranty • EasySet Menu gives you quick and easy access to all the settings on your detector. It is used to select: User SecondarynIcons Settings (see page 19) n Alert Settings (see page 24) n GPS settings only if the GPS Locator is installed (see page 38) Refer also to the Menu Flow Diagrams on pages 16, 17 and 18 for User Settings, Alert SettinNgotisce, and GPS Settings to easily navigate to the setting you want to change. All settings are stored in memory when the power is turned Off and will be recalled when the power is turned back On. There are also shortcuts to some frequently accessed settings. The shortcuts are described in the sections relating to those settings. NOTE You cannot enter Menu mode during an alert. The unit will not detect signals while in Menu mode. During menu setting, if no icons are clicked or pressed for 15 seconds, the unit will automatically exit Menu mode and save the most recent settings. If power is turned Off while in Menu mode, settings are saved to those in effect before Menu mode was entered. To use EasySet Menu: 1. Click on the Menu icon on the touchscreen to reach the opening menu screen. 2. Choose whether you want to change: a. User Settings - click on the User icon. (see page 19) b. Alert Settings - click on the Alert icon. (see page 25) c. GPS Settings - click on the GPS icon. (see page 38) 14 English Your Detector EasySet Menu Intro Operation Customer 3A.ssCistlainccek 3 4 Warranty the or navigation arrows at the bottom of the touchscreen to step backward or forward through the chosen settings loop until the desired setting is reached. Secondary Icons 4. Click on the check box icon to toggle the setting On and Off. Some settings will have multiple choices rather than On and Off; in those cases, click on the choice you want. Other Notice settings will display minus (-) and plus (+) icons to allow you to step through a series of options for the setting. A few settings involve a series of steps which are explained on those screens. 5. Repeat steps 3 and 4 to move to and set the next desired setting(s). Continue to use the 3and4 navigation arrows to set the other options. 6. Click the Exit icon at the bottom center of the display when finished. This will save your settings, exit the EasySet Menu mode, and return the unit to the Main Standby screen. NOTE If no icons are clicked or pressed for ten seconds while in the select menu screen, the unit will return to the Main Standby screen. If no icons are clicked or pressed for fifteen seconds while in any sub-menu screen, the unit will return to the Main Standby screen. Nothing Comes Close to a Cobra® 15
-
 1
1 -
2
-
3
-
4
-
 5
5 -
 6
6 -
 7
7 -
 8
8 -
 9
9 -
 10
10 -
 11
11 -
 12
12 -
 13
13 -
 14
14 -
 15
15 -
16
-
17
-
18
-
19
-
20
-
21
-
22
-
23
-
24
-
25
-
26
-
27
 |
 |