Cobra XRS 9965 XRS9965_70G_MANL - Page 5
Installation - power cord
 |
View all Cobra XRS 9965 manuals
Add to My Manuals
Save this manual to your list of manuals |
Page 5 highlights
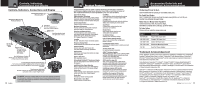
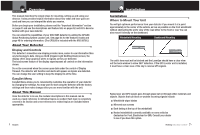
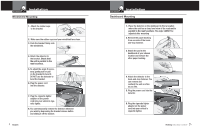
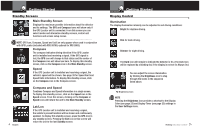
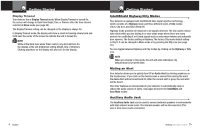
Your Detector Installation Intro Operation Customer Windshield MouAnssitstianncge Warranty Secondary Icons 1. Attach the rubber cups to the bracket. 2. Make sure the rubber cups and your windshield are clean. Notice 3. Push the bracket firmly onto the windshield. 4. Attach the detector to the bracket. Check that the unit is parallel to the road's surface. 5. To adjust the angle if necessary, gently push or pull on the bracket to bend it. DO NOT use the detector to bend the bracket. 6. Plug the power cord into the detector. 7. Plug the cigarette lighter adapter on the power cord into your vehicle's cigarette lighter. 8. You can temporarily remove the detector whenever you wish by depressing the bracket release button and sliding it off the bracket. 4 English Your Detector Installation Intro Operation Customer Dashboard MouAnssitstiannceg Warranty Secondary Icons 1. Place the detector on the dashboard to find a location where the unit has a clear, level view of the road and is parallel to the road's surface. The angle CANNOT be adjusted after mounting 2. Remove the paper backing from one side of the hook- Notice and-loop fastener. 3. Attach the pad to the dashboard at your chosen location and remove the other paper backing. 4. Attach the detector to the hook-and-loop fastener. You can remove and reattach the unit as often as you like. 5. Plug the power cord into the detector. 6. Plug the cigarette lighter adapter on the power cord into your vehicle's cigarette lighter. Nothing Comes Close to a Cobra® 5
-
 1
1 -
 2
2 -
 3
3 -
 4
4 -
 5
5 -
 6
6 -
 7
7 -
 8
8 -
 9
9 -
 10
10 -
 11
11 -
12
-
13
-
14
-
15
-
16
-
17
-
18
-
19
-
20
-
21
-
22
-
23
-
24
-
25
-
26
-
27
 |
 |
