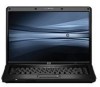
Compaq 6730s HP Compaq 6730s and 6735s Notebook PC - Maintenance and Service G - Page 76
prevent damage to the display assembly, support it before removing the screws.
 |
UPC - 884420582700
View all Compaq 6730s manuals
Add to My Manuals
Save this manual to your list of manuals |
Page 76 highlights
Remove the display cable: 1. Turn the computer right-side up, with the front toward you. 2. Open the computer as far as possible. 3. Disconnect the display panel cable (1) from the system board. CAUTION: There is a ground loop off the display panel cable that is secured to the left hinge. Be sure you do not pull or damage the cable. 4. Disconnect the camera and microphone module cables (2) from the system board, and then remove the cables from the routing path (3). 5. Remove the wireless antenna cables (4) from the clips and routing channels built into the top cover. Remove the display assembly: CAUTION: The display assembly will be unsupported when the following screws are removed. To prevent damage to the display assembly, support it before removing the screws. 1. Remove the four slotted Torx T8M2.5×7.0 screws (1) that secure the display assembly to the computer. CAUTION: There is a ground loop off the display panel cable (2) that is secured to the left hinge. Be sure you do not pull or damage the cable. 68 Chapter 4 Removal and replacement procedures
-
 1
1 -
2
-
3
-
4
-
5
-
6
-
7
-
8
-
9
-
10
-
11
-
12
-
13
-
14
-
15
-
16
-
17
-
18
-
19
-
20
-
21
-
22
-
23
-
24
-
25
-
26
-
27
-
28
-
29
-
30
-
31
-
32
-
33
-
34
-
35
-
36
-
37
-
38
-
39
-
40
-
41
-
42
-
43
-
44
-
45
-
46
-
47
-
48
-
49
-
50
-
51
-
52
-
53
-
54
-
55
-
56
-
57
-
58
-
59
-
60
-
61
-
62
-
63
-
64
-
65
-
66
-
67
-
68
-
69
-
70
-
 71
71 -
 72
72 -
 73
73 -
 74
74 -
 75
75 -
 76
76 -
 77
77 -
 78
78 -
 79
79 -
 80
80 -
 81
81 -
82
-
83
-
84
-
85
-
86
-
87
-
88
-
89
-
90
-
91
-
92
-
93
-
94
-
95
-
96
-
97
-
98
-
99
-
100
-
101
-
102
-
103
-
104
-
105
-
106
-
107
-
108
-
109
-
110
-
111
-
112
-
113
-
114
-
115
-
116
-
117
-
118
-
119
-
120
-
121
-
122
-
123
-
124
-
125
-
126
-
127
-
128
-
129
-
130
-
131
-
132
-
133
-
134
-
135
-
136
-
137
-
138
-
139
-
140
-
141
-
142
-
143
-
144
-
145
-
146
-
147
-
148
-
149
-
150
-
151
-
152
-
153
-
154
-
155
-
156
-
157
-
158
-
159
-
160
-
161
-
162
-
163
-
164
-
165
-
166
-
167
-
168
-
169
-
170
-
171
 |
 |
