Craftsman 21194 Operation Manual
Craftsman 21194 - 7-1/4 in. Sliding Compound Miter Saw Manual
 |
View all Craftsman 21194 manuals
Add to My Manuals
Save this manual to your list of manuals |
Craftsman 21194 manual content summary:
- Craftsman 21194 | Operation Manual - Page 1
® Model No. 137.211940 C US CAUTION: Before using this Miter Saw, read this manual and follow all its Safety Rules and Operating Instructions • Safety Instructions • Installation • Operation • Maintenance • Parts List Customer Help Line For Technical Support 1-800-843-1682 Sears Parts & Repair - Craftsman 21194 | Operation Manual - Page 2
CRAFTSMAN ONE YEAR FULL WARRANTY If this Craftsman commercial or rental purposes. This warranty does not include expendable parts, such as lamps, batteries, bits or blades. This warranty also have other rights which vary from state to state. Sears, Roebuck and Co., Hoffman Estates, IL 60179 WARNING ] - Craftsman 21194 | Operation Manual - Page 3
Detent Stops Bevel Positive Stops 9-1/32 in. 0, 15, 22.5, 31.6, 45°R & L 0, 45° L CUTTING CAPACITY: Crosscut Miter 45 ° R & L Bevel 45 ° L 45 ° Miter and 45 ° Bevel 2 in. x 8 in. 2 in. x 6 in. 1-1/2 in. x 8 in. 1-1/2 in. x 6 in. i_J_ WARNING] To avoid electrical hazards, fire hazards - Craftsman 21194 | Operation Manual - Page 4
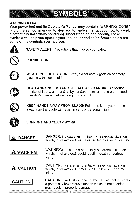
power tool and its Operator's Manual may contain "WARNING iCONS" (a picture symbol intended to alert you to, and/or instruct you how to avoid, manual before using this product. KEEP HANDS AWAY FROM BLADE: Failure to keep your hands away from the blade will result in serious 3ersonal injury. SUPPORT - Craftsman 21194 | Operation Manual - Page 5
iNSTRUCTiONS understood the following. . READ and become familiar with the entire Operator's Manual. LEARN the tool's application, limitations and possible hazards. . KEEP GUARDS other jewelry which may get caught in moving parts. Nonslip footwear is recommended. Wear protective hair covering sears. - Craftsman 21194 | Operation Manual - Page 6
TOOLS FROM POWER SOURCE before servicing, and when changing accessories such as Consult this Operator's Manual for recommended accessories. The PARTS. Before further use of the tool, a guard or other part safest performance. Follow instructions for lubricating and Always operate saw in well- - Craftsman 21194 | Operation Manual - Page 7
SPECiFiC SAFETY iNSTRUCTiONS FOR THiS COMPOUND MITER SAW . DO NOT operate the miter saw until it is completely assembled and installed according to these instructions. . iF YOU ARE NOT thoroughly familiar with the operation of miter saws, seek guidance from your supervisor, instructor or other - Craftsman 21194 | Operation Manual - Page 8
21.NEVERcutsmallpiecesI.f the workpiecebeingcutwouldcause yourhandorfingersto be within 6-3/4in.of thesawbladethe workpieceis toosmall. 22.PROVIDEadequatesupporto the sidesofthesawtablefor longwork pieces. 23.NEVERusethemitersawinan areawithflammableliquidsor gases. 24.NEVERusesolventsto clean - Craftsman 21194 | Operation Manual - Page 9
1. Use only identical replacement parts when servicing a tool with double insulation. Servicing should be performed by a SAW. Check the saw blade to make sure it turns freely. If the blade is free, try to start the saw again. If the motor still does not start, refer to the TROUBLESHOOTING GUIDE - Craftsman 21194 | Operation Manual - Page 10
nowbestartedandthecutfinished. excessiveheatanddamporwetareas. 4. FUSESmay"blow"or circuit Use a separate electrical circuit for breakersmaytripfrequentlyif: a. MOTORisoverloade-d your tools. This circuit must not be less than a #18 wire with a 9 A time lag overloadincganoccurifyoufeed fuse. - Craftsman 21194 | Operation Manual - Page 11
miter saw. Follow instructions that accompany accessories. Use of improper accessories may cause hazards. o The use of any cutting tool except 7-1/4 in. saw recommended by Sears. o Read warnings and conditions on your CARBIDE TIPPED SAW BLADE. Do not operate the saw without the proper saw blade guard - Craftsman 21194 | Operation Manual - Page 12
Supplied Blade Wrench Not supplied Adjustable Wrench Phillips Screwdriver 6mm Hex Wrench Slotted Screwdriver Combination Square COMBINATION SQUARE MUST BE TRUE Should not gap or overlap when square is flipped over (see dotted figure). Draw light line on board along this edge. Straight edge - Craftsman 21194 | Operation Manual - Page 13
cord until the missing or damaged part is correctly replaced. Call 1=800-843=1682 for missing or damaged parts. o To avoid electric shock, use only identical replacement parts when servicing double insulated tools. Call 1-800=4-MY=HOME ® for replacement parts. Miter saw Hold-down clamp Dust bag - Craftsman 21194 | Operation Manual - Page 14
Upperbladeguard Bevelockhandle Hold-dowcnlamp Switchhandle ON/OFFtrigger switch Motor Laserguide Tableinsert Mountinghole Lowerbladeguard Miterhandle Turntable LaserON/OFFswitch Hold-downlatch Slidecarriage Sawblade Positivestoplockinglever Positivemiterdetent Slidecarriage lockknob Bevelscale - Craftsman 21194 | Operation Manual - Page 15
torageandtransportation. INSTRUCTIOONROPERATOR'S MANUAL- Bookleat ccompanying to rotate the table, and to rotate the saw to a right or left cutting position. MITER SCALE - Measures the miter angle 0 ° to 45 ° left and right. MOUNTING HOLES - To mount the miter saw to a stable surface. ON/OFF TRIGGER - Craftsman 21194 | Operation Manual - Page 16
miter is a type of joint where the two parts to be joined are cut at an angle, and typically the finished joint forms a 90-degree angle. Also commonly spelled "mitre part of the workpiece which will be cut. SET - The distance between two saw cut without using a fence (guide), hold down or other proper - Craftsman 21194 | Operation Manual - Page 17
miter saw to the power source until it is completely assembled and adjusted, and you have read and understood this Operator's Manual. iNSTALLING THE MITER HANDLE (FIG. A) 1. Thread the miter handle (1) into the hole located at the front of the miter 2C:: _Z_\:: JK \_ SAW BLADE WRENCH (FIG. D) - Craftsman 21194 | Operation Manual - Page 18
handle. Only lift machine by the base hand holds. RELEASING CUTTING HEAD (FIG. F) i_l_ WARNING] To avoid injury and damage to the saw, transport or store the miter saw with the cutting head locked in the down position. Never use the hold down latch to hold the cutting head in a down position for - Craftsman 21194 | Operation Manual - Page 19
or clamp the saw to its support. Mounting instructions 1. For stationary use, place the saw in the desired location, directly on a workbench where there is room for handling and proper support of the workpiece. The base of the saw has four mounting holes. Bolt the base of the miter saw (1) to the - Craftsman 21194 | Operation Manual - Page 20
plug is not connected to the power source outlet. o Only use a 7-1/4 inch diameter blade. o NEVER cut metals or masonry products with this tool. This miter saw is designed for use on wood and wood-like products only. . Locate the arbor lock (5) below motor lower cover. (Fig. K) 8. Press the arbor - Craftsman 21194 | Operation Manual - Page 21
INSTALLING BLADE (FIG. J, K, L) i_ WARNING] Un-plug the miter saw before changing/installing the blade. 1. Install a 7-1/4 in. blade with the table and check for any contact with the metal base or the turn table. THE LASER GUIDE (FIG. M) 1. To turn laser on, press on/off rocker switch (1) to "ON" - Craftsman 21194 | Operation Manual - Page 22
instructions. Your tool is equipped with the Laser Trac ®cutting guide using Class II laser beam. The laser beam will enable you to preview the saw blade path on the stock to be cut before starting the miter saw. This laser guide should be performed by authorized service center personnel. BEVEL STOP - Craftsman 21194 | Operation Manual - Page 23
° to the table. 3. If the blade is not at 45 ° to the miter table, tilt the cutting arm to the right, loosen the Iocknut (9) on the alignment. 5. Repeat steps 1 through 4 until the blade is at 45 ° to the miter table. 6. Tighten bevel lock handle (8) and Iocknut (9) when alignment is achieved. Fig - Craftsman 21194 | Operation Manual - Page 24
angles from 0 ° to 45 ° to the left, and 0 ° to 45 ° to the right. The miter saw table has nine of the most common angle setttings with positive stops at 0 °, 15 °, 22.5 °, 31.6 °, and 45 °. These positive stops position the blade at - Craftsman 21194 | Operation Manual - Page 25
to see that the blade does not extend more than 1/4 in. below the table insert, and does not touch the control arm throat or any part of the base or table, if the maximum depth needs readjusting: 1. Loosen the stop knob (1) while moving the cutting head down until the blade extends - Craftsman 21194 | Operation Manual - Page 26
latch, bevel lock handle and cover plate screws. o Review and understand all safety instructions and operating procedures in this Operator's Manual. (SAFETY & OPERATIONS) o Review the MAINTENANCE and TROUBLESHOOTING GUIDE for your miter saw. o To avoid injury or possible death from electrical shock - Craftsman 21194 | Operation Manual - Page 27
Operator's Manual and labels affixed to the tool. Learn its application and limitations as well as the specific potential hazards peculiar to this tool. To avoid injury from accidental contact with moving parts, do not do layout, assembly, or setup work on the miter saw while any parts are moving - Craftsman 21194 | Operation Manual - Page 28
use another person as a substitute for a table extension, or as an additional support for a workpiece that is longer or wider than the basic miter saw table, or to help feed, support, or pull the workpiece. o Do not use this saw to cut small pieces. If the workpiece being cut would cause your hand - Craftsman 21194 | Operation Manual - Page 29
not stop within 10 seconds, unplug the saw and follow the instructions in TROUBLESHOOTING GUIDE section. Before freeing jammed material: o Release trigger switch. o Wait for all moving parts to stop. o Unplug the miter saw. _-- No Hand Zone _ 13-1/2 in. BASIC SAW OPERATIONS [_, WARNING] For your - Craftsman 21194 | Operation Manual - Page 30
To avoid injury from materials being thrown, always unplug the saw to avoid accidental starting, and remove small pieces of Fig. V MITER CUT (FIG. W) 1. When a miter cut is required, unlock the miter table by turning the miter handle (1) counterclockwise. 2. While holding the miter handle, lift - Craftsman 21194 | Operation Manual - Page 31
the table at the desired angle. Release the positive stop locking lever and lock the miter handle. SLIDE CUTTING WIDE BOARDS UP TO 8 in. WIDE (FIG. Z) [,_ WARNING be drawn back completely then pushed forward when sawing. o Let the blade reach full speed before cutting. This will help reduce - Craftsman 21194 | Operation Manual - Page 32
2. Set both the desired bevel angle and/or the miter angle and lock into position. 3. Use a hold from materials being thrown, always unplug the saw to avoid accidental starting and remove small incorrectly or try to cut the workpiece without the support of the fence. This will cause the blade to - Craftsman 21194 | Operation Manual - Page 33
(2)until it touchesthestopplate(1). 4. Cuttwoparallegl roovesasshown below. Fig. BB 2 Cut these grooves with saw Use a chisel to cut out the middle WORKPIECE SUPPORT (FIG. CO) Long pieces need extra support. The support should be placed under the workpiece. Keep your hand holding the workpiece - Craftsman 21194 | Operation Manual - Page 34
, remember that the settings are interdependent; changing one changes the other, as well. Fig. FF Fig. EE e Miter saw table miter at 450, bevel at 0° miter at 0°, bevel at 450 NOTE: Always 3erform a dry run cut so you can determine if the operation being attempted is possible before power is - Craftsman 21194 | Operation Manual - Page 35
table set at RIGHT 31.6 °. 3. LEFT side is finished piece. 31.6 ° Left inside corner-Right side il. Position bottom of molding against fence. i2. Miter table set at LEFT 31.6 °. 31.6 ° Left 3. LEFT side is finished piece. Outside corner-Left side il. Position bottom of molding against fence. i2 - Craftsman 21194 | Operation Manual - Page 36
CROWNMOLDING CHART Compound Miter saw Miter and bevel Angle settings Wall to Crown Molding Angle Angle Between Walls 67 68 8.12 4.72 4.33 3.94 3.84 3.18 2.78 2.36 1.97 1.88 1.18 0.79 0.39 45/45 ° Crown Molding Miter Setting 20.61 20.21 19.81 19.42 19.03 18.64 18.28 17.86 17.48 17.09 16.71 16.32 - Craftsman 21194 | Operation Manual - Page 37
acetone, lacquer thinner or similar highly volatile solvents to clean the miter saw. Fig. HH o To avoid injury from unexpected starting or saw. o For your safety, this saw is double=insulated. To avoid electrical shock, fire or injury, use only parts identical to those identified in the parts - Craftsman 21194 | Operation Manual - Page 38
Periodically, sawdust will accumulate under the work table and base. This could cause difficulty in the movement of the worktable when setting up a miter cut. Frequently blow out or vacuum up the sawdust. i,A WARNING 1 Wear proper eye protection to keep debris from entering eyes when removing - Craftsman 21194 | Operation Manual - Page 39
moving, replacing the blade or making adjustments. TROUBLESHOOTING GUIDE = MOTOR PROBLEM PROBLEM CAUSE Brake does 1. Motor brushes not See REMOVING OR INSTALLING THE BLADE section. 4. Replace brushes. 5. Contact Sears Service Center. Motor does not start Brush spark when switch released. 1. - Craftsman 21194 | Operation Manual - Page 40
TROUBLESHOOTING GUIDE =SAW OPERATION PROBLEM PROBLEM CAUSE SUGGESTED CORRECTIVE ACTION Blade hits table. 1. Misalignment. 1. See ADJUSTMENT -Setting Angle of cut not 1. Miter table unlocked. accurate. Can 2. Sawdust under table. not adjust miter. Cutting Depth section. 1. See OPERATION - - Craftsman 21194 | Operation Manual - Page 41
MITER SAW MODEL NO. 137.211940 [_ WARNING] When servicing use only CRAFTSMAN replacement parts. Use of any other parts many create a HAZARD or cause product damage. Any attempt to repair or replace electrical parts on this Miter Saw M610T 6 2TgK OPERATORS MANUAL 0KTQ CABLE CLAMP 2TgN LABEL - Craftsman 21194 | Operation Manual - Page 42
7=1/4 in. COMPOUND MITER SAW SCHEMATIC OKBA OKTS MODEL NO. 137.211940 OKTQ\ 0C_'5 OJBO i i i 2TgR _2CD2 2RSH / - Craftsman 21194 | Operation Manual - Page 43
7=1/4 in. COMPOUND MITER SAW MODEL NO. 137.211940 PARTS LiST FOR MOTOR I.D. & WASHER SCREW HEX. NUT BRUSH HOLDER ASS'Y CARBON BRUSH ASS'Y BRUSH COVER CUTTER SHAFT SPACER HELIX GEAR FLOW GUIDE MOTOR COVER WAVE WASHER BALL BEARING GEAR BOX FIELD ASS'Y ARMATURE ASS'Y Size M5_0.8-6 M5 _ 12-65 M6"1.0 - Craftsman 21194 | Operation Manual - Page 44
who sold it! For the replacement parts, accessories and owner's manuals that you need to do-it-yourself. For Sears professional installation of home appliances and items (Canada) www.sears.com www.sears.ca 1i 11iii/To purchase a protection agreement on a product serviced by Sears: 1"800-827"
-
 1
1 -
 2
2 -
 3
3 -
 4
4 -
 5
5 -
 6
6 -
 7
7 -
8
-
9
-
10
-
11
-
12
-
13
-
14
-
15
-
16
-
17
-
18
-
19
-
20
-
21
-
22
-
23
-
24
-
25
-
26
-
27
-
28
-
29
-
30
-
31
-
32
-
33
-
34
-
35
-
36
-
37
-
38
-
39
-
40
-
41
-
42
-
43
-
44
 |
 |

Operator's
Manual
CRRFrSr4RH
°
7-1/4 in. SLiDiNG COMPOUND
MITER SAW WiTH LASER TRAC
®
Model No. 137.211940
C
US
CAUTION:
Before using this Miter Saw,
read this manual and follow
all its Safety Rules and
Operating
Instructions
•
Safety Instructions
•
Installation
•
Operation
•
Maintenance
•
Parts List
Customer
Help
Line
For
Technical
Support
1-800-843-1682
Sears
Parts
&
Repair
Center
1-800-488-1222
Sears,
Roebuck
and Co., Hoffman
Estates,
IL 60179 USA
Visit
our Craftsman
website:
www.sears.com/craftsman
Part No. 137211940001
Printed in China