Craftsman 21194 Operation Manual - Page 33
ontheline.Usea
 |
View all Craftsman 21194 manuals
Add to My Manuals
Save this manual to your list of manuals |
Page 33 highlights
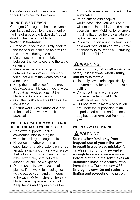
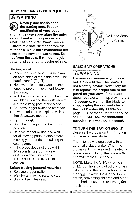
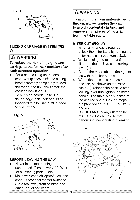
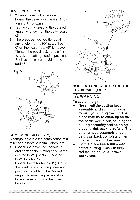
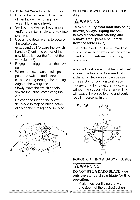
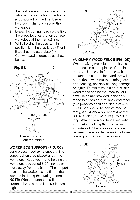
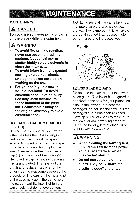
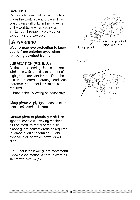
theworkpieceandpositiononthe tablesotheinsidetip oftheblade is positioneodnthe line.Usea holddownclampto securethe workpiece. 2. Lowerthecuttingheadsothetip of thebladetouchesthetopsurface workpieceat themarkedline. 3. Whileholdingtheupperarmin positiontu, rnthestopknob(2)until it touchesthestopplate(1). 4. Cuttwoparallegl roovesasshown below. Fig. BB 2 Cut these grooves with saw Use a chisel to cut out the middle WORKPIECE SUPPORT (FIG. CO) Long pieces need extra support. The support should be placed under the workpiece. Keep your hand holding the workpiece positioned 6-3/4 inches or more away from the blade. The support must let the workpiece lay flat on the work table during the cutting operation. NOTE: When mounted on a flat surface, the saw table is 3-1/4 inches high. Fig. CO 3-1/4 in. AUXILIARY WOOD FENCE (FIG. DD) When making multiple or repetitive cuts that result in cut-off pieces of one inch or less, it is possible for the saw blade to catch the cut-off piece and throw it out of the saw or into the blade guard and housing, possibly causing damage or injury. To minimize this an auxiliary wood fence can be mounted to your saw. Holes are provided in the saw fence to attach an auxiliary wood fence (this provides additional depth of cut). This fence should be constructed of straight auxiliary wood approximately 3/4 in. thick by 1-1/2 in. high by 16 in. long. Attach the wood fence securely and make a full depth cut to make a blade slot. Check for interference between the wood fence and the lower blade guard. Adjust if necessary. Fig. DD / Auxiliary fence \ Blade slot
-
 1
1 -
2
-
3
-
4
-
5
-
6
-
7
-
8
-
9
-
10
-
11
-
12
-
13
-
14
-
15
-
16
-
17
-
18
-
19
-
20
-
21
-
22
-
23
-
24
-
25
-
26
-
27
-
 28
28 -
 29
29 -
 30
30 -
 31
31 -
 32
32 -
 33
33 -
 34
34 -
 35
35 -
 36
36 -
 37
37 -
 38
38 -
39
-
40
-
41
-
42
-
43
-
44
 |
 |
