Craftsman 21194 Operation Manual - Page 20
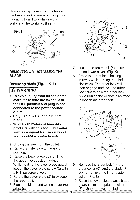
plywood, using, themounting, holeson, thebase.UseC-clamps, toclampthis, mountingboardtoastablework,
 |
View all Craftsman 21194 manuals
Add to My Manuals
Save this manual to your list of manuals |
Page 20 highlights
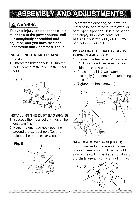
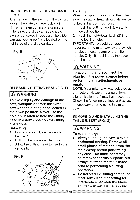
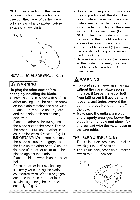
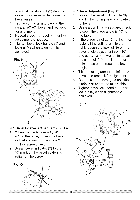
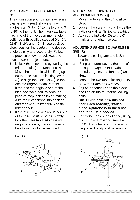
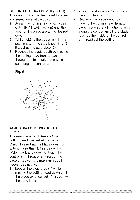
plywooudsingthemountinhgoleson thebase.UseC-clampsto clampthis mountingboardto a stablework surfaceat theworksite(.Fig.I) Fig. I 3/4 Inch plywood Fig. J REMOVING OR INSTALLING THE BLADE Removing Blade (Fig. J, K, L) i,A WARNING] o To avoid injury from an accidental start, make sure the switch is in the OFF position and plug is not connected to the power source outlet. o Only use a 7-1/4 inch diameter blade. o NEVER cut metals or masonry products with this tool. This miter saw is designed for use on wood and wood-like products only. . Locate the arbor lock (5) below motor lower cover. (Fig. K) 8. Press the arbor lock, holding it in firmly while turning the blade clockwise. The arbor lock will then engage and lock the arbor. Continue to hold the arbor lock, while turning the wrench clockwise to loosen the arbor bolt. Fig. K 1. Unplug the saw from the outlet. 2. Raise the miter saw to the upright position. 3. Raise the lower blade guard (1) to the uppermost position. (Fig. J) 4. While holding the lower blade guard, loosen the cover plate screw (2) with a Phillips screwdriver. 5. Rotate the cover plate (3) to expose the arbor bolt. 6. Place the blade end wrench over the arbor bolt. 9. Remove the arbor bolt (4), the arbor collar (6), and the blade (7). Do not remove the inner blade collar. (Fig. L) 10. Raise the lower clear plastic blade guard (1) to the upright position (Eig J) to[emovetheb!ade .
-
 1
1 -
2
-
3
-
4
-
5
-
6
-
7
-
8
-
9
-
10
-
11
-
12
-
13
-
14
-
 15
15 -
 16
16 -
 17
17 -
 18
18 -
 19
19 -
 20
20 -
 21
21 -
 22
22 -
 23
23 -
 24
24 -
 25
25 -
26
-
27
-
28
-
29
-
30
-
31
-
32
-
33
-
34
-
35
-
36
-
37
-
38
-
39
-
40
-
41
-
42
-
43
-
44
 |
 |
