Craftsman 21194 Operation Manual - Page 18
I_l_ Warning]
 |
View all Craftsman 21194 manuals
Add to My Manuals
Save this manual to your list of manuals |
Page 18 highlights
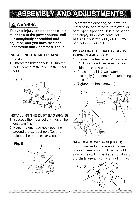
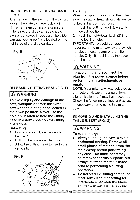
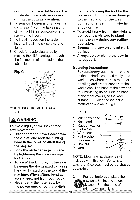
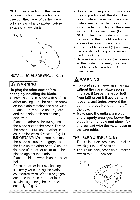
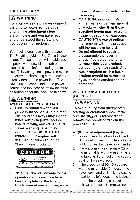
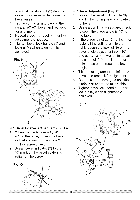
UNLOCKING THE SLIDE CARRIAGE (FIG. E) After removing the saw from the carton, loosen the slide carriage lock knob (1). When transporting or storing the miter saw, the slide carriage should always be locked in position. The slide carriage lock knob (1) is located on the right side of the slide carriage. Fig. E Locking When transporting or storing the miter saw, the cutting head should always be locked in the down position. 1. Push the cutting head down to its lowest position. 2. Push the hold-down latch (2) into the locking hole. IMPORTANT: To avoid damage, never carry the miter saw by the switch handle, the cutting arm or the miter handle. Only lift machine by the base hand holds. RELEASING CUTTING HEAD (FIG. F) i_l_ WARNING] To avoid injury and damage to the saw, transport or store the miter saw with the cutting head locked in the down position. Never use the hold down latch to hold the cutting head in a down position for cutting operations. Unlocking 1. Push down slightly on the switch handle (1). 2. Pull out the hold-down latch (2). 3. Allow the cutting head to rise to the up position. Fig. F 2 I,A WARNING] To avoid injury, disconnect the plug from the power source before performing any adjustments or repair. NOTE: Your miter saw was adjusted at the factory. However, during shipment slight misalignment may have occurred. Check the following settings and adjust if necessary prior to using this miter SaW. REMOVING AND iNSTALLING THE TABLE iNSERT (FIG. G) I_ WARNING] To avoid injury: o Always unplug the saw to avoid accidental starting. Remove all small pieces of material from the table cavity before performing any cuts. The table insert may be removed for this purpose, but always reattach the table insert prior to performing a cutting operation. o Do not start the sliding compound miter saw without checking for interference between the blade and table insert. Damage could
-
 1
1 -
2
-
3
-
4
-
5
-
6
-
7
-
8
-
9
-
10
-
11
-
12
-
 13
13 -
 14
14 -
 15
15 -
 16
16 -
 17
17 -
 18
18 -
 19
19 -
 20
20 -
 21
21 -
 22
22 -
 23
23 -
24
-
25
-
26
-
27
-
28
-
29
-
30
-
31
-
32
-
33
-
34
-
35
-
36
-
37
-
38
-
39
-
40
-
41
-
42
-
43
-
44
 |
 |
