Cub Cadet CC 600 Operation Manual - Page 13
Cleaning the Mower, Blade Care
 |
View all Cub Cadet CC 600 manuals
Add to My Manuals
Save this manual to your list of manuals |
Page 13 highlights
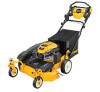
5 4 Figure 4-5 5. Position the hose back over the deck and press the hose back into place on the deck. 6. Refill the engine with new oil. Refer to the Engine Operator's Manual for information regarding the volume and weight of engine oil. Cleaning the Mower Smart Jet Your mower's deck is equipped with a water port on its surface as part of its deck wash system. Use the Smart Jet to rinse grass clippings from the deck's underside and prevent the buildup of corrosive chemicals. Complete the following steps AFTER EACH MOWING: WARNING! Before using the deck wash system, always disengage the blade control, stop engine and remove key to prevent unintended starting. 1. Position the mower on a level, clear location on your lawn, near enough for your garden hose to reach. CAUTION: Make certain the mower's discharge chute is directed AWAY from your house, garage, parked cars, etc. 2. Remove the fast attach deck wash nozzle from the mower deck and thread it onto the end of your garden hose. 3. Attach garden hose with the deck wash nozzle to the water port on your deck's surface. See Figure 4-6. 4. Turn the water ON and start the engine as described in the Controls & Operation section. 5. While in the operator's position behind the mower, depress the lockout lever and pull the blade control back against the drive control to engage the blades. 6. Remain in the operator's position with the cutting deck engaged for a minimum of two minutes, allowing the underside of the cutting deck to thoroughly rinse. 7. Release the blade control to disengage the cutting deck and stop the blades. 8. Push and hold the ON/OFF switch until the mower engine stops. 9. Turn the water OFF and detach the deck wash nozzle from the water port on your deck's surface. After cleaning your deck with the Smart Jet system, start the mower's engine, return to the operator's position and engage the blades. Keep the cutting deck running for a minimum of two minutes, allowing the underside of the cutting deck to thoroughly dry. Mower Deck For every 25 hours of operation and before offseason storage, it is recommended to remove the deck cover and remove any grass clipping or other debris. NOTE: Drive belt assembly not shown in figure 1-7 for clarity. 1. Remove the four shoulder screws securing the deck shroud to the mower deck. Note: When removing the deck shroud two tabs (a) on the shroud are inserted into the mower frame. Tabs must be inserted into the frame when reinstalling the deck shroud. 2. Remove the deck shroud from the mower deck. Note: DO NOT use water to remove grass clippings or debris. 3. Using a brush or compressed air, remove any grass clippings or debris present. 4. Position the deck shroud onto the mower deck. 5. Using the four shoulder screws, secure the deck shroud to the mower deck. (a) Blade Care WARNING! Shut the engine OFF and remove ignition key (if so equipped) before removing the cutting blade(s) for sharpening or replacement. Protect your hands by using heavy gloves when grasping the blades. WARNING! Periodically inspect the blade and/or spindle for cracks or damage, especially after you've struck a foreign object. Do not operate the machine until damaged components are replaced. To remove the blades, proceed as follows: 1. Allow the engine to run until it is out of fuel. Do not attempt to pour fuel from the engine. Disconnect spark plug wire. Refer to Engine Operator's Manual. 2. Turn mower on its side making sure that the air filter and the carburetor are facing up. 3. Place a block of wood between the center deck housing baffle and the cutting blade to prevent the blade from turning when loosening the blade's hex flange nut. See Figure 4-7. Figure 4-8 4. Remove the hex flange nuts (a) that secures the blades to the spindle assembly. See Figure 4-8. Note: The hex flange nuts are secured using a standard thread pattern. Turn counter-clockwise to loosen. (b) (a) Figure 4-6 Figure 4-7 Figure 4-9 5. Remove the blades (b) from the mowing deck. Section 4 - Service 13
-
 1
1 -
2
-
3
-
4
-
5
-
6
-
7
-
 8
8 -
 9
9 -
 10
10 -
 11
11 -
 12
12 -
 13
13 -
 14
14 -
 15
15 -
 16
16 -
 17
17 -
 18
18 -
19
-
20
-
21
-
22
-
23
-
24
-
25
-
26
-
27
-
28
-
29
-
30
-
31
-
32
 |
 |
