DIRECTV R16-300 User Guide - Page 72
A/V Connection Better Quality
 |
View all DIRECTV R16-300 manuals
Add to My Manuals
Save this manual to your list of manuals |
Page 72 highlights
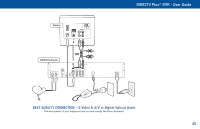
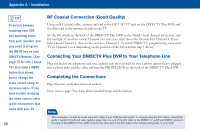
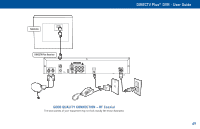
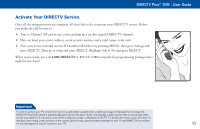
Appendix A - Installation TIP To switch between watching your VCR and watching video from your receiver, you may need to program the INPUT key on your DIRECTV Remote. (See page 72 for info.) Some TVs also have a menu button that allows you to change the video source using an onscreen menu. If you have trouble changing the video source, refer to the instructions that came with your TV. 66 A/V Connection (Better Quality) Using the A/V cable, connect the white, red and yellow plugs from one end of the A/V cable to the AUDIO L (white) and R (red) and VIDEO (yellow) output jacks on the back of the DIRECTV Plus DVR. Connect the other end of the A/V cable to the corresponding A/V input jacks on your TV. If hooking up a VCR, using another A/V cable, connect the white, red and yellow plugs from one end of the A/V cable to the AUDIO L (white) and R (red) and VIDEO (yellow) output jacks on the back of the DIRECTV Plus DVR. Connect the other end of the A/V cable to the corresponding input jacks on your VCR. Then, run an A/V cable from the VCR's A/V output to the TV's A/V inputs. This will allow you to watch videotapes. NOTE: If your TV only has one set of A/V input jacks, this connection can also be made by running a RF cable from the VCR's out to TV jack to the TV's antenna in jack. Now, continue on page 68, "Connecting Your DIRECTV Plus DVR to Your Telephone Line." Important If your TV only has one audio input jack use AUDIO L (white) jack on the back of the DIRECTV Plus DVR to make the connection.
-
 1
1 -
2
-
3
-
4
-
5
-
6
-
7
-
8
-
9
-
10
-
11
-
12
-
13
-
14
-
15
-
16
-
17
-
18
-
19
-
20
-
21
-
22
-
23
-
24
-
25
-
26
-
27
-
28
-
29
-
30
-
31
-
32
-
33
-
34
-
35
-
36
-
37
-
38
-
39
-
40
-
41
-
42
-
43
-
44
-
45
-
46
-
47
-
48
-
49
-
50
-
51
-
52
-
53
-
54
-
55
-
56
-
57
-
58
-
59
-
60
-
61
-
62
-
63
-
64
-
65
-
66
-
 67
67 -
 68
68 -
 69
69 -
 70
70 -
 71
71 -
 72
72 -
 73
73 -
 74
74 -
 75
75 -
 76
76 -
 77
77 -
78
-
79
-
80
-
81
-
82
-
83
-
84
-
85
-
86
 |
 |
