Dell 1125 Mono Laser User's Guide - Page 33
Setting Up Your Printer
 |
View all Dell 1125 Mono Laser manuals
Add to My Manuals
Save this manual to your list of manuals |
Page 33 highlights
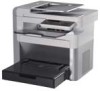
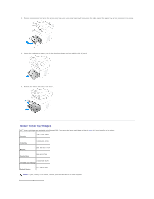
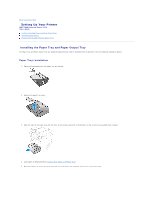
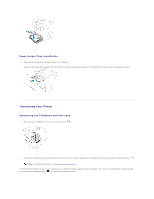
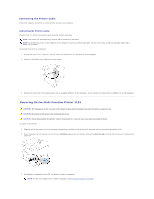
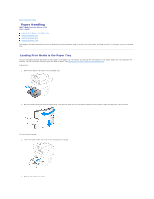
Back to Contents Page Setting Up Your Printer Dell™ Multi-Function Printer 1125 User's Guide Installing the Paper Tray and Paper Output Tray Connecting Your Printer Powering On the Multi-Function Printer 1125 Installing the Paper Tray and Paper Output Tray The Paper Tray and Paper Output Tray are supplied separately and must be installed prior to operation. See the following installation guides. Paper Tray Installation 1. Remove all packaging from the paper tray and discard. 2. Remove the paper tray cover. 3. Align the tabs on the paper tray with the slots on the printer and push in the direction of the arrow until an audible click is heard. 4. Load paper as described below (Loading Print Media in the Paper Tray). 5. Place the paper tray cover on top of the paper tray and slide in the direction shown until it clicks into place.
-
 1
1 -
2
-
3
-
4
-
5
-
6
-
7
-
8
-
9
-
10
-
11
-
12
-
13
-
14
-
15
-
16
-
17
-
18
-
19
-
20
-
21
-
22
-
23
-
24
-
25
-
26
-
27
-
 28
28 -
 29
29 -
 30
30 -
 31
31 -
 32
32 -
 33
33 -
 34
34 -
 35
35 -
 36
36 -
 37
37 -
 38
38 -
39
-
40
-
41
-
42
-
43
-
44
-
45
-
46
-
47
-
48
-
49
-
50
-
51
-
52
-
53
-
54
-
55
-
56
-
57
-
58
-
59
-
60
-
61
-
62
-
63
-
64
-
65
-
66
-
67
-
68
-
69
-
70
-
71
-
72
-
73
-
74
-
75
-
76
-
77
-
78
-
79
-
80
-
81
-
82
-
83
-
84
-
85
-
86
-
87
-
88
-
89
-
90
-
91
-
92
-
93
-
94
-
95
-
96
-
97
-
98
-
99
-
100
-
101
-
102
-
103
-
104
-
105
-
106
-
107
-
108
-
109
-
110
-
111
 |
 |
