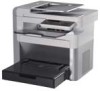
Dell 1125 Mono Laser User's Guide - Page 6
Clearing LCD Error Messages
 |
View all Dell 1125 Mono Laser manuals
Add to My Manuals
Save this manual to your list of manuals |
Page 6 highlights
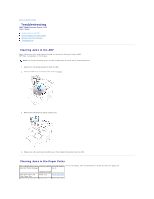
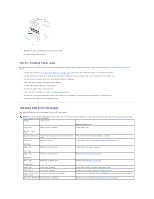
3. Replace the toner cartridge and close the front cover. Printing automatically resumes. Tips for Avoiding Paper Jams By selecting the correct paper types, most paper jams can be avoided. When a paper jam occurs, follow the steps outlined in Clearing Jams in the Paper Paths. l Follow the procedures in Loading Print Media in the Paper Tray. Ensure that the adjustable guides are correctly positioned. l Do not overload the paper tray. Ensure that the paper is below the paper capacity mark on the inside wall of the paper tray. l Do not remove the paper from the tray while your printer is printing. l Flex, fan, and straighten the paper before loading. l Do not use creased, damp, or curled paper. l Do not mix paper types in the paper tray. l Use only recommended print media. See Recommended Paper. l Ensure that the recommended print side of print media is facing down in the paper tray and facing up in the bypass tray. l Ensure that the duplex unit is installed correctly. Clearing LCD Error Messages The following table lists error messages that the LCD may display. NOTE: The Status Monitor displays the same errors but in a different format, though the cause and solution are identical. See Using the Dell MFP 1125 Status Monitor for more information. Display Likely cause Tray error Paper tray not installed. Suggested solutions Install paper tray. Reinsert Input tray Engine Comms Error Printer engine may be damaged or connection faulty. No Paper No paper in trays. Restart printer. If message reappears, call Dell. Insert paper. (see Loading Print Media in the Paper Tray) Add Paper Paper Jam Paper jam in fuser area. Remove jam (see Fuser Area Jam). Fuse Area Paper Jam Paper jam in drum area. Remove jam (see Fuser Area Jam). Drum Area Paper Jam Paper jam in feeder area. Remove jam (see Paper Feed Jam). Feeder Area Toner Low Toner 75% depleted. Toner Empty Toner 95% depleted. Invalid Toner/ No Incorrect or empty toner installed. Toner Found Drum Life Exceeded The drum life is depleted. Toner almost empty. Prepare replacement toner. Replace toner (see Replacing the Toner Cartridge). Install new Dell™ genuine toner cartridge(see Replacing the Toner Cartridge). Replace drum cartridge(see Replacing the Drum Cartridge).
-
 1
1 -
 2
2 -
 3
3 -
 4
4 -
 5
5 -
 6
6 -
 7
7 -
 8
8 -
 9
9 -
 10
10 -
 11
11 -
 12
12 -
13
-
14
-
15
-
16
-
17
-
18
-
19
-
20
-
21
-
22
-
23
-
24
-
25
-
26
-
27
-
28
-
29
-
30
-
31
-
32
-
33
-
34
-
35
-
36
-
37
-
38
-
39
-
40
-
41
-
42
-
43
-
44
-
45
-
46
-
47
-
48
-
49
-
50
-
51
-
52
-
53
-
54
-
55
-
56
-
57
-
58
-
59
-
60
-
61
-
62
-
63
-
64
-
65
-
66
-
67
-
68
-
69
-
70
-
71
-
72
-
73
-
74
-
75
-
76
-
77
-
78
-
79
-
80
-
81
-
82
-
83
-
84
-
85
-
86
-
87
-
88
-
89
-
90
-
91
-
92
-
93
-
94
-
95
-
96
-
97
-
98
-
99
-
100
-
101
-
102
-
103
-
104
-
105
-
106
-
107
-
108
-
109
-
110
-
111
 |
 |
