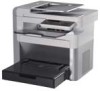
Dell 1125 Mono Laser User's Guide - Page 35
Powering On the Multi-Function Printer 1125
 |
View all Dell 1125 Mono Laser manuals
Add to My Manuals
Save this manual to your list of manuals |
Page 35 highlights
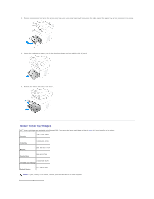
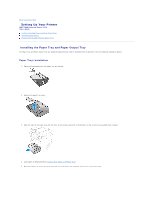
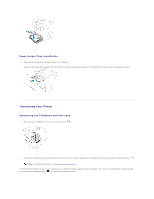
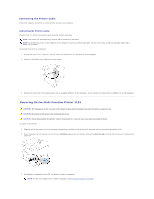
Connecting the Printer Cable The printer supports connection as a local printer serving a local computer. Connecting the Printer Locally A local printer is a printer connected to your computer using a USB cable. NOTE: USB cables are sold separately. Contact Dell to purchase a USB cable. NOTE: Connecting the printer to the USB port of the computer requires a certified USB cable. You will need to buy a USB 2.0 compliant cable that is about 3 m in length. To connect the printer to a computer: 1. Ensure that the printer, computer, and any other attached devices are powered off and unplugged. 2. Connect a USB cable to the USB port on your printer. 3. Connect the other end of the cable directly into an available USB port on the computer; do not connect the other end to a USB port on a USB keyboard. Powering On the Multi-Function Printer 1125 CAUTION: The fusing area at the rear part of the inside of your printer becomes hot once the printer is powered on. CAUTION: Be careful of hot areas when accessing this area. CAUTION: Do not disassemble the printer when it is powered on. If you do, you may receive an electric shock. To power on the printer: 1. Plug one end of the power cord into the power receptacle at the back of the printer and the other end into a properly grounded outlet. 2. Press the power switch to power on the printer. Initializing appears on the display, followed by Warming Up indicating that the printer is preparing for operation. 3. Once Ready is displayed on the LCD, the printer is ready for operation. NOTE: To view your display text in another language, see Changing the Display Language.
-
 1
1 -
2
-
3
-
4
-
5
-
6
-
7
-
8
-
9
-
10
-
11
-
12
-
13
-
14
-
15
-
16
-
17
-
18
-
19
-
20
-
21
-
22
-
23
-
24
-
25
-
26
-
27
-
28
-
29
-
 30
30 -
 31
31 -
 32
32 -
 33
33 -
 34
34 -
 35
35 -
 36
36 -
 37
37 -
 38
38 -
 39
39 -
 40
40 -
41
-
42
-
43
-
44
-
45
-
46
-
47
-
48
-
49
-
50
-
51
-
52
-
53
-
54
-
55
-
56
-
57
-
58
-
59
-
60
-
61
-
62
-
63
-
64
-
65
-
66
-
67
-
68
-
69
-
70
-
71
-
72
-
73
-
74
-
75
-
76
-
77
-
78
-
79
-
80
-
81
-
82
-
83
-
84
-
85
-
86
-
87
-
88
-
89
-
90
-
91
-
92
-
93
-
94
-
95
-
96
-
97
-
98
-
99
-
100
-
101
-
102
-
103
-
104
-
105
-
106
-
107
-
108
-
109
-
110
-
111
 |
 |
