Dell 1230c Color Laser Printer User's Guide - Page 25
Maintenance, to be halted for any reason. - toner cartridge waste container for
 |
View all Dell 1230c Color Laser Printer manuals
Add to My Manuals
Save this manual to your list of manuals |
Page 25 highlights
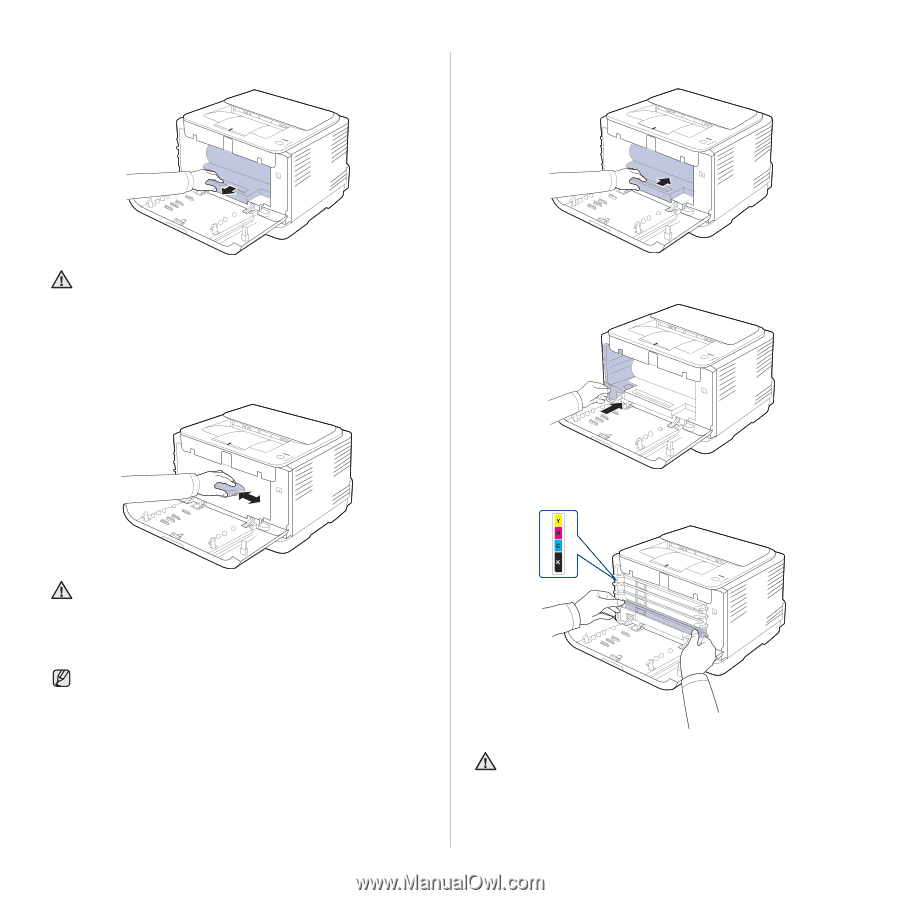
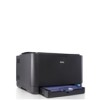
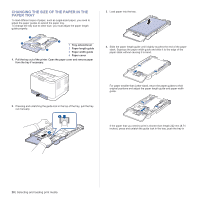
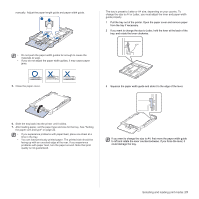
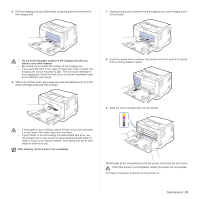
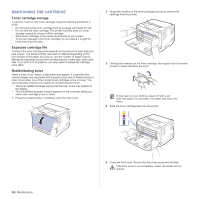
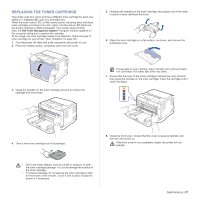
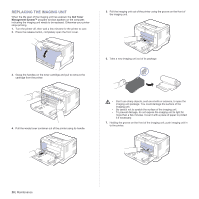
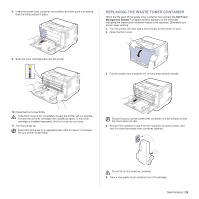
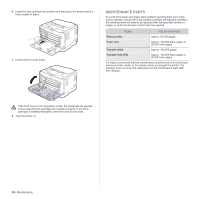
5. Pull the imaging unit out of the printer using the groove on the front of the imaging unit. 7. Holding the groove on the front of the imaging unit, push imaging unit in to the printer. • Do not touch the green surface on the imaging unit with your hands or any other material. • Be careful not to scratch the surface of the imaging unit. • If you leave the front cover open for more than a few minutes, the imaging unit can be exposed to light. This will cause damage to the imaging unit. Close the front cover should the installation need to be halted for any reason. 6. With a dry lint-free cloth, wipe away any dust and spilled toner from the toner cartridges area and their cavities. 8. Insert the waste toner container into position and then push it to ensure that it is firmly seated in place. 9. Slide the toner cartridge back into the printer. • If toner gets on your clothing, wipe it off with a dry cloth and wash it in cold water. Hot water sets toner into fabric. • If your printer or its surrounding is contaminated with toner, we recommend you to use a cloth or tissue dampened with water to clean it. If you use a vacuum cleaner, toner blows into the air then might be harmful to you. After cleaning, let the printer to dry completely. 10. Reinstall all the compartments into the printer, and close the front cover. If the front cover is not completely closed, the printer will not operate. 11. Plug in the power cord and turn the printer on Maintenance | 25
-
 1
1 -
2
-
3
-
4
-
5
-
6
-
7
-
8
-
9
-
10
-
11
-
12
-
13
-
14
-
15
-
16
-
17
-
18
-
19
-
 20
20 -
 21
21 -
 22
22 -
 23
23 -
 24
24 -
 25
25 -
 26
26 -
 27
27 -
 28
28 -
 29
29 -
 30
30 -
31
-
32
-
33
-
34
-
35
-
36
-
37
-
38
-
39
-
40
-
41
-
42
-
43
-
44
-
45
-
46
-
47
-
48
-
49
-
50
-
51
-
52
-
53
-
54
-
55
-
56
-
57
-
58
-
59
-
60
-
61
-
62
-
63
-
64
-
65
-
66
-
67
-
68
-
69
-
70
-
71
-
72
-
73
-
74
 |
 |