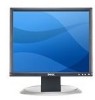
Dell 1704FPV User Guide - Page 13
Using the Front Panel Buttons, image, see Troubleshooting Your Monitor. - usb
 |
View all Dell 1704FPV manuals
Add to My Manuals
Save this manual to your list of manuals |
Page 13 highlights
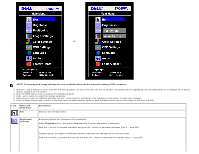
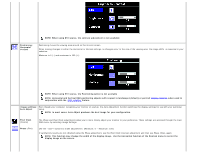
1. Turn off your computer and disconnect the power cable. 2. Connect either the white DVI or blue VGA cables to the connectors on the computer and the monitor. 3. Connect the USB cable that was included with your monitor to the computer and the upstream USB connector on the monitor. Once this cable is connected to the computer and the monitor, you can use the USB connectors on the monitor. 4. Connect any USB devices. 5. Connect the power cables 6. Turn on your monitor and computer. If you do not see an image, push the input select button and ensure the correct input source is selected. If you still do not see an image, see Troubleshooting Your Monitor. Using the Front Panel Buttons Use the buttons on the front of the monitor to adjust the image settings. The Menu button is used to open the on-screen display (OSD), exit from menus and sub-menus, and to exit the OSD. See Using the OSD OSD menu / select Use the Input Select button to select between two different video signals that may be connected to your monitor. NOTE: The floating 'Dell - self-test Feature Check' dialog appears (against a black background) if the monitor cannot sense a video signal. Depending upon the selected input, one of the dialogs shown below will scroll continually.
-
 1
1 -
2
-
3
-
4
-
5
-
6
-
7
-
 8
8 -
 9
9 -
 10
10 -
 11
11 -
 12
12 -
 13
13 -
 14
14 -
 15
15 -
 16
16 -
 17
17 -
 18
18 -
19
-
20
-
21
-
22
-
23
-
24
-
25
-
26
-
27
-
28
-
29
-
30
-
31
-
32
-
33
-
34
-
35
-
36
-
37
-
38
-
39
-
40
-
41
-
42
-
43
-
44
-
45
-
46
-
47
-
48
-
49
-
50
-
51
-
52
-
53
-
54
-
55
-
56
-
57
 |
 |
