Dell 962 Owner's Manual
Dell 962 Manual
 |
View all Dell 962 manuals
Add to My Manuals
Save this manual to your list of manuals |
Dell 962 manual content summary:
- Dell 962 | Owner's Manual - Page 1
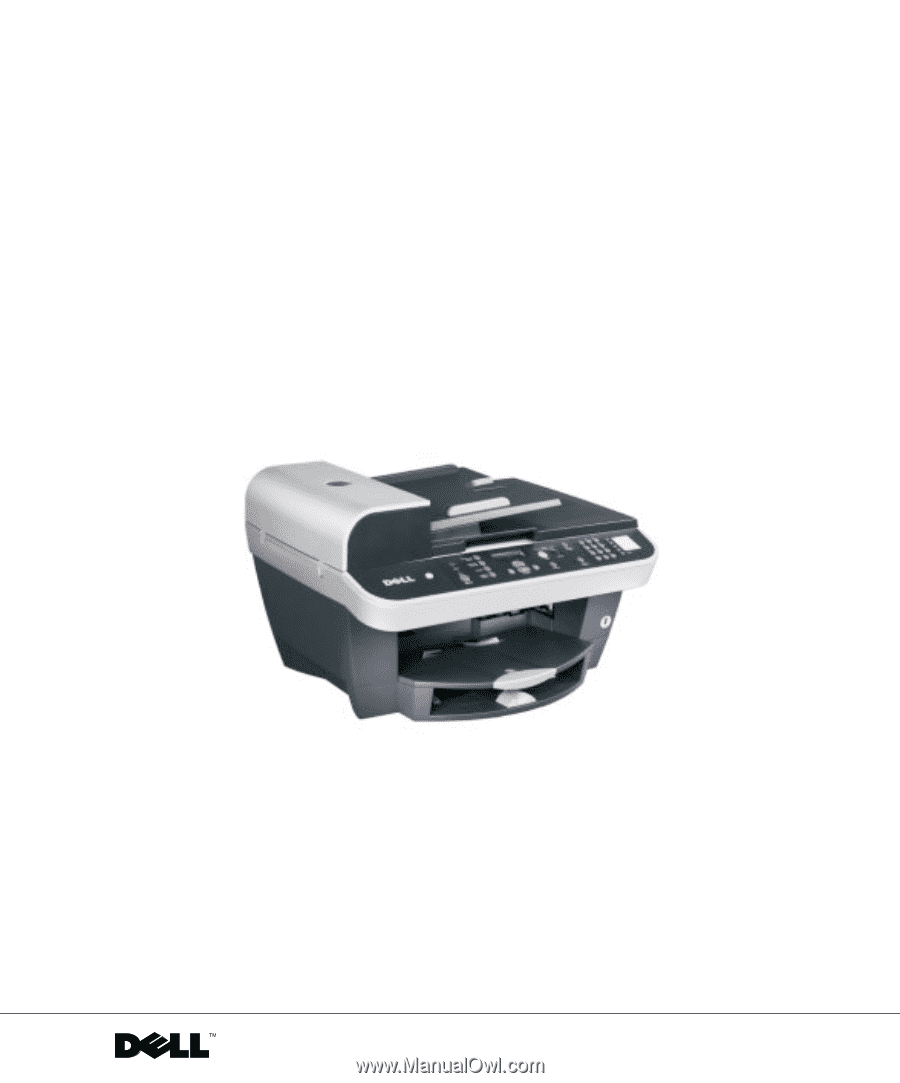
Dell™ Photo All-in-One Printer 962 Owner's Manual Look Inside For: • Ordering Supplies • Getting Started • Using Your Printer • Understanding the Software • Maintenance and Troubleshooting www.dell.com/supplies | support.dell.com - Dell 962 | Owner's Manual - Page 2
Ink Cartridges and Supplies Your Dell™ Photo All-In-One Printer 962 includes software installed to detect the ink levels in the printer. During a print job, a screen appears on your computer to warn you of low ink levels. You can order ink online at www.dell 674 4881 231622 64 Contact your local - Dell 962 | Owner's Manual - Page 3
use of your printer. NOTICE: A NOTICE indicates either potential damage to hardware or loss of data and tells you how to avoid the problem. CAUTION: in Technical Data and Computer Software clause at DFARS 252.227-7013 and in applicable FAR provisions: Dell Inc., One Dell Way, Round Rock, Texas, 78682 - Dell 962 | Owner's Manual - Page 4
www.dell.com/supplies | support.dell.com - Dell 962 | Owner's Manual - Page 5
Paper Into the Paper Support 34 Load an Original Document Into the ADF 36 Placing Your Original Document on the Scanner Glass 38 2 Using the Printer Printing 39 Printing a Document 39 Printing Collated Copies of Your Document 39 Printing Photos 40 Printing More Than one Page on a Sheet of - Dell 962 | Owner's Manual - Page 6
62 Manually Dialing a Fax While Listening to a Telephone Line (On Hook Dial 64 Broadcast Send 64 Adding Fax Numbers From Which to Block Faxes 65 Using Auto Fax Convert 65 3 Understanding the Software Using the Dell Printer Solution Center 67 Using the Dell All-In-One Center 68 6 Contents - Dell 962 | Owner's Manual - Page 7
71 Aligning Ink Cartridges 74 Cleaning the Ink Cartridge Nozzles 75 5 Troubleshooting Setup Problems 77 Computer Problems 77 Removing and Reinstalling Software 78 Printer Problems 79 General Problems 80 Fax Problems 80 Paper Problems 81 Error Messages and Lights 84 Improving Print Quality - Dell 962 | Owner's Manual - Page 8
Limited Warranties and Return Policy 110 Limited Warranty for Dell-Branded Hardware Products (U.S. Only 110 Total Satisfaction Return Policy (U.S. Only 113 Dell Inc. Ink and Toner Cartridges Limited Warranties . . . . . 114 Dell Software License Agreement 114 Regulatory Notices 116 Index 119 - Dell 962 | Owner's Manual - Page 9
in the user documentation, to a professional service person. CAUTION: Do not use the fax feature during a lightning storm. Do not set up this product or make any electrical or cabling connections, such as the power cable or telephone, during a lightning storm. CAUTION: SAFETY INSTRUCTIONS 9 - Dell 962 | Owner's Manual - Page 10
www.dell.com | support.dell.com 10 CAUTION: SAFETY INSTRUCTIONS - Dell 962 | Owner's Manual - Page 11
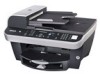
Printer unit 8 Description: Scan, copy, or fax multiple page documents and/or legal sized documents. Panel on the printer you use to control copying, scanning, faxing, and printing. For more information, see "Using the Operator Panel" on page 15. Unit you lift to gain access to the ink cartridges - Dell 962 | Owner's Manual - Page 12
dell.com | support.dell.com Number: 4 5 6 7 8 Part: Paper input tray ADF input tray Top cover with integrated ADF exit tray PictBridge connector Paper exit tray Description: Where you load paper into the printer. Load original documents in the printer. Recommended for scanning, copying, or faxing - Dell 962 | Owner's Manual - Page 13
or ISDN (integrated services digital network) without using a digital line filter to the printer. 13 USB connector Connects your printer to a computer. 14 Rear access door Open to remove paper jams. 15 Power cord connector Supplies power to the printer. NOTE: The power supply is removable - Dell 962 | Owner's Manual - Page 14
Guide on your Drivers and Utilities CD. Setting Up Your Printer NOTE: The Dell Photo All-In-One Printer 962 supports Microsoft® Windows® 2000 and Windows XP. To setup your printer, follow the steps on your Setting Up Your Printer poster. If you encounter problems during setup, see "Troubleshooting - Dell 962 | Owner's Manual - Page 15
one is installed). 2 Choose the correct operator panel for your language. 3 Position the clips on the printer, and then press down. Using the Operator Panel The operator panel buttons allow you to scan, copy, fax and customize documents without connecting to a computer. The printer is on when Power - Dell 962 | Owner's Manual - Page 16
www.dell.com | support.dell.com The display features: • Printer status • Messages • Menus 1 2 3 4 5 6 7 8 9 10 11 12 Number 1 2 3 4 5 6 7 8 9 10 13 14 15 16 17 18 19 20 21 Part: Power Fax LED Scan LED Copy LED Number of Copies Reduce/Enlarge LCD (Liquid Crystal Display) Menu Color - Dell 962 | Owner's Manual - Page 17
shown on the printer display. • In copy mode: Select the number of copies you want to make. To select a mode for your printer • Copy • Fax • Scan NOTE: The selected mode is lit. You can: • Select from the following copy qualities: Draft, Normal, or Photo. • Select a fax resolution: Standard, Fine - Dell 962 | Owner's Manual - Page 18
www.dell.com | support.dell.com Number 19 Part: Cancel 20 Auto Answer 21 Speed Dial buttons Purpose: Press to: • Cancel a scan, print, or copy job in progress. • Exit a menu. • Clear a fax number or end a fax transmission and return the display to the fax default. • Clear current settings and - Dell 962 | Owner's Manual - Page 19
Scan Mode Menu Items ORIGINAL SIZE Auto Detect Letter B5 A4 A5 A6 Wallet 3x5 4x6 5x7 8x10 L 2L POWER SAVE After 30 min After 60 min Never Immediately After 10 min CLEAR : Leave this on Auto Detect (default) unless the size of the document you printed is not satisfactory. Getting Started 19 - Dell 962 | Owner's Manual - Page 20
www.dell.com | support.dell.com From this menu: Power Save Clear Settings Set Defaults Language You can: Select a time to begin reducing power: • After 30 min (default) • After 60 min • Never • Immediately • After 10 min Select when you want your All-In-One to return to the default settings: • - Dell 962 | Owner's Manual - Page 21
Off BLANK PAPER TYPE Auto Detect Plain Coated Photo Transparency ORIGINAL SIZE Auto Detect Letter B5 A4 A5 A6 Wallet 3x5 4x6 5x7 8x10 L 2L POWER SAVE After 30 min After 60 min Never Immediately After 10 min MAINTENANCE Align Cartridges Clean Cartridges Print Test Page REPEAT IMAGE 1x per page 4x - Dell 962 | Owner's Manual - Page 22
www.dell.com | support.dell.com From this menu: Blank Paper Size Blank • Coated • Photo • Transparency Auto Detect optimizes the setting according to the type of paper loaded. NOTE: For other specialty types, see the All-In-One Center. Specify how many copies of one image you want on one page: • - Dell 962 | Owner's Manual - Page 23
Maintenance Power Save Clear Settings Set Defaults Language You can: Scan multiple pages to memory and print them out in reverse order. • Off (default) • On Turn on or off the sound that is made when you press a control panel button. The options are: • Low (default) • High • Off • Align Cartridges - Dell 962 | Owner's Manual - Page 24
a digital line filter. Contact your Internet Service Provider for more details. • If you are using fax software to fax, the printer must be connected to a computer with a USB cable. Fax Mode Menu Items PENDING FAXES None RINGER TONE Low High Off PRINT REPORTS Activity report (the last 40 sent - Dell 962 | Owner's Manual - Page 25
3 rings (default) • After 5 rings When the Auto Answer light is off, receive the fax manually by pressing DELL# (3355#) on the keypad. Enter a specific time to send a fax. For help, see "Send a Delayed Broadcast Fax" on page 64. NOTE: Make sure the date and time are entered correctly before you set - Dell 962 | Owner's Manual - Page 26
www.dell.com | support.dell.com From this menu: Edit Speed Dial Edit Date/Time Personalize Fax Blank Paper Size Blank Paper Type Fax Forward Advanced Fax You can: Make the following changes to your speed dial list: • Add to it • Remove a number from it • Modify it • Print it NOTE: For more - Dell 962 | Owner's Manual - Page 27
minutes 8 minutes FAX CONFIRMATION Off Print for all Print for errors ACTIVITY REPORT On request After 40 faxes DIAL PREFIX None Create RING PATTERN Single Double Triple Any FIT FAX TO PAGE Try to fit Two pages DIALING METHOD Touch-Tone Pulse Behind a PBX FAX FOOTER On Off SCAN BEFORE DIAL No - Dell 962 | Owner's Manual - Page 28
4 minutes • 5 minutes • 6 minutes • 7 minutes • 8 minutes • Off - no status page is printed • Print for all - prints a status report after each fax you send, including jobs that have errors • Print for errors (default) - prints a status report only after jobs that did not send • On request (default - Dell 962 | Owner's Manual - Page 29
Pattern Dial Prefix Scan Before Dial Blocked Faxes Block "No ID" Calls Edit Blocked Fax List Block Host Fax Settings Auto Fax Convert You can select: • Any (default) • Single • Double • Triple NOTE: You can choose distinctive rings if they are available from your local telephone service. If they - Dell 962 | Owner's Manual - Page 30
www.dell.com | support.dell.com From this Advanced Fax option: Max Send Speed Error Correction Language Country Code You can select: A bps speed: • 33,600 (default) • 31,200 • 28,800 • 26,400 • 24,000 • 21,600 • 19,200 • 16,800 • 14,400 • 12, - Dell 962 | Owner's Manual - Page 31
From this Advanced Fax option: Country Code (continued) You can select: • Japan • Jordan • Korea • Kuwait • Latvia • Lebanon • Lithuania • Luxembourg • Malaysia • Mexico • Morocco • Netherlands • New Zealand • Nigeria • Norway • Oman • Paraguay • Peru • Philippines • Poland • - Dell 962 | Owner's Manual - Page 32
load one of these paper types, the printer detects the paper type and automatically adjusts the Quality/Speed settings. Paper type Plain Transparency Glossy/photo Coated Quality/Speed settings Black and Color Cartridges Installed Photo and Color Cartridges Installed Normal Photo Normal Photo - Dell 962 | Owner's Manual - Page 33
paper type sensor for all print jobs: 1 In Windows XP, click Start→ Control Panel→ Printers and Other Hardware→ Printers and Faxes. In Windows 2000, click Start→ Settings→ Printers. 2 Right-click the printer icon. 3 Click Printing Preferences. 4 Click the Quality/Copies tab, and then click Paper - Dell 962 | Owner's Manual - Page 34
of the letterhead going into the printer first. • The paper guide rests against the bottom edge of the paper. • You select Draft (select Photo if a photo cartridge is installed), Normal, or Photo print quality. • You remove any paper from the paper support before inserting banner paper. • You place - Dell 962 | Owner's Manual - Page 35
faces down. • The paper is centered in the paper support. • You select Normal or Photo print quality. • The paper guides rest against the right and left edges of the paper. • The paper guide rests against the bottom edge of the paper. • You follow the loading instructions on the iron-on transfer - Dell 962 | Owner's Manual - Page 36
load up to 50 sheets of your original document (text side up) into the ADF for scanning, copying, and faxing. The ADF is recommended for loading multiple page documents. NOTE: Do not load postcards, photo cards, photo paper, or small images in the ADF. Place these items on the scanner glass. NOTE - Dell 962 | Owner's Manual - Page 37
the preprinted media to dry thoroughly before use in the ADF. • You do not use media printed with metallic ink particles in the ADF. • You avoid embossed designs. • The document is loaded text side up. • The paper guide is against the edge of the paper. • Your paper size fits within these dimensions - Dell 962 | Owner's Manual - Page 38
www.dell.com | support.dell.com Placing Your Original Document on the Scanner Glass 1 Open the top cover. 2 Place the original document face down on the scanner glass in the upper left corner. To get a copy with portrait (vertical) orientation To get a copy with landscape (horizontal) orientation - Dell 962 | Owner's Manual - Page 39
. 5 Click OK or Print (depending on the program). Printing Collated Copies of Your Document When your printer is attached to your computer, you can print black and white or color collated copies. To print collated copies: 1 Make sure you have paper loaded in the paper support. 2 With your document - Dell 962 | Owner's Manual - Page 40
(glossy) side facing down. For more information, see "Print Media Guidelines for the Paper Support" on page 34. 2 Make sure you have a color cartridge and a photo cartridge (sold separately) installed. For more information, see "Replacing Ink Cartridges" on page 71. 3 With your document open, click - Dell 962 | Owner's Manual - Page 41
side is facing down. For more information, see "Print Media Guidelines for the Paper Support" on page 34. 2 Make sure you have a color cartridge and a photo cartridge (sold separately) installed. For more information, see "Replacing Ink Cartridges" on page 71 3 With your document open, click File - Dell 962 | Owner's Manual - Page 42
(depending on the program or operating system). 4 From the Quality/Copies tab, activate the Print Last Page First check box. 5 Click OK. 6 Click OK to print your document. Printing a Banner 1 Place a stack of banner paper (20 sheets or less) in front of the printer, and feed in the first sheet - Dell 962 | Owner's Manual - Page 43
or operating system). The Printing Preferences dialog box appears along with the I Want To menu. 3 Select one of the available projects or click See more printing ideas. 4 Follow the instructions on the screen to complete your project. Copying To make copies, you can use the printer operator panel - Dell 962 | Owner's Manual - Page 44
top cover. 6 Click Start→ Programs or All Programs→ Dell Printers→ Dell Photo AIO Printer 962→ Dell All-In-One Center. The Dell All-In-One Center appears. 7 Select a copy quantity (1-99) and color. 8 Click See More Copy Settings to: - Choose a copy quality. - Select the blank paper size. - Select - Dell 962 | Owner's Manual - Page 45
or All Programs→ Dell Printers→ Dell Photo AIO Printer 962→ Dell All-In-One Center. The Dell All-In-One Center appears. 5 Click Preview Now. 6 Adjust the dotted lines to fit around the portion of the image you want to print. 7 In the Copy section, select Photo. 8 Select a copy quantity and color - Dell 962 | Owner's Manual - Page 46
on your color document. 6 When you finish customizing your copy settings, click OK, and then click Copy Now. Scanning You can use your printer to scan using the operator panel or the printer software. NOTE: Scanning cannot be done on printers connected to a network. Using the Operator Panel 1 Turn - Dell 962 | Owner's Manual - Page 47
-One Center appears. 4 Click Preview Now to view your scanned image. NOTE: If the size of the scan (found in the lower right of the preview window) appears in red, you do not have the system resources available to perform the scan at the resolution or size you have selected. To correct this problem - Dell 962 | Owner's Manual - Page 48
Printers→ Dell Photo AIO Printer 962→ Dell All-In-One Center. The Dell All-In-One Center appears. 3 In the Send scanned image to: drop-down menu, select the program you want to use. For example, you might want to fax or e-mail multiple pages to someone. 4 In the Scan section, click See More Scan - Dell 962 | Owner's Manual - Page 49
scanned. Editing Scanned Text Using Optical Character Recognition (OCR) Optical Character Recognition (OCR) is a software feature that converts a scanned Programs→ Dell Printers→ Dell Photo AIO Printer 962→ Dell All-In-One Center. The Dell All-In-One Center appears. 3 In the Send scanned images to - Dell 962 | Owner's Manual - Page 50
All Programs→ Dell Printers→ Dell Photo AIO Printer 962→ Dell All-In-One Center. The Dell All-In-One Center appears. 2 In the Creative Tasks section, click Save an image on my computer. 3 Follow the instructions on your computer screen to save an image on your computer. E-mailing a Scanned Image or - Dell 962 | Owner's Manual - Page 51
or All Programs→ Dell Printers→ Dell Photo AIO Printer 962→ Dell All-In-One Center. The Dell All-In-One Center appears. 4 Click Preview Now. NOTE: If the size of the scan (found in the lower right of the preview window) appears in red, you do not have the system resources available to perform - Dell 962 | Owner's Manual - Page 52
www.dell.com | support.dell.com Faxing You do not need to connect your printer to a computer in order to fax. Use the printer operator panel for basic faxing. See "Faxing Using the Printer Operator Panel" on page 55. NOTE: For advanced faxing instructions using the computer software, see "Sending - Dell 962 | Owner's Manual - Page 53
can connect a telephone to your printer to use the fax line as a normal telephone line. 1 Connect a phone cord from the LINE connector ( - right side connector) on the printer to the telephone wall jack. 2 Remove the protective plug from the PHONE jack connector ( - left side connector) on the back - Dell 962 | Owner's Manual - Page 54
www.dell.com | support.dell.com 3 Connect a phone cord from the telephone to the PHONE jack connector ( - left side connector) on the printer. Connecting to an answering machine 1 Connect a phone cord from the LINE connector ( - right side connector) on the printer to the telephone wall jack. 2 - Dell 962 | Owner's Manual - Page 55
a phone cord from the computer modem to the PHONE jack connector ( - left side connector) on the printer. Faxing Using the Printer Operator Panel What if I Have a Digital Subscriber Line (DSL)? DSL delivers digital data to a computer through a telephone line. Your Dell Photo AIO Printer 962 is - Dell 962 | Owner's Manual - Page 56
www.dell.com | support.dell.com NOTE: ISDN (integrated services digital network) and cable modems are not fax modems and are not supported for faxing. Send a Fax 1 Make sure your printer is on and an active telephone line is connected to the LINE connector ( ) on the printer. 2 Load your document - Dell 962 | Owner's Manual - Page 57
phone lines to one wall jack. What if I Have a Digital Subscriber Line (DSL)? DSL delivers digital data to a computer through a telephone line. Your Dell Photo AIO Printer 962 is designed to work with analog data. If you are faxing over a telephone line connected to a DSL modem, install a DSL filter - Dell 962 | Owner's Manual - Page 58
→ Dell Photo AIO Printer 962 → Dell All-In-One Center. 4 Place the document you want to fax face down under the lid of the printer. 5 Select Fax from the Scan drop-down menu. 6 Click Scan Now. 7 Follow the instructions on the computer screen to send your fax. Receive a Fax The Dell Photo AIO Printer - Dell 962 | Owner's Manual - Page 59
the Dell All-In-One Center to first scan a document to a file, and then use Fax Console or Fax Service Management to print the file to fax. Install Fax Console (Windows XP Only) 1 Click Start → Control Panel. 2 Click Add or Remove Programs. 3 Click Add/Remove Windows Components. Using the Printer - Dell 962 | Owner's Manual - Page 60
to select Dell Photo AIO Printer 962. e To create an archive copy of each fax, click to select Store a copy in a folder, and then use the Browse button to select the desired archive location. 6 Click Next, confirm your settings, and click Finish. Configure Fax Service Management (Windows 2000 Only - Dell 962 | Owner's Manual - Page 61
) → Dell Printers → Dell Photo AIO Printer 962 → Dell All-In-One Center. 4 Place the document you want to fax face down under the lid of the printer. 5 Select File from the Scan drop-down menu. 6 Save your file to a desired location. 7 Open the file you just scanned and saved. 8 Click File → Print - Dell 962 | Owner's Manual - Page 62
www.dell.com | support.dell.com If you selected the Enable Receive check box when configuring Fax Console, you are now ready to receive a fax. NOTE: Selecting the Enable Receive check box allows you to receive faxes but may cause the computer modem to answer all phone calls, in which case you may - Dell 962 | Owner's Manual - Page 63
Printers → Dell Photo AIO Printer 962 → Printer Setup Utility. 2 Click the Speed Dial tab. 3 Follow the instructions on the Speed Dial tab to add a new number to your speed dial list. Create a Group Dial List From the Operator Panel 1 Press Mode until the Fax LED is lit. 2 Press Menu until you see - Dell 962 | Owner's Manual - Page 64
and white, or press Color to send your fax as a color fax. Manually Dialing a Fax While Listening to a Telephone Line (On Hook Dial) 1 Press Mode until the Fax LED is lit. 2 Press Menu repeatedly until On Hook Dial appears. 3 Press Select to make the printer go off hook. 4 Enter the number to which - Dell 962 | Owner's Manual - Page 65
and white, or if you are faxing high-resolution document to a fax machine that prints at a lower resolution, the Dell Photo AIO 962 can automatically adjust the fax you send. To turn on Auto Fax Convert: 1 On the operator panel, press Mode repeatedly until Fax is selected. Using the Printer 65 - Dell 962 | Owner's Manual - Page 66
www.dell.com | support.dell.com 2 Press Menu until ADVANCED FAX appears on the display, and then press Select. 3 Press Menu until AUTO FAX CONVERT appears on the display. 4 Press > until On appears on the display, and then press Select. 66 Using the Printer - Dell 962 | Owner's Manual - Page 67
3 Understanding the Software The printer software includes: • Dell Printer Solution Center (for troubleshooting, maintenance, and cartridge ordering information) • Dell All-In-One Center (for scanning, copying, and faxing) • Printing Preferences (for printing) • Dell Picture Studio v2.0 (for - Dell 962 | Owner's Manual - Page 68
Photo AIO Printer 962→ Dell Printer Solution Center. Using the Dell All-In-One Center The Dell All-In-One Center allows you to: • Scan, copy, fax, and perform creative tasks. • Select where you want to send the scanned image. • Select the quantity and color of your copies. • Access troubleshooting - Dell 962 | Owner's Manual - Page 69
of the preview image to scan. • View an image of what will be printed or copied. For more information about the Dell All-In-One Center, click Help in the Dell All-In-One Center. Using Printing Preferences Printing Preferences allows you to change the various printer settings. You can change your - Dell 962 | Owner's Manual - Page 70
photo cartridge (sold separately) installed. Multiple Copies - Customize how the printer prints several photocopies of a single print job: Collated, Normal, or Print Last Page First. Print Color Images in Black and White - Print your color images in black and white to save the ink in your color ink - Dell 962 | Owner's Manual - Page 71
and Supplies" on page 2. Dell recommends Dell ink cartridges for your printer. Dell does not provide warranty coverage for problems caused by using accessories, parts, or components not supplied by Dell. 1 Turn on your printer. 2 Lift the printer unit The ink cartridge carrier moves and stops at - Dell 962 | Owner's Manual - Page 72
.com | support.dell.com 3 Press down on the ink cartridge lever to raise each ink cartridge lid. 4 Remove the old ink cartridges. 5 Store the cartridges in an air-tight container (one is included with each photo cartridge you purchase) or dispose of them. 6 If you are installing new ink cartridges - Dell 962 | Owner's Manual - Page 73
photo printing, use a photo cartridge (sold separately) and a color cartridge. 7 Insert the new ink cartridges. Make sure the black or photo ink cartridge is secure in the left ink cartridge carrier and the color ink cartridge is secure in the right ink cartridge carrier . photo or black cartridge - Dell 962 | Owner's Manual - Page 74
www.dell.com | support.dell.com 8 Snap each lid closed. 9 Close the printer unit . An alignment page prints. Aligning Ink Cartridges Your printer automatically aligns the ink cartridges when they are installed or replaced. To verify your ink cartridges are aligned, you can print an alignment page. - Dell 962 | Owner's Manual - Page 75
the paper support. For more information, see "Loading Paper" on page 34. 2 Click Start→ Programs or All Programs→ Dell Printers→ Dell Photo AIO Printer 962→ Dell Printer Solution Center. 3 Click the Maintenance tab 4 Click Align to fix blurry edges. 5 Click Print. The ink cartridges align when the - Dell 962 | Owner's Manual - Page 76
www.dell.com | support.dell.com 76 Ink Cartridge Maintenance - Dell 962 | Owner's Manual - Page 77
computer. • If an error message appears on the operator panel display, write down the exact message. Setup Problems Computer Problems VE R I F Y T H A T Y O U R P R I N T E R I S C O M P A T I B L E W I T H Y O U R C O M P U T E R - The Dell Photo AIO Printer 962 supports Windows 2000 and Windows XP - Dell 962 | Owner's Manual - Page 78
. Reconnect the printer power cable into the electrical outlet and turn on the printer. • Restart your computer. SET YOUR PRINTER AS THE DEFAULT PRINTER - Windows XP 1 Click Start→ Control Panel→ Printers and Other Hardware→ Printers and Faxes. 2 Right-click Dell Photo AIO Printer 962 and select Set - Dell 962 | Owner's Manual - Page 79
installation. Printer Problems ENSURE THAT THE PRINTER POWER CABLE IS FIRMLY CONNECTED TO THE PRINTER AND THE ELECTRICAL OUTLET. DETERMINE IF THE PRINTER HAS BEEN HELD OR PAUSED Windows XP 1 Click Start→ Control Panels→ Printers and Other Hardware→ Printers and Faxes. 2 Double-click Dell Photo AIO - Dell 962 | Owner's Manual - Page 80
962 (Copy 1), and Dell 962 (Copy 2), and so on. 2 Print a job to each one of these print objects to see which print object is active. 3 Set the active print object as the default printer. by right-clicking on it in the Printers and Faxes window. 4 Delete the other copies of the print object by left - Dell 962 | Owner's Manual - Page 81
INTO THE PAPER SUPPORT" ON PAGE 34). MAKE SURE THE PRINTER DOESN'T HAVE A PAPER JAM. IF IT DOES, SEE "CHECK FOR A PAPER JAM" ON PAGE 82. MAKE SURE THE MEMORY IS NOT FULL. DIAL THE RECEIVING NUMBER FIRST, AND THEN SCAN YOUR ORIGINAL DOCUMENT ONE PAGE AT A TIME. MAKE SURE THE POWER SUPPLY, TELEPHONE - Dell 962 | Owner's Manual - Page 82
www.dell.com | support.dell.com CHECK FOR A PAPER JAM Near the ADF 1 Lift the ADF cover or ADF unit located to the left of the ADF input tray. 2 Pull firmly on the paper to remove it. 3 Close the ADF cover or unit. 4 Press the Select button. 5 Resend your print job to print any missing pages. NOTE - Dell 962 | Owner's Manual - Page 83
the Select button. 5 Resend your print job to print any missing pages. Near the rear access door 1 Open the rear access door. 2 Pull firmly on the paper to remove it. 3 Close the rear access door. 4 Press the Select button. 5 Resend your print job to print any missing pages. Troubleshooting 83 - Dell 962 | Owner's Manual - Page 84
the operator panel. For more information, see "Check for a paper jam" on page 82. Follow the instructions on the display to clear the message, and then print your document. Install a Black or Photo ink cartridge. For more information, see "Replacing Ink Cartridges" on page 71. 84 Troubleshooting - Dell 962 | Owner's Manual - Page 85
is installed in the left cartridge carrier. The wrong ink cartridge is installed in the right cartridge carrier. There is a problem with the ink cartridges or the print heads. Data error or incomplete data. Scan carrier error. A paper feed error has occurred. The attached device is not supported, or - Dell 962 | Owner's Manual - Page 86
. For more information on aligning, see "Aligning Ink Cartridges" on page 74. For more information on cleaning ink cartridges, see "Cleaning the Ink Cartridge Nozzles" on page 75. For additional solutions, check your Dell Printer Solution Center or go to support.dell.com. 86 Troubleshooting - Dell 962 | Owner's Manual - Page 87
To access the Dell Printer Solution Center: 1 Click Start→ Programs or All Programs→ Dell Printers→ Dell Photo AIO Printer 962→ Dell Printer Solution Center. 2 Click the Troubleshooting tab. Troubleshooting 87 - Dell 962 | Owner's Manual - Page 88
www.dell.com | support.dell.com 88 Troubleshooting - Dell 962 | Owner's Manual - Page 89
If you need help with a technical problem, Dell is ready to assist you. 1 Call technical support from a telephone near or at the printer so that technical support can assist you with any necessary procedures. When calling Dell, use your Express Service Code to help expedite the routing of your - Dell 962 | Owner's Manual - Page 90
www.dell.com | support.dell.com Automated Order-Status Service To check on the status of any Dell products that you have ordered, you can go to support.dell.com, or you can call the automated order-status service. A recording prompts you for the information needed to locate and report on your order - Dell 962 | Owner's Manual - Page 91
refurbished computers) toll-free: 1-888-798-7561 Software and Peripherals Sales toll-free: 1-800-671-3355 Spare Parts Sales toll-free: 1-800-357-3355 Extended Service and Warranty Sales toll-free: 1-800-247-4618 Fax toll-free: 1-800-727-8320 Dell Services for the Deaf, Hard-of-Hearing, or - Dell 962 | Owner's Manual - Page 92
Access Code Country Code City Code Department Name or Service Area, Website and E-Mail Address Argentina (Buenos Aires) Website: www.dell.com.ar International Access Code: 00 Tech Support and Customer Care Country Code: 54 Sales City Code: 11 Tech Support Fax Customer Care Fax Aruba - Dell 962 | Owner's Manual - Page 93
www.dell.com/br International Access Code: 00 Customer Support, Technical Support Country Code: 55 Tech Support Fax City Code: 51 Customer Care Fax Sales British Virgin Islands General Support Brunei Customer Technical Support (Penang, Malaysia) Country Code: 673 Customer Service (Penang - Dell 962 | Owner's Manual - Page 94
City Code: 2 China (Xiamen) Country Code: 86 City Code: 592 Colombia Costa Rica Department Name or Service Area, Website and E-Mail Address Sales, Customer Support, and Technical Support Tech Support website: support.ap.dell.com/china Tech Support E-mail: [email protected] Tech Support Fax Home - Dell 962 | Owner's Manual - Page 95
Code: 00 Country Code: 45 Dominica Dominican Republic Ecuador El Salvador Department Name or Service Area, Website and E-Mail Address Website: support.euro.dell.com E-mail: [email protected] Technical Support Customer Care Fax TechFax Switchboard Website: support.euro.dell.com E-mail Support - Dell 962 | Owner's Manual - Page 96
Name or Service Area, Website and E-Mail Address Finland (Helsinki) Website: support.euro.dell.com International Access Code: 990 E-mail: [email protected] Country Code: 358 City Code: 9 E-mail Support (servers): [email protected] Technical Support Technical Support Fax Relational - Dell 962 | Owner's Manual - Page 97
) International Access Code Country Code City Code Department Name or Service Area, Website and E-Mail Address Germany (Langen) Website: support.euro.dell.com International Access Code: 00 E-mail: [email protected] Country Code: 49 Technical Support City Code: 6103 Home - Dell 962 | Owner's Manual - Page 98
www.dell.com | support.dell.com Country (City) International Access Code Country Code City Code India Ireland (Cherrywood) International Access Code: 16 Country Code: 353 City Code: 1 Italy (Milan) International Access Code: 00 Country Code: 39 City Code: 02 Jamaica Department Name or Service Area - Dell 962 | Owner's Manual - Page 99
Fax (Technical Support and Customer Service) (Austin, Texas, U.S.A.) Sales (Austin, Texas, U.S.A.) SalesFax (Austin, Texas, U.S.A.) Luxembourg International Access Code: 00 Country Code: 352 Macao Country Code: 853 Website: support.euro.dell.com E-mail: [email protected] Technical Support - Dell 962 | Owner's Manual - Page 100
www.dell.com | support.dell.com Country (City) International Access Code Country Code City Code Malaysia (Penang) International Access Code: 00 Country Code: 60 City Code: 4 Mexico International Access Code: 00 Country Code: 52 Department Name or Service Area, Website and E-Mail Address Technical - Dell 962 | Owner's Manual - Page 101
Code Country Code City Code Netherlands (Amsterdam) International Access Code: 00 Country Code: 31 City Code: 20 New Zealand International Access Code: 00 Country Code: 64 Nicaragua Department Name or Service Area, Website and E-Mail Address Website: support.euro.dell.com E-mail (Technical Support - Dell 962 | Owner's Manual - Page 102
dell.com Country Code: 48 Customer Service Phone City Code: 22 Customer Care Sales Customer Service Fax Reception Desk Fax Switchboard Portugal Website: support.euro.dell.com International Access Code: 00 E-mail: support.euro.dell.com/pt/en/emaildell/ Country Code: 351 Technical Support - Dell 962 | Owner's Manual - Page 103
: 27 Customer Care City Code: 11 Sales Fax Switchboard Southeast Asian and Pacific Countries Customer Technical Support, Customer Service, and Sales (Penang, Malaysia) Spain (Madrid) Website: support.euro.dell.com International Access Code: 00 E-mail: support.euro.dell.com/es/es/emaildell - Dell 962 | Owner's Manual - Page 104
.dell.com | support.dell.com Country (City) International Access Code Country Code City Code Department Name or Service Area, Website and E-Mail Address Sweden (Upplands Vasby) Website: support.euro.dell.com International Access Code: 00 E-mail: [email protected] Country Code: 46 City Code - Dell 962 | Owner's Manual - Page 105
Service Area, Website and E-Mail Address Area Codes, Local Numbers, and Toll-Free Numbers General Support toll-free: 1-866-540-3355 Website: support.euro.dell.com Customer Care website: support.euro.dell Home and Small Business Fax General Support General Support General Support 0870 908 0500 - Dell 962 | Owner's Manual - Page 106
www.dell.com | support.dell.com 106 Contacting Dell - Dell 962 | Owner's Manual - Page 107
. Dell may invoice parts of an order separately. Your order is subject to cancellation by Dell, at Dell's sole discretion. Unless you and Dell have agreed to a different discount, Dell's standard pricing policy for Dell-branded systems, which include both hardware and services in one discounted - Dell 962 | Owner's Manual - Page 108
SERVICES, ONLY UPON DELL'S RECEIPT OF PAYMENT IN FULL FOR THE ITEM TO BE WARRANTED OR SERVICED. 5 Software. All software is provided subject to the license agreement that is part of the software instructions and policies provided by Dell, Dell Dell's policy is one of ongoing update and revision. Dell - Dell 962 | Owner's Manual - Page 109
DELL IS NOT LIABLE TO YOU FOR WARRANTIES, SUPPORT, OR SERVICE MADE BY OR PURCHASED FROM A THIRD PARTY AND NOT DIRECTLY FROM DELL. DELL reference only and do not form a part of these terms and conditions, and no NATIONAL ARBITRATION FORUM (NAF) under its Code of Procedure then in effect (available via - Dell 962 | Owner's Manual - Page 110
of software • Non-Dell-branded and Solution Provider Direct products and accessories • Problems that result from: - External causes such as accident, abuse, misuse, or problems with electrical power - Servicing not authorized by Dell - Usage that is not in accordance with product instructions - Dell 962 | Owner's Manual - Page 111
Commercial Customers, Healthcare Customers, and Value-Added Resellers (VARs): Technical Support and Customer Service Government and Education Customers: Technical Support and Customer Service Dell-Branded Memory support.dell.com/ContactUs/ContactUsHome.aspx?c =us&l=en&s=gen U.S. Only 1-800-624 - Dell 962 | Owner's Manual - Page 112
on how to obtain service. How will you fix my product? We use new and refurbished parts made by various manufacturers in performing warranty repairs and in building replacement parts and systems. Refurbished parts and systems are parts or systems that have been returned to Dell, some of which were - Dell 962 | Owner's Manual - Page 113
system that has been installed by Dell, you must return the entire computer. A different return policy applies to nondefective products purchased through Dell's Software and Peripherals division by customers of our Small and Medium Business divisions. Those products may be returned within twenty-one - Dell 962 | Owner's Manual - Page 114
or reimburse you for the cartridge purchase cost, at Dell's sole option. This limited warranty does not apply to ink or toner cartridges that have been refilled or improperly stored or due to problems resulting from misuse, abuse, accident, neglect, mishandling, incorrect environments, or wear from - Dell 962 | Owner's Manual - Page 115
of Software installed on Dell with all records reasonably related to your use of the Software. The audit will be limited to verification of your compliance with the terms of this agreement. The Software is protected by United States copyright laws and international treaties. You may make one copy - Dell 962 | Owner's Manual - Page 116
agreement between you and Dell regarding the Software. Regulatory Notices Electromagnetic Interference (EMI) is any signal or emission, radiated in free space or conducted along power or signal leads, that endangers the functioning of a radio navigation or other safety service or seriously degrades - Dell 962 | Owner's Manual - Page 117
by Dell could void your authority to operate this equipment. This device complies with Part 15 of not installed and used in accordance with the manufacturer's instruction manual, may Model number: 962 • Company name: Dell Inc. One Dell Way Round Rock, Texas 78682 USA 512-338-4400 Fax Branding The - Dell 962 | Owner's Manual - Page 118
www.dell.com | support.dell.com 118 Appendix - Dell 962 | Owner's Manual - Page 119
, ink aligning, 74 cleaning, 75 replacing, 71 cleaning ink cartridge nozzles, 75 Color Copy button, 16 connecting printer to answering machine, 54 computer modem, 55 telephone, 53 telephone wall jack, 53 copies, 43 copying operator panel, 43 software, 43 D Dell contacting, 90 Dell All-In-One Center - Dell 962 | Owner's Manual - Page 120
, 64 receiving automatically, 56 receiving manually, 56 receiving with an answering machine connected to the printer, 57 speed dial, 62 faxing, 65 G general troubleshooting, 80 glossy paper loading, 35 greeting cards loading, 35 group dial list, 63 I index cards loading, 35 ink cartridges aligning - Dell 962 | Owner's Manual - Page 121
Q Quality/Copies tab, 70 R reinstalling software, 78 removing software, 78 replacing ink cartridges, 71 right arrow button, 17 S safety information, 9 setup troubleshooting, 77 software Dell All-In-One Center, 68 Dell Printer Solution Center, 67 Print Properties, 69 Printer Setup Utility, 58 - Dell 962 | Owner's Manual - Page 122
122 Index
-
 1
1 -
 2
2 -
 3
3 -
 4
4 -
 5
5 -
 6
6 -
 7
7 -
8
-
9
-
10
-
11
-
12
-
13
-
14
-
15
-
16
-
17
-
18
-
19
-
20
-
21
-
22
-
23
-
24
-
25
-
26
-
27
-
28
-
29
-
30
-
31
-
32
-
33
-
34
-
35
-
36
-
37
-
38
-
39
-
40
-
41
-
42
-
43
-
44
-
45
-
46
-
47
-
48
-
49
-
50
-
51
-
52
-
53
-
54
-
55
-
56
-
57
-
58
-
59
-
60
-
61
-
62
-
63
-
64
-
65
-
66
-
67
-
68
-
69
-
70
-
71
-
72
-
73
-
74
-
75
-
76
-
77
-
78
-
79
-
80
-
81
-
82
-
83
-
84
-
85
-
86
-
87
-
88
-
89
-
90
-
91
-
92
-
93
-
94
-
95
-
96
-
97
-
98
-
99
-
100
-
101
-
102
-
103
-
104
-
105
-
106
-
107
-
108
-
109
-
110
-
111
-
112
-
113
-
114
-
115
-
116
-
117
-
118
-
119
-
120
-
121
-
122
 |
 |
www.dell.com/supplies | support.dell.com
Dell™ Photo All-in-One Printer 962
Owner’s Manual
Look Inside For:
• Ordering Supplies
• Getting Started
• Using Your Printer
• Understanding the Software
• Maintenance and Troubleshooting