Dell Digital Jukebox Owner's Manual - Page 34
Accessing and Managing Your Recordings, Transferring Recordings Between the Dell DJ and Your
 |
View all Dell Digital Jukebox manuals
Add to My Manuals
Save this manual to your list of manuals |
Page 34 highlights
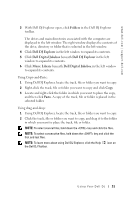
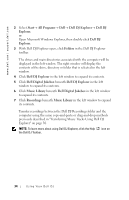
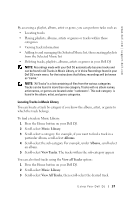
www.dell.com | support.dell.com To delete a new recording: 1 After stopping a recording, press the scroll dial. A list of options appears. 2 Scroll-select Delete Recording. To start a new recording immediately after finishing a recording: 1 After stopping a recording, press the scroll dial. A list of options appears. 2 Scroll-select New Recording, then press the record button. NOTE: You can also start a new recording by pressing the record button. When you have finished your recordings, press the Home button on the device to return to the Main Menu. Accessing and Managing Your Recordings You can also play, view details, select or delete a recording from your Dell DJ using the following steps: 1 Press the Home button to return to the Main Menu. 2 Scroll-select Voice Recordings to display a list of the recordings on your Dell DJ. 3 Scroll-select the desired voice recording track from the list. 4 Scroll-select the desired function, Play Track, View Track Details, Add to Selected or Delete Track. Transferring Recordings Between the Dell DJ and Your Computer You can transfer your Dell DJ recordings to your computer using Dell DJ Explorer. NOTE: Recordings cannot be transferred between the Dell DJ and a computer unless Dell DJ Explorer is installed on the computer. Recordings must be stored in the Recordings folder inside the Dell DJ Music Library folder in order to be played by the Dell DJ. Access the Recordings folder in the Music Library folder on your Dell DJ: 1 Connect your Dell DJ to your computer using the included USB cable. Using Yo ur Dell DJ 33
-
 1
1 -
2
-
3
-
4
-
5
-
6
-
7
-
8
-
9
-
10
-
11
-
12
-
13
-
14
-
15
-
16
-
17
-
18
-
19
-
20
-
21
-
22
-
23
-
24
-
25
-
26
-
27
-
28
-
 29
29 -
 30
30 -
 31
31 -
 32
32 -
 33
33 -
 34
34 -
 35
35 -
 36
36 -
 37
37 -
 38
38 -
 39
39 -
40
-
41
-
42
-
43
-
44
-
45
-
46
-
47
-
48
-
49
-
50
-
51
-
52
-
53
-
54
-
55
-
56
-
57
-
58
-
59
-
60
-
61
-
62
-
63
-
64
-
65
-
66
-
67
-
68
-
69
-
70
-
71
-
72
-
73
-
74
-
75
-
76
-
77
-
78
-
79
-
80
-
81
-
82
-
83
-
84
-
85
 |
 |
