Dell OptiPlex FX160 Dell™ OptiPlex™ FX160 Re-Imaging Guide - Page 17
Windows PE, Diskpart, Windows Vista
 |
View all Dell OptiPlex FX160 manuals
Add to My Manuals
Save this manual to your list of manuals |
Page 17 highlights
其中
-
 1
1 -
2
-
3
-
4
-
5
-
6
-
7
-
8
-
9
-
10
-
11
-
 12
12 -
 13
13 -
 14
14 -
 15
15 -
 16
16 -
 17
17 -
 18
18 -
 19
19 -
 20
20 -
 21
21 -
 22
22 -
23
-
24
-
25
-
26
-
27
-
28
-
29
-
30
-
31
-
32
-
33
-
34
-
35
-
36
-
37
-
38
-
39
-
40
-
41
-
42
-
43
-
44
-
45
-
46
-
47
-
48
-
49
-
50
-
51
-
52
-
53
-
54
-
55
-
56
-
57
-
58
-
59
-
60
-
61
-
62
-
63
-
64
-
65
-
66
-
67
-
68
-
69
-
70
-
71
-
72
-
73
-
74
-
75
-
76
-
77
-
78
-
79
-
80
-
81
-
82
-
83
-
84
-
85
-
86
-
87
-
88
-
89
-
90
-
91
-
92
-
93
-
94
-
95
-
96
-
97
-
98
-
99
-
100
-
101
-
102
-
103
-
104
-
105
-
106
-
107
-
108
-
109
-
110
-
111
-
112
-
113
-
114
-
115
-
116
-
117
-
118
-
119
-
120
-
121
-
122
-
123
-
124
-
125
-
126
-
127
-
128
-
129
-
130
-
131
-
132
 |
 |

Dell OptiPlex FX160
重新映像指南
17
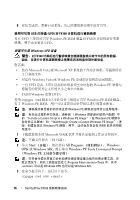
其中
<dest
>
是此步骤的本地目录,例如
c:\winpe_x86
。此脚本
创建
<dest
>
目录,并将
x86
体系结构所需的全部文件复制到该目录
中。在本例中,将创建以下目录:
\winpe_x86
\winpe_x86\ISO
\winpe_x86\mount
4
在命令提示符下,使用
ImageX
将
Windows PE
映像
(
Winpe.wim
)
安
装到
\mount
目录:
imagex /mountrw c:\winpe_x86\winpe.wim 1
c:\winpe_x86\mount
5
从升级
DVD
中将以下文件复制到
\
winpe_x86\mount\windows\system32\
目录:
winpeshl.ini
DellImageDeploy.exe
Comctl32.dll
Oledlg.dll
Wimgapi.dll
注:
使用戴尔映像部署工具时不需要进行映像准备 (此操作在下一步进
行)。跳过这一步后,您只需重新安装
boot.wim
并将更新文件复制到正
确目录便可将未来更新添加到映像。
6
使用
peimg /prep
命令准备映像。以下命令将从映像中删除未安装
的软件包,以减小最终映像的大小:
peimg /prep c:\winpe_x86\mount\Windows
7
使用
ImageX /unmount
选项和
/commit
选项将更改提交到原始映
像文件
(
Winpe.wim
)
:
imagex /unmount c:\winpe_x86\mount /commit
8
将
\winpe_x86\ISO
目录中的默认
Boot.wim
替换为新的自定义映
像。该映像的名称必须是
Boot.wim
。
警告:
格式化
UFD
设备后,其所有文件都会被擦除。
9
准备
UFD
设备。使用
Diskpart
在
Windows Vista
或
Windows PE
环境
下格式化
UFD
。
a
在
Windows Vista
操作系统或
Windows PE
会话中,插入
UFD
设备。