Dell OptiPlex FX160 Dell™ OptiPlex™ FX160 Re-Imaging Guide - Page 90
boot.wim
 |
View all Dell OptiPlex FX160 manuals
Add to My Manuals
Save this manual to your list of manuals |
Page 90 highlights
Dell Image Deployment boot.wim 7 peimg /prep peimg /prep c:\winpe_x86\mount\Windows 8 ImageX /unmount commit Winpe.wim imagex /unmount c:\winpe_x86\mount /commit 9 \winpe_x86\ISO Boot.wim Boot.wim 警告:UFD 10 UFD Diskpart Windows Vista または Windows PE 環境で UFD a Windows Vista Windows PE UFD b UFD 全体を 1 つの FAT32 UFD が disk 1 diskpart select disk 1 clean create partition primary size= select partition 1 active format fs=fat32 assign exit 90 Dell OptiPlex FX160
-
 1
1 -
2
-
3
-
4
-
5
-
6
-
7
-
8
-
9
-
10
-
11
-
12
-
13
-
14
-
15
-
16
-
17
-
18
-
19
-
20
-
21
-
22
-
23
-
24
-
25
-
26
-
27
-
28
-
29
-
30
-
31
-
32
-
33
-
34
-
35
-
36
-
37
-
38
-
39
-
40
-
41
-
42
-
43
-
44
-
45
-
46
-
47
-
48
-
49
-
50
-
51
-
52
-
53
-
54
-
55
-
56
-
57
-
58
-
59
-
60
-
61
-
62
-
63
-
64
-
65
-
66
-
67
-
68
-
69
-
70
-
71
-
72
-
73
-
74
-
75
-
76
-
77
-
78
-
79
-
80
-
81
-
82
-
83
-
84
-
 85
85 -
 86
86 -
 87
87 -
 88
88 -
 89
89 -
 90
90 -
 91
91 -
 92
92 -
 93
93 -
 94
94 -
 95
95 -
96
-
97
-
98
-
99
-
100
-
101
-
102
-
103
-
104
-
105
-
106
-
107
-
108
-
109
-
110
-
111
-
112
-
113
-
114
-
115
-
116
-
117
-
118
-
119
-
120
-
121
-
122
-
123
-
124
-
125
-
126
-
127
-
128
-
129
-
130
-
131
-
132
 |
 |

90
Dell OptiPlex FX160
イメージ再作成ガイド
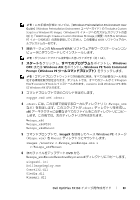
メモ:
次の手順のイメージ準備作業は、
Dell Image Deployment
ツールでは不要です。
この手順を省略すると、
boot.wim
を再マウントして、アップデートファイルを
正しいディレクトリにコピーするだけで、今後のアップデートをイメージに追加で
きます。
7
peimg /prep
コマンドを使用して、イメージを作成します。このコマン
ドは、インストールされないパッケージをイメージから削除して、最終的
なイメージのサイズを縮小します。
peimg /prep c:
\
winpe_x86
\
mount
\
Windows
8
ImageX /unmount
オプションに
/commit
オプションを付けて、元のイ
メージファイル(
Winpe.wim
)に変更内容をコミットします。
imagex /unmount c:
\
winpe_x86
\
mount /commit
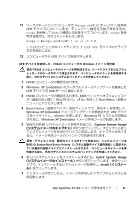
9
\
winpe_x86
\
ISO
ディレクトリ内のデフォルトの
Boot.wim
を新しくカ
スタマイズしたイメージに置き換えます。このイメージの名前は
Boot.wim
にする必要があります。
警告:
UFD
デバイスをフォーマットすると、デバイス上のファイルはすべて消去さ
れます。
10
UFD
デバイスを準備します。
Diskpart
を使用して、
Windows Vista
または
Windows PE
環境で
UFD
をフォーマットします。
a
Windows Vista
オペレーティングシステムまたは
Windows PE
のセッ
ション中に、
UFD
デバイスを挿入します。
b
UFD
全体を
1
つの
FAT32
ドライブとしてフォーマットします。次の例
では、
UFD
が
disk 1
です。コマンドウィンドウを開き、次のコマン
ドを入力します。
diskpart
select disk 1
clean
create partition primary size=<size of device>
select partition 1
active
format fs=fat32
assign
exit