Dell PowerVault 221S Rack Installation Guide
Dell PowerVault 221S Manual
 |
View all Dell PowerVault 221S manuals
Add to My Manuals
Save this manual to your list of manuals |
Dell PowerVault 221S manual content summary:
- Dell PowerVault 221S | Rack Installation Guide - Page 1
Dell™ Systems Rack Installation Guide www.dell.com | support.dell.com - Dell PowerVault 221S | Rack Installation Guide - Page 2
to hardware or loss of data and tells you how to avoid the problem. CAUTION: A CAUTION indicates a potentially hazardous situation which, if not the entities claiming the marks and names or their products. Dell Computer Corporation disclaims any proprietary interest in trademarks and trade names other - Dell PowerVault 221S | Rack Installation Guide - Page 3
1-2 RapidRails Rack Kit Contents 1-2 Dell Rack Requirements 1-3 VersaRails Rack Kit Contents 1-3 Non-Dell Rack Requirements 1-4 Before You Begin 1-4 Important Safety Information 1-4 Rack Stabilizer Feet 1-4 Recommended Tools and Supplies 1-5 Installation Tasks 1-5 Removing the Rack - Dell PowerVault 221S | Rack Installation Guide - Page 4
1-3 One Rack Unit 1-6 Marking the Vertical Rails 1-7 Installing the RapidRails Mounting Rails 1-8 Installing the VersaRails Mounting Rails 1-9 Removing the Front Bezel 1-11 Removing the Tower System Cover 1-12 Installing the Rack Front Panel 1-14 Installing the System in the Rack 1-15 - Dell PowerVault 221S | Rack Installation Guide - Page 5
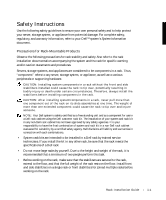
Safety Instructions Use the following safety guidelines to ensure your own personal safety and to help protect your server, storage system, or appliance from potential damage. For complete safety, regulatory, and warranty information, refer to your Dell™ system's System Information document. - Dell PowerVault 221S | Rack Installation Guide - Page 6
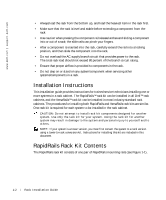
power to the rack. The total rack load should not exceed 80 percent of the branch circuit rating. • Ensure that proper airflow is provided to components in the rack. • Do not step on or stand on any system/component when servicing other systems/components in a rack. Installation Instructions - Dell PowerVault 221S | Rack Installation Guide - Page 7
Dell Rack Requirements NOTICE: This rack kit is intended to be installed in a Dell rack by trained service technicians. If you install the kit in any other rack, be sure that the rack meets the specifications inch pan-head Phillips screws (8) VersaRails mounting rails Rack Installation Guide 1-3 - Dell PowerVault 221S | Rack Installation Guide - Page 8
dell.com | support.dell.com Non-Dell Rack Requirements NOTICE: This rack kit is intended to be installed by trained service technicians in a rack that meets the specifications Instructions" in the front of this document, as well as the safety instructions at one time. The weight of more than one - Dell PowerVault 221S | Rack Installation Guide - Page 9
™ 4210 rack cabinet, see the procedures in the Dell PowerEdge 4210 Rack Installation Guide. If you have a rack cabinet not manufactured by Dell, see the manufacturer's documentation for removing doors. CAUTION: Because of the size and weight of the rack cabinet doors, never attempt to remove - Dell PowerVault 221S | Rack Installation Guide - Page 10
(0.5 inch) For more information about requirements for installing components in a Dell rack, see the Dell Rack Advisor software available on the Dell website at http://support.dell.com. CAUTION: If you are installing line on some rack cabinets-see Figure 1-3). 1-6 Rack Installation Guide - Dell PowerVault 221S | Rack Installation Guide - Page 11
1-5). 2 Align the rail mounting-bracket flange (on the front of the rail) with the square holes in the front vertical rails (see Figure 1-5). Rack Installation Guide 1-7 - Dell PowerVault 221S | Rack Installation Guide - Page 12
www.dell.com | support.dell.com 3 Push the rail forward until the mounting hooks are positioned in their square holes on the vertical rail, and then push down rack. 6 Ensure that the rails are mounted at the same position on the vertical rails on each side of the rack. 1-8 Rack Installation Guide - Dell PowerVault 221S | Rack Installation Guide - Page 13
of the cabinet, pull back on the back mounting-bracket flange until it is aligned with the holes on the back vertical rail. Rack Installation Guide 1-9 - Dell PowerVault 221S | Rack Installation Guide - Page 14
www.dell.com | support.dell.com 5 Using two 10-32 x 0.5 Bezel, Drives, Covers, and Front Panel 1 Shut down and turn off power to your system and disconnect your power and peripheral cables. 2 To remove the bezel (see Figure 1-7): a Using the system key, unlock the front bezel. b Swing the bezel - Dell PowerVault 221S | Rack Installation Guide - Page 15
1-7. Removing the Front Bezel lock thumbscrew bezel 3 Label all hard drives and remove them from the system. NOTE: Although it is not necessary for the conversion, you might want to remove the two power-supply and cooling modules at the back of the system chassis to reduce the weight of the chassis - Dell PowerVault 221S | Rack Installation Guide - Page 16
www.dell.com | support.dell.com 5 To remove the tower system base: a Lay the system on its right side. b Use a 3/16-inch hex-head (Allen) wrench Re moving the Towe r Syst em Cover round covers (2) hex-socket cap screw (4) flat washer (4) left and right covers base 1-12 Rack Installation Guide - Dell PowerVault 221S | Rack Installation Guide - Page 17
that you removed in step 6 of the last procedure, "Removing the Bezel, Drives, Covers, and Front Panel" (see Figure 1-9). 3 Reinstall the power and cooling modules (if they were removed). NOTE: Do not install the hard drives until the next procedure, "Installing the System in the Rack," is completed - Dell PowerVault 221S | Rack Installation Guide - Page 18
www.dell.com | support.dell.com Figure 1-9. Installing the Rack Front of the mounting rails you installed in the rack cabinet. CAUTION: Because of the size and weight of the system, never attempt to install the system in the rails by yourself. 2 Slide 's front panel. 1-14 Rack Installation Guide - Dell PowerVault 221S | Rack Installation Guide - Page 19
in the documentation provided with your Dell 24-U and 42-U rack cabinets. If you have a Dell PowerEdge 4210 rack cabinet, see the procedures in the Dell PowerEdge 4210 Rack Installation Guide. If you have a rack cabinet not manufactured by Dell, see the manufacturer's documentation for replacing - Dell PowerVault 221S | Rack Installation Guide - Page 20
www.dell.com | support.dell.com 1-16 Rack Installation Guide - Dell PowerVault 221S | Rack Installation Guide - Page 21
rack marking, 1-5 stabilizer feet, 1-4 rack kit contents illustrated, 1-3 installing, 1-5 list of, 1-2 rack unit, 1-6 RapidRails kit contents, 1-2 RapidRails mounting rails installing, 1-8 requirements Dell rack, 1-3 non-Dell rack, 1-4 S safety information, 1-4 system installing in rack, 1-14, 1-15 - Dell PowerVault 221S | Rack Installation Guide - Page 22
2 Index - Dell PowerVault 221S | Rack Installation Guide - Page 23
Systèmes Dell™ Guide d'installation du rack www.dell.com | support.dell.com - Dell PowerVault 221S | Rack Installation Guide - Page 24
dangereuse qui, si elle n'est pas évitée, peut provoquer une blessure mineure ou modérée. Les informations fournies dans ce guide sont susceptibles d'être modifiées sans préavis. © 2001 Dell Computer Corporation. Tous droits réservés La reproduction de ce document de quelque manière que ce soit sans - Dell PowerVault 221S | Rack Installation Guide - Page 25
Sommaire Instructions de sécurit 2-1 Instructions d'installation 2-2 Contenu du kit du rack RapidRails 2-3 Caractéristiques techniques du rack Dell 2-3 Contenu du kit du rack VersaRails 2-3 Caractéristiques techniques des racks d'autres marques que Dell 2-4 Avant de commencer 2-4 - Dell PowerVault 221S | Rack Installation Guide - Page 26
Figures Figure 2-1. Figure 2-2. Figure 2-3. Figure 2-4. Figure 2-5. Figure 2-6. Figure 2-7. Figure 2-8. Figure 2-9. Figure 2-10. Contenu du kit du rack RapidRails 2-3 Contenu du kit du rack VersaRails 2-4 Unité à un rack 2-7 Marquage des rails verticaux 2-8 Installation des rails de montage - Dell PowerVault 221S | Rack Installation Guide - Page 27
Instructions de sécurité Respectez les consignes de sécurité de ce guide ne tirez jamais plus d'un composant du rack sur les supports coulissants. Le poids représenté par plus d'un que ce rack répond à toutes les spécifications d'un rack Dell. • Ne déplacez pas seul les racks volumineux. En raison - Dell PowerVault 221S | Rack Installation Guide - Page 28
l'aide des supports coulissants. • guide d'installation contient des instructions s'adressant à des techniciens de maintenance qualifiés et explique comment installer un ou plusieurs systèmes dans une armoire rack. Le kit de rack RapidRails™ peut être installé dans toutes les armoires rack Dell - Dell PowerVault 221S | Rack Installation Guide - Page 29
Rails de montage RapidRails Caractéristiques techniques du rack Dell MISE EN GARDE : Ce kit de rack est destiné à être installé dans un rack Dell par des techniciens expérimentés. Si vous installez ce 10 avec 32 filetages est désignée par l'appellation vis 10-32. Guide d'installation du rack 2-3 - Dell PowerVault 221S | Rack Installation Guide - Page 30
dell.com | support.dell.com Figure 2-2. Contenu du kit du rack VersaRails vis à tête plate Phillips 10-32 x 0,5 pouce (8) Rails de montage VersaRails Caractéristiques techniques des racks d'autres marques que Dell "Instructions de sécurité" au début de ce document, ainsi que les instructions de - Dell PowerVault 221S | Rack Installation Guide - Page 31
du système dans le rack 6 Remise en place des portes du rack REMARQUE : Les procédures suivantes s'appliquent à la fois aux armoires en rack Dell et à celles d'autres fabricants que Dell sauf indication contraire. Guide d'installation du rack 2-5 - Dell PowerVault 221S | Rack Installation Guide - Page 32
www.dell.com | support.dell.com Retrait des portes du rack Pour savoir comment retirer les portes du rack, reportez-vous à la documentation fournie avec les armoires en rack Dell 24U et 42U. Si vous possédez un rack Dell PowerEdge™ 4210, reportez-vous aux procédures contenues dans le Guide d' - Dell PowerVault 221S | Rack Installation Guide - Page 33
composants dans un rack, reportez-vous au logiciel Dell Rack Advisor disponible sur le site Web de Dell à l'adresse suivante : http://support.dell.com. ATTENTION : Si vous installez plusieurs systè ligne horizontale sur certaines armoires rack - voir la Figure 2-3). Guide d'installation du rack 2-7 - Dell PowerVault 221S | Rack Installation Guide - Page 34
www.dell.com | support.dell.com 2 Placez une marque à 13,3 cm (5,25 pouces) au-dessus de la marque originale (ou comptez neuf trous vers le haut la bride de fixation soit située entre les marques (ou la bande adhésive) placées sur le rack (voir la Figure 2-5). 2-8 Guide d'installation du rack - Dell PowerVault 221S | Rack Installation Guide - Page 35
1 à 4 pour le rail restant de l'autre côté du rack. 6 Vérifiez que les rails sont montés à la même position sur les rails verticaux de chaque côté du rack. Guide d'installation du rack 2-9 - Dell PowerVault 221S | Rack Installation Guide - Page 36
www.dell.com | support.dell.com Installation des rails de montage VersaRails REMARQUE : Si vous avez déjà installé les rails de montage RapidRails, sautez cette section. la bride de fixation jusqu'à ce qu'elle soit alignée sur les trous du rail vertical arrière. 2-10 Guide d'installation du rack - Dell PowerVault 221S | Rack Installation Guide - Page 37
ème. c Desserrez les deux vis à molette fixant la charnière du cache au panneau avant (voir la Figure 2-7). d Retirez le cache et mettez-le de côté. Guide d'installation du rack 2-11 - Dell PowerVault 221S | Rack Installation Guide - Page 38
www.dell.com | support.dell.com Figure 2-7. Retrait du cache avant verrou vis pendant l'exécution de la procédure (pour savoir comment retirer et remplacer ces modules, consultez les instructions du Guide d'installation et de dépannage du système). 4 Pour retirer les capots gauche et droit du - Dell PowerVault 221S | Rack Installation Guide - Page 39
côté (voir la Figure 2-8). Figure 2-8. Retrait du capot du système en tour capuchons ronds (2) vis à tête cylindrique 6 pans (4) rondelles plates (4) capots gauche et droit base Guide d'installation du rack 2-13 - Dell PowerVault 221S | Rack Installation Guide - Page 40
www.dell.com | support.dell.com 6 Pour retirer le panneau avant du système en tour (voir la Figure 2-9): a Positionnez le système de façon : N'installez pas les disques durs avant d'avoir terminé la procédure suivante, "Installation du système dans le rack". 2-14 Guide d'installation du rack - Dell PowerVault 221S | Rack Installation Guide - Page 41
système soit placé contre les rails verticaux (voir la Figure 2-10). 3 Resserrez les vis à molette captives de chaque côté du panneau avant du système. Guide d'installation du rack 2-15 - Dell PowerVault 221S | Rack Installation Guide - Page 42
remettre en place les portes du rack, reportez-vous à la documentation fournie avec les armoires en rack Dell 24U et 42U. Si vous possédez un rack Dell PowerEdge 4210, reportez-vous aux procédures du Guide d'installation du rack Dell PowerEdge 4210. Si vous possédez un rack d'un autre fabricant que - Dell PowerVault 221S | Rack Installation Guide - Page 43
techniques rack Dell, 2-3 racks d'autres marques que Dell, 2-4 Caractéristiques techniques du rack Dell, 2-3 contenu du kit illustration, 2-3, 2-4 Kit RapidRails, 2-3 Kit VersaRails, 2-3 liste, 2-3 contenu du kit de rack, 2-3 illustration, 2-3, 2-4 installation, 2-5 liste, 2-3 I Informations sur - Dell PowerVault 221S | Rack Installation Guide - Page 44
2 Index - Dell PowerVault 221S | Rack Installation Guide - Page 45
Dell™-Systeme Rack-Installationsanleitung www.dell.com | support.dell.com - Dell PowerVault 221S | Rack Installation Guide - Page 46
Hardware oder den Verlust von Daten hin und beschreibt, wie dieses Problem vermieden werden kann. VORSICHT: Die Angabe VORSICHT warnt vor einer mö Informationen können ohne Vorankündigung geändert werden. © 2001 Dell Computer Corporation. Alle Rechte vorbehalten. Eine Reproduktion dieses Dokuments - Dell PowerVault 221S | Rack Installation Guide - Page 47
Inhalt Sicherheitshinweise 3-1 Installationsanleitung 3-2 Inhalt des RapidRails-Rack-Kits 3-3 Dell-Rack-Anforderungen 3-3 Inhalt des VersaRails-Rack-Kits 3-3 Rack-Anforderungen anderer Anbieter 3-4 Bevor Sie beginnen 3-4 Wichtige Sicherheitsinformationen 3-4 Rack-Stabilisatoren 3-5 - Dell PowerVault 221S | Rack Installation Guide - Page 48
Abbildungen Abbildung 3-1. Abbildung 3-2. Abbildung 3-3. Abbildung 3-4. Abbildung 3-5. Abbildung 3-6. Abbildung 3-7. Abbildung 3-8. Abbildung 3-9. Abbildung 3-10. Inhalt des RapidRails-Rack-Kits 3-3 Inhalt des VersaRails-Rack-Kits 3-4 Eine Rack-Einheit 3-7 Markieren der vertikalen Schienen 3-8 - Dell PowerVault 221S | Rack Installation Guide - Page 49
auch in der zum System gehörenden Dokumentation zur RackInstallation. Server, Speichersysteme und Geräte werden als Komponenten in einem Rack Es liegt in Ihrer Verantwortung, die Eignung der endgültigen Kombination von Dell-Systemen und Rack-Kits für den Einsatz in Gestellschränken anderer Hersteller - Dell PowerVault 221S | Rack Installation Guide - Page 50
www.dell.com | support.dell.com • Bevor Sie an einem Rack arbeiten, vergewissern Sie sich, dass in einem Gestellschrank durch geschulte Servicetechniker. Das RapidRails™ RackKit kann in allen Dell™-Gestellschränken installiert werden und das VersaRails™ Rack-Kit in den meisten Standardgestellschr - Dell PowerVault 221S | Rack Installation Guide - Page 51
-Rack-Kit enthält ein Paar RapidRails-Montageschienen (siehe Abbildung 3-1). Abbildung 3-1. Inhalt des RapidRails-Rack-Kits RapidRails-Montageschienen Dell-Rack-Anforderungen BITTE BEACHTEN: Dieses Rack-Kit muss von geschulten Servicetechnikern in einem DellRack installiert werden. Wenn Sie das Kit - Dell PowerVault 221S | Rack Installation Guide - Page 52
www.dell.com | support.dell.com Abbildung 3-2. Inhalt des VersaRails-Rack-Kits 10-32 x 0,5-Zoll FlachkopfKreuzschlitzschrauben (8) VersaRails-Montageschienen Rack-Anforderungen anderer Anbieter BITTE BEACHTEN: Dieses Rack-Kit muss von geschulten - Dell PowerVault 221S | Rack Installation Guide - Page 53
-Kits (falls erforderlich) 5 Installieren des Systems im Rack 6 Einsetzen der Rack-Türen HINWEIS: Die im Folgenden beschriebenen Verfahren gelten für Dell-Gestellschränke und für Gestellschränke anderer Anbieter gleichermaßen, sofern nicht anders angegeben. Rack-Installationsanleitung 3-5 - Dell PowerVault 221S | Rack Installation Guide - Page 54
dell.com | support.dell.com Abnehmen der Rack-Türen Weitere Informationen zum Abnehmen der Türen finden Sie der den Dell 24-U- und 42-UGestellschränken beiliegenden Dokumentation. Wenn Sie einen Gestellschrank des Typs Dell 3-U (5,25 Zoll) einhalten. Dell-Gestellschränke und Gestellschränke anderer - Dell PowerVault 221S | Rack Installation Guide - Page 55
mm (0,5 Zoll) Weitere Informationen über die Anforderungen zur Installation von Komponenten in einem Dell-Rack finden Sie in der Software Dell Rack Advisor auf der Dell-Website unter http://support.dell.com. VORSICHT: Wenn Sie mehr als ein System installieren, installieren Sie die Montageschienen - Dell PowerVault 221S | Rack Installation Guide - Page 56
www.dell.com | support.dell.com Um das Rack markieren, gehen Sie wie folgt vor: 1 Bringen Sie auf den vorderen vertikalen Schienen des Racks eine Markierung an der Stelle an, - Dell PowerVault 221S | Rack Installation Guide - Page 57
Installieren der RapidRails-Montageschienen HINWEIS: Wenn Sie VersaRails-Schienen installieren, lesen Sie „Installieren der VersaRailsMontageschienen". 1 Positionieren Sie an der Vorderseite des Gestellschrankes eine der Montageschienen so, dass der zugehörige Montagehalterungsflansch zwischen die - Dell PowerVault 221S | Rack Installation Guide - Page 58
www.dell.com | support.dell.com 4 Ziehen Sie an der Rückseite des Gestellschrankes den Flansch der Montagehalterung nach hinten, bis die Montagehaken in ihren rechteckigen Löchern auf der vertikalen Schiene - Dell PowerVault 221S | Rack Installation Guide - Page 59
2 Drücken Sie die Montageschiene nach vorn, bis die Montagelöcher mit den Löchern auf der vorderen vertikalen Schiene ausgerichtet sind. 3 Befestigen Sie den vorderen Montagehalterungsflansch mit zwei 10-32 x 0,5-ZollKreuzschlitzschrauben an der vorderen vertikalen Schiene. 4 Ziehen Sie auf der Rü - Dell PowerVault 221S | Rack Installation Guide - Page 60
www.dell.com | support.dell.com Abbildung 3-7. Entfernen der Frontblende Riegel Flügelschraube Blende 3 Beschriften Sie alle Festplatten und nehmen Sie sie aus dem System heraus. HINWEIS: Obwohl es für die - Dell PowerVault 221S | Rack Installation Guide - Page 61
5 Um den Sockel des Tower-Systems zu entfernen, führen Sie die folgenden Schritte aus: a Legen Sie das System auf die rechte Seite. b Entfernen Sie die beiden Sechskantschrauben und flachen Unterlegscheiben auf der Unterseite des Tower-Systems mithilfe eines 3/16-Zoll-Inbusschlüssels. c Entfernen - Dell PowerVault 221S | Rack Installation Guide - Page 62
www.dell.com | support.dell.com 6 Um die Frontplatte des Tower-Systems zu entfernen, führen Sie die folgenden Schritte aus (siehe Abbildung 3-9): a Positionieren Sie das System so, dass die Frontplatte - Dell PowerVault 221S | Rack Installation Guide - Page 63
Abbildung 3-9. Installieren der Rack-Frontplatte Schrauben (14) Lichtröhren (5) Frontplatte Installieren des Systems im Rack VORSICHT: Wenn Sie mehrere Systems installieren, installieren Sie das schwerste System möglichst weit unten in dem Rack. VORSICHT: Ziehen Sie niemals mehr als eine - Dell PowerVault 221S | Rack Installation Guide - Page 64
www.dell.com | support.dell.com Abbildung 3-10. Installieren des Systems im Rack Selbstsichernde Flügelschraube (2) Einsetzen der Rack-Türen Weitere Informationen über das Einsetzen der Türen finden Sie in der den Dell 24-U- und 42-U-Gestellschränken beiliegenden Dokumentation. Wenn Sie ein Rack - Dell PowerVault 221S | Rack Installation Guide - Page 65
, 3-4 D Dell-Rack-Anforderungen, 3-3 Dell-Website, 3-7 E Einbau Rack-Frontplatte, 3-14 RapidRails-Montageschienen, 3-9 System im Rack, 3-15, 3-16 Tower-nach-Rack-Kit, 3-11 VersaRails-Montageschienen, 3-10 I Inhalt des Rack-Kits, 3-3 Installation Schritte, 3-5 K Kit-Inhalt abgebildet, 3-3, 3-4 Liste - Dell PowerVault 221S | Rack Installation Guide - Page 66
2 Index - Dell PowerVault 221S | Rack Installation Guide - Page 67
Sistemas Dell™ Guía de montaje del rack www.dell.com | support.dell.com - Dell PowerVault 221S | Rack Installation Guide - Page 68
este documento pueden utilizarse otras marcas y nombres comerciales para referirse a las entidades propietarias de dichas marcas y nombres o a sus productos. Dell Computer Corporation renuncia a cualquier derecho sobre las marcas y nombres comerciales que no sean de su propiedad. Septiembre de 2001 - Dell PowerVault 221S | Rack Installation Guide - Page 69
4-1 Instrucciones de instalación 4-2 Contenido del kit de rack RapidRails 4-3 Requisitos para racks Dell 4-3 Contenido del kit de rack VersaRails 4-3 Requisitos para racks que no sean Dell 4-4 Antes de empezar 4-4 Información de seguridad importante 4-4 Pie estabilizador para el rack - Dell PowerVault 221S | Rack Installation Guide - Page 70
Figuras Figura 4-1. Figura 4-2. Figura 4-3. Figura 4-4. Figura 4-5. Figura 4-6. Figura 4-7. Figura 4-8. Figura 4-9. Figura 4-10. Contenido del kit de rack RapidRails 4-3 Contenido del kit de rack VersaRails 4-4 Unidad de rack 4-7 Marcado de las guías verticales 4-8 Instalación de las guías de - Dell PowerVault 221S | Rack Installation Guide - Page 71
. El montaje del sistema y kit de rack en armarios rack de otra marca que no sea Dell no ha sido aprobado por ninguna agencia de seguridad. Es responsabilidad del cliente la evaluación, por parte de una agencia de seguridad certificada, de la combinación de sistema y kit de rack montados en armarios - Dell PowerVault 221S | Rack Installation Guide - Page 72
www.dell.com | support.dell.com • Antes de trabajar en el rack, los estabilizadores deben delanteros para varios racks unidos antes de trabajar en el rack. • Cargue siempre el rack desde la parte inferior hacia arriba, colocando en primer lugar el elemento más pesado. • El rack debe estar nivelado - Dell PowerVault 221S | Rack Installation Guide - Page 73
(véase la Figura 4-1). Figura 4-1. Contenido del kit de rack RapidRails Guías de montaje RapidRails Requisitos para racks Dell AVISO: este kit de rack está concebido para su montaje en un rack Dell por técnicos de servicio con experiencia. Si monta el kit en otro rack, éste debe cumplir con las - Dell PowerVault 221S | Rack Installation Guide - Page 74
dell.com | support.dell.com Figura 4-2. Contenido del kit de rack VersaRails tornillos Phillips de cabeza cónica de 10-32 x 0,5 pulgadas (8) guías de montaje VersaRails Requisitos para racks que no sean Dell aún cuando se montan sistemas en la parte alta del rack. 4-4 Guía de montaje del rack - Dell PowerVault 221S | Rack Installation Guide - Page 75
(en caso necesario) 5 Montaje del sistema en el rack 6 Colocación de las puertas del rack NOTA: Los procedimientos siguientes se aplican tanto a los armarios rack Dell como a los no fabricados por Dell a menos que se especifique. Guía de montaje del rack 4-5 - Dell PowerVault 221S | Rack Installation Guide - Page 76
www.dell.com | support.dell.com Desmontaje de las puertas del rack Consulte los procedimientos para desmontar las puertas en la documentación que se facilita con los armarios rack Dell 24-U y 42-U. Si tiene un rack Dell PowerEdge 4210, consulte los procedimientos indicados en la Guía de montaje del - Dell PowerVault 221S | Rack Installation Guide - Page 77
montaje de componentes en un rack Dell, consulte al software Dell Rack Advisor, disponible en el sitio web de Dell, en http://support.dell.com. PRECAUCIÓN: si va en las que desee colocar la parte inferior del sistema que está instalando en el armario rack. La parte inferior de cada espacio 1-U se - Dell PowerVault 221S | Rack Installation Guide - Page 78
www.dell.com | support.dell.com 2 Coloque una marca a 13,3 centímetros (5,25 pulgadas) por encima de la marca original (o 3-U (5,25 pulgadas) entre guías (el dibujo no está realizado a escala) puntos de cinta adhesiva para la parte superior e inferior del sistema 4-8 Guía de montaje del rack - Dell PowerVault 221S | Rack Installation Guide - Page 79
, consulte "Montaje de las guías de montaje VersaRails". 1 En la parte frontal del armario rack, coloque una de las guías de montaje de 2 Alinee la brida del soporte de montaje de la guía (situada en la parte frontal de la guía) con los orificios cuadrados de las guías verticales frontales ( - Dell PowerVault 221S | Rack Installation Guide - Page 80
www.dell.com | support.dell.com 4 En la parte posterior del armario, tire hacia atrás de la brida de VersaRails NOTA: si ya ha instalado las guías de montaje RapidRails, ignore esta sección. 1 En la parte frontal del armario rack, coloque una de las guías de montaje de forma que la brida del soporte - Dell PowerVault 221S | Rack Installation Guide - Page 81
del soporte de montaje frontal a la guía vertical frontal. 4 En la parte trasera del armario, tire hacia atrás de la brida del soporte de montaje tapas y el panel frontal 1 Apague y desenchufe el sistema y desconecte los cables de alimentación y periféricos. 2 Para retirar el bisel (consulte la - Dell PowerVault 221S | Rack Installation Guide - Page 82
.com | support.dell.com Figura 4-7. Extracción del bisel frontal cierre tornillo de mano bisel 3 Etiquete todas las unidades de disco duro y retírelas del sistema. NOTA: aunque no es necesario para la conversión, quizás desee retirar los dos módulos de alimentación y refrigeración de la parte - Dell PowerVault 221S | Rack Installation Guide - Page 83
5 Para extraer la base del sistema de torre: a Tumbe el sistema sobre su lado derecho. b Utilice una llave de cabeza hexagonal (Allen) de 3/16 pulgadas para retirar los dos tornillos hexagonales con encastre en cabeza y las arandelas planas de la base del chasis de torre. c Retire la base y coló - Dell PowerVault 221S | Rack Installation Guide - Page 84
www.dell.com | support.dell.com 6 Para extraer el panel frontal del sistema de torre (consulte del panel frontal. Montaje del panel frontal del rack 1 Coloque el panel frontal del rack en la parte frontal del chasis del sistema, y monte con cuidado los cinco tubos ligeros en sus orificios del panel - Dell PowerVault 221S | Rack Installation Guide - Page 85
Figura 4-9. Montaje del panel frontal del rack tornillos (14) tubos ligeros (5) panel frontal Montaje del sistema en el rack PRECAUCIÓN: si va a montar más de un sistema, monte el sistema más pesado en la posición más baja que haya disponible en el rack. PRECAUCIÓN: nunca extraiga más de un - Dell PowerVault 221S | Rack Installation Guide - Page 86
www.dell.com | support.dell.com Figura 4-10. Montaje del sistema en el rack tornillos de mano integrados (2) Colocación de las puertas en el rack Consulte los procedimientos para volver a colocar las puertas en la documentación que se facilita con los armarios rack Dell 24-U y 42-U. Si tiene un - Dell PowerVault 221S | Rack Installation Guide - Page 87
, 4-6 pie estabilizador, 4-5 rack que no sea de Dell requisitos, 4-4 RapidRails contenido del kit, 4-3 requisitos rack Dell, 4-3 rack que no sea de Dell, 4-4 Requisitos para racks Dell, 4-3 S sistema montar en rack, 4-15, 4-16 sitio web de Dell, 4-7 T torre a rack montar, 4-11 U unidad de rack - Dell PowerVault 221S | Rack Installation Guide - Page 88
2 Índice - Dell PowerVault 221S | Rack Installation Guide - Page 89
Dell www.dell.com | support.dell.com - Dell PowerVault 221S | Rack Installation Guide - Page 90
2001 Dell Computer Corporation Dell Computer Corporation Dell、DELL ロゴ、PowerEdge、RapidRails VersaRails は Dell Computer Corporation Dell Computer Corporation 2001 年 9 月 P/N 7F206 Rev. A00 - Dell PowerVault 221S | Rack Installation Guide - Page 91
目次 5-1 5-2 RapidRails 5-3 Dell 5-3 VersaRails 5-3 Dell 5-4 5-4 5-4 5-5 5-5 5-5 5-6 5-6 RapidRails 5-9 VersaRails 5-10 5-11 5-11 5-14 5-15 5-16 索引 目次 3 - Dell PowerVault 221S | Rack Installation Guide - Page 92
図 図 5-1 図 5-2 図 5-3 図 5-4 図 5-5 図 5-6 図 5-7 図 5-8 図 5-9 図 5-10 RapidRails 5-3 VersaRails 5-4 1-U 5-7 5-8 RapidRails 5-9 VersaRails 5-10 5-12 5-13 5-15 5-16 4 目次 - Dell PowerVault 221S | Rack Installation Guide - Page 93
Dell 2 Dell Dell Dell Dell Dell Dell Dell Dell Dell Dell 1 2 1 5-1 - Dell PowerVault 221S | Rack Installation Guide - Page 94
www.dell.com | support.dell.com AC 80 1 RapidRails Dell VersaRails RapidRails および VersaRails 1 1 5-2 - Dell PowerVault 221S | Rack Installation Guide - Page 95
RapidRails RapidRails 1 組の RapidRails 5-1 参照 )。 図 5-1. RapidRails RapidRails Dell Dell ANSI EIA) 規格 ANSI/EIA-310-D-92 IEC) 297 DIN) 41494 1 1 VersaRails VersaRails 5-2 参照 )。 • VersaRails 1 組 • 10-32 x 0.5 8 個 32 の #10 10-32 5-3 - Dell PowerVault 221S | Rack Installation Guide - Page 96
www.dell.com | support.dell.com 図 5-2. VersaRails 10-32 x 0.5 8) VersaRails Dell ANSI EIA) 規格 ANSI/EIA-310-D-92 IEC) 297 DIN) 41494 1 1 はじめに 5-4 - Dell PowerVault 221S | Rack Installation Guide - Page 97
• #2 VersaRails Torx T-10 3/16 1 2 3 4 5 6 Dell Dell 5-5 - Dell PowerVault 221S | Rack Installation Guide - Page 98
www.dell.com | support.dell.com Dell 24-U および 42-U Dell PowerEdge™ 4210 Dell PowerEdge 4210 Dell 1 メモ : VersaRails VersaRails 3-U (5.25 Dell EIA-310 Dell 1-U ごとに 3 1-U 15.9 mm、15.9 mm、12.7 mm (0.625 0.625 0.5 5-3 参照 )。 5-6 - Dell PowerVault 221S | Rack Installation Guide - Page 99
図 5-3 1-U 1-U (4.4 cm または 1.75 インチ ) 12.7 mm (0.5 15.9 mm (0.625 15.9 mm (0.625 12.7 mm (0.5 インチ ) Dell Dell Rack Advisor Dell の Web http://support.jp.dell.com 警告 : 2 1 5-7 - Dell PowerVault 221S | Rack Installation Guide - Page 100
www.dell.com | support.dell.com 1 1-U 2 5-3 2 13.3 cm (5.25 EIA-310 9 5-4 参照 )。 図 5-4 3-U (5.25 5-8 - Dell PowerVault 221S | Rack Installation Guide - Page 101
RapidRails メモ : VersaRails VersaRails 1 5-5 参照 )。 2 5-5 参照 )。 3 図 5-5. RapidRails 2) RapidRails 2) 5-9 - Dell PowerVault 221S | Rack Installation Guide - Page 102
www.dell.com | support.dell.com 4 5 1 ~ 4 6 VersaRails メモ : RapidRails 1 5-6 図 5-6. VersaRails 2) 5-10 VersaRails 2) - Dell PowerVault 221S | Rack Installation Guide - Page 103
2 3 10-32 x 0.5 2 4 5 10-32 x 0.5 2 6 1 ~ 5 7 1 2 5-7 a b c 2 5-7 d 5-11 - Dell PowerVault 221S | Rack Installation Guide - Page 104
www.dell.com | support.dell.com 図 5-7 ロック 蝶ネジ ベゼル 3 2 Installation and Troubleshooting Guide 4 5-8 参照 )。 a 2 b 3/16 Allen c 5-12 - Dell PowerVault 221S | Rack Installation Guide - Page 105
5 a b 3/16 Allen 2 c 5-8 参照 )。 図 5-8 2 4) 4) ベース 5-13 - Dell PowerVault 221S | Rack Installation Guide - Page 106
www.dell.com | support.dell.com 6 5-9 参照 )。 a 2.5 cm (1 b 14 4-40 x 0.25 T-10 Torx c 5 1 5 14 T-10 Torx 2 6 14 T-10 Torx 5-9 参照 )。 3 5-14 - Dell PowerVault 221S | Rack Installation Guide - Page 107
図 5-9 ネジ (14) 5) 正面パネ 警告: 2 1 1 2 5-10 参照 )。 3 5-15 - Dell PowerVault 221S | Rack Installation Guide - Page 108
www.dell.com | support.dell.com 図 5-10 2) Dell 24-U および 42-U Dell PowerEdge 4210 Dell PowerEdge 4210 Dell 5-16 - Dell PowerVault 221S | Rack Installation Guide - Page 109
索引 D Dell Web 5-7 Dell 要件 , 5-4 Dell 5-3 R RapidRails 5-3 RapidRails 5-9 V VersaRails Dell 5-4 5-3 あ 5-4 き RapidRails 5-3 一覧 , 5-3 図 , 5-3, 5-4 5-3 VersaRails 5-3 こ 5-5 し 5-15, 5-16 す 1 5-7 5-8 た 5-11 と 5-16 5-6 RapidRails 5-9 VersaRails 5-10 作業 , 5-5 5-11 5-14 - Dell PowerVault 221S | Rack Installation Guide - Page 110
ら ラック , 5-5 5-6 5-3 図 , 5-3, 5-4 5-3 5-5 5-6 5-7 2 索引
-
 1
1 -
 2
2 -
 3
3 -
 4
4 -
 5
5 -
 6
6 -
 7
7 -
8
-
9
-
10
-
11
-
12
-
13
-
14
-
15
-
16
-
17
-
18
-
19
-
20
-
21
-
22
-
23
-
24
-
25
-
26
-
27
-
28
-
29
-
30
-
31
-
32
-
33
-
34
-
35
-
36
-
37
-
38
-
39
-
40
-
41
-
42
-
43
-
44
-
45
-
46
-
47
-
48
-
49
-
50
-
51
-
52
-
53
-
54
-
55
-
56
-
57
-
58
-
59
-
60
-
61
-
62
-
63
-
64
-
65
-
66
-
67
-
68
-
69
-
70
-
71
-
72
-
73
-
74
-
75
-
76
-
77
-
78
-
79
-
80
-
81
-
82
-
83
-
84
-
85
-
86
-
87
-
88
-
89
-
90
-
91
-
92
-
93
-
94
-
95
-
96
-
97
-
98
-
99
-
100
-
101
-
102
-
103
-
104
-
105
-
106
-
107
-
108
-
109
-
110
 |
 |

www.dell.com | support.dell.com
Dell™ Systems
Rack Installation Guide