Dell PowerVault 221S Rack Installation Guide - Page 17
Installing the Rack Front Panel, Front Panel see
 |
View all Dell PowerVault 221S manuals
Add to My Manuals
Save this manual to your list of manuals |
Page 17 highlights
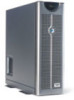
6 To remove the tower system front panel (see Figure 1-9): a Position the system so that the front panel extends about 2.5 centimeters (1 inch) beyond the edge of the table or work surface. b Remove the 14 4-40 x 0.25-inch pan head black T-10 Torx screws that secure the tower front panel to the chassis. c Remove the front panel from the system chassis, taking care to avoid damaging the five plastic light pipes that extend through the front panel. Installing the Rack Front Panel 1 Position the rack front panel on the front of the system chassis, using care to install the five light pipes in their holes in the front panel. NOTE: In the next step, start all 14 T-10 Torx screws in their holes before tightening any of the screws to ensure proper alignment. 2 Secure the rack front panel to the chassis with the 14 T-10 Torx screws that you removed in step 6 of the last procedure, "Removing the Bezel, Drives, Covers, and Front Panel" (see Figure 1-9). 3 Reinstall the power and cooling modules (if they were removed). NOTE: Do not install the hard drives until the next procedure, "Installing the System in the Rack," is completed. Rack Installation Guide 1-13
-
 1
1 -
2
-
3
-
4
-
5
-
6
-
7
-
8
-
9
-
10
-
11
-
 12
12 -
 13
13 -
 14
14 -
 15
15 -
 16
16 -
 17
17 -
 18
18 -
 19
19 -
 20
20 -
 21
21 -
 22
22 -
23
-
24
-
25
-
26
-
27
-
28
-
29
-
30
-
31
-
32
-
33
-
34
-
35
-
36
-
37
-
38
-
39
-
40
-
41
-
42
-
43
-
44
-
45
-
46
-
47
-
48
-
49
-
50
-
51
-
52
-
53
-
54
-
55
-
56
-
57
-
58
-
59
-
60
-
61
-
62
-
63
-
64
-
65
-
66
-
67
-
68
-
69
-
70
-
71
-
72
-
73
-
74
-
75
-
76
-
77
-
78
-
79
-
80
-
81
-
82
-
83
-
84
-
85
-
86
-
87
-
88
-
89
-
90
-
91
-
92
-
93
-
94
-
95
-
96
-
97
-
98
-
99
-
100
-
101
-
102
-
103
-
104
-
105
-
106
-
107
-
108
-
109
-
110
 |
 |
