Dell PowerVault 221S Rack Installation Guide - Page 9
Recommended Tools and Supplies, Installation Tasks, Removing the Rack Doors, Marking the Rack - driver
 |
View all Dell PowerVault 221S manuals
Add to My Manuals
Save this manual to your list of manuals |
Page 9 highlights
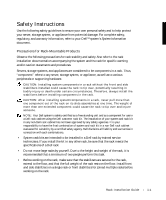
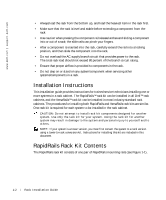
Recommended Tools and Supplies The following items make the installation easier: • A #2 Phillips screwdriver (if installing a VersaRails kit) • Torx T-10 driver (if installing the tower-to-rack kit) • 3/16-inch hex-head wrench (if installing the tower-to-rack kit) Installation Tasks Installing a rack kit involves the following tasks: 1 Removing the rack doors 2 Marking the rack 3 Installing the mounting rails in the rack 4 Installing the tower-to-rack conversion kit (if needed) 5 Installing the system in the rack 6 Replacing the rack doors NOTE: The procedures that follow apply to both Dell rack cabinets and rack cabinets not manufactured by Dell unless identified as specific to one or the other. Removing the Rack Doors See the procedures for removing doors in the documentation provided with your Dell 24-U and 42-U rack cabinets. If you have a Dell PowerEdge™ 4210 rack cabinet, see the procedures in the Dell PowerEdge 4210 Rack Installation Guide. If you have a rack cabinet not manufactured by Dell, see the manufacturer's documentation for removing doors. CAUTION: Because of the size and weight of the rack cabinet doors, never attempt to remove or install them by yourself. Marking the Rack NOTE: If you are installing a VersaRails rack kit, skip to the procedure, "Installing the VersaRails Mounting Rails." You must allow 3-U (5.25 inches) of vertical space for each system you install in the rack. Dell rack cabinets and rack cabinets not manufactured by Dell that meet EIA-310 standards have an alternating pattern of three holes per U with center-to-center hole spacing (beginning at the top hole of a 1-U space) of 15.9 mm, 15.9 mm, and 12.7 mm (0.625-inch, 0.625-inch, and 0.5-inch) for the front and rear vertical rails (see Figure 1-3). Rack Installation Guide 1-5
-
 1
1 -
2
-
3
-
 4
4 -
 5
5 -
 6
6 -
 7
7 -
 8
8 -
 9
9 -
 10
10 -
 11
11 -
 12
12 -
 13
13 -
 14
14 -
15
-
16
-
17
-
18
-
19
-
20
-
21
-
22
-
23
-
24
-
25
-
26
-
27
-
28
-
29
-
30
-
31
-
32
-
33
-
34
-
35
-
36
-
37
-
38
-
39
-
40
-
41
-
42
-
43
-
44
-
45
-
46
-
47
-
48
-
49
-
50
-
51
-
52
-
53
-
54
-
55
-
56
-
57
-
58
-
59
-
60
-
61
-
62
-
63
-
64
-
65
-
66
-
67
-
68
-
69
-
70
-
71
-
72
-
73
-
74
-
75
-
76
-
77
-
78
-
79
-
80
-
81
-
82
-
83
-
84
-
85
-
86
-
87
-
88
-
89
-
90
-
91
-
92
-
93
-
94
-
95
-
96
-
97
-
98
-
99
-
100
-
101
-
102
-
103
-
104
-
105
-
106
-
107
-
108
-
109
-
110
 |
 |
