Dell Precision 530 Service Manual
Dell Precision 530 Manual
 |
View all Dell Precision 530 manuals
Add to My Manuals
Save this manual to your list of manuals |
Dell Precision 530 manual content summary:
- Dell Precision 530 | Service Manual - Page 1
Dell Precision™ WorkStation 530 SERVICE MANUAL www.dell.com support.dell.com - Dell Precision 530 | Service Manual - Page 2
to hardware or loss of data and tells you how to avoid the problem. CAUTION: A CAUTION indicates a potentially hazardous situation which, if not avoided of Dell Computer Corporation is strictly forbidden. Trademarks used in this text: Dell Precision and the DELL logo are trademarks of Dell Computer - Dell Precision 530 | Service Manual - Page 3
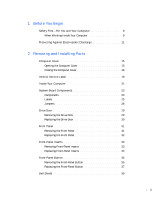
the Computer Cover 15 Closing the Computer Cover 16 Interior Service Label 19 Inside Your Computer 21 System Board Components 23 Components 23 Labels 25 Jumpers 26 Drive Door 29 Removing the Drive Door 29 Replacing the Drive Door 30 Front Panel 31 Removing the Front Panel 31 Replacing - Dell Precision 530 | Service Manual - Page 4
the Dell Shield 40 Power Supply 41 Removing the Power Supply 41 Replacing the Power Supply 43 Computer Memory 45 System Memory Installation Guidelines 47 Removing a Memory Module 48 Installing a Memory Module 49 Removing Memory Riser Boards 50 Installing Memory Riser Boards 53 Disk Drives - Dell Precision 530 | Service Manual - Page 5
the Microprocessor Airflow Shroud 104 Microprocessor 107 Installation Guidelines 107 Upgrading the Microprocessor(s 107 Microprocessor Cooling Fan 113 Removing the a VRM 115 Installing a VRM 116 Computer Battery 119 System Board 123 Removing the System Board 123 Replacing the System - Dell Precision 530 | Service Manual - Page 6
6 - Dell Precision 530 | Service Manual - Page 7
SECTION 1 Before You Begin Safety First-For You and Your Computer Protecting Against Electrostatic Discharge www.dell.com | support.dell.com - Dell Precision 530 | Service Manual - Page 8
www.dell.com | support.dell.com 8 Be fo r e Yo u Be g in - Dell Precision 530 | Service Manual - Page 9
computer, wait 10 to 20 seconds after disconnecting the computer from its electrical outlet. Before removing a component from the system board, verify that the standby power light on the system board has turned off. To locate this light, see "System Board Components" or "Interior Service Label." 9 - Dell Precision 530 | Service Manual - Page 10
on a card. Hold a card by its edges or by its metal mounting bracket. Hold a component such as a microprocessor chip by its edges, not by its pins. Also see "Protecting Against Electrostatic Discharge." In addition, Dell recommends that you periodically review the safety instructions in your - Dell Precision 530 | Service Manual - Page 11
Protecting Against Electrostatic Discharge Static electricity can harm delicate components inside your computer. To prevent static damage, discharge static electricity from your body before you touch any of your computer's electronic components, such as the microprocessor. You can do so by touching - Dell Precision 530 | Service Manual - Page 12
www.dell.com | support.dell.com 12 - Dell Precision 530 | Service Manual - Page 13
Board Components Drive Door Front Panel Front-Panel Inserts Front-Panel Button Dell Shield Power Supply Computer Memory Disk Drives and Media Expansion-Card Airflow Shroud Expansion Cards Expansion-Card Cooling Fan and Guide Control Panel I/O Panel Chassis Intrusion Switch www.dell.com | support - Dell Precision 530 | Service Manual - Page 14
www.dell.com | support.dell.com Speaker Microprocessor Airflow Shroud Microprocessor Microprocessor Cooling Fan VRM Computer Battery System Board 14 Removi ng and Inst alli ng Parts - Dell Precision 530 | Service Manual - Page 15
the computer from its electrical outlet. Before removing a component from the system board, verify that the standby power light on the system board has turned off. To locate this light, see "System Board Components." 1 Turn off the computer and devices, disconnect them from their electrical - Dell Precision 530 | Service Manual - Page 16
www.dell.com | support.dell.com Opening the Computer Cover cover release latch padlock ring Closing the Computer Cover 1 Check all cable connections, especially those that might have come loose - Dell Precision 530 | Service Manual - Page 17
Closing the Computer Cover cover release latch padlock ring 4 Stand the computer upright. 5 If you are using a padlock to secure your computer, reinstall the padlock. 17 - Dell Precision 530 | Service Manual - Page 18
www.dell.com | support.dell.com 18 - Dell Precision 530 | Service Manual - Page 19
Interior Service Label A service label affixed to the inside of your computer cover provides information about working inside your computer. Interior Service Label interior service label 19 - Dell Precision 530 | Service Manual - Page 20
www.dell.com | support.dell.com 20 - Dell Precision 530 | Service Manual - Page 21
color-coded green. Inside the Computer interior service label diskette drive bracket hard-drive bracket externally accessible-drive bracket chassis intrusion switch control panel memory riser board retention bracket (if needed) microprocessor airflow shroud I/O panel connectors expansion-card slots - Dell Precision 530 | Service Manual - Page 22
www.dell.com | support.dell.com 22 - Dell Precision 530 | Service Manual - Page 23
System Board Components Components The following figure shows the principal connectors and components on the system board. 23 - Dell Precision 530 | Service Manual - Page 24
www.dell.com | support.dell.com RIMM sockets (4) CD audio input connector system board speaker System Board Components VRM 0 connector USB (2) connectors VRM 1 connector 32-bit PCI expansion card connectors (3) 64-bit PCI expansion card connectors (2) suspend-to-RAM light diskette-drive - Dell Precision 530 | Service Manual - Page 25
connectors and components on the system board, and briefly describes the function of each. System Board Labels Connector or Component 1394 AGP RTCRST Label IEEE 1394 connector AGP Pro card connector Audio connectors Auxiliary drive access light connector Battery socket CD audio input connector - Dell Precision 530 | Service Manual - Page 26
www.dell.com | support.dell.com S y s t e m B o a r d L a b e l s (continued) Connector or Component SCSI SPKR STANDBY_LED STR_LED TAPI/MODEM USB_NIC VRM_0 VRM_1 Label LVD SCSI connector System board speaker Standby power light Suspend-to-RAM light Telephony connector Network and Port 2 USB (2) - Dell Precision 530 | Service Manual - Page 27
following table lists the system board jumpers and their settings. System-Board Jumper Settings Jumper Setting Description PSWD (default) Password features are enabled. Password features are disabled. RTCRST Real-time clock reset. Can be used for troubleshooting. jumpered unjumpered 27 - Dell Precision 530 | Service Manual - Page 28
www.dell.com | support.dell.com 28 - Dell Precision 530 | Service Manual - Page 29
Drive Door • Removing the drive door • Replacing the drive door Removing the Drive Door 1 Open the drive door to a 90-degree angle (see the following figure). Opening the Drive Door 2 Unsnap the top hinge, and pull the top of the drive door outward, away from the chassis. 29 - Dell Precision 530 | Service Manual - Page 30
www.dell.com | support.dell.com Removing the Drive Door top hinge bottom hinge 3 Lift the bottom hinge off of the chassis. Replacing the Drive Door To replace the drive door, perform the removal procedures in reverse. 30 - Dell Precision 530 | Service Manual - Page 31
outlets, wait at least 10 to 20 seconds, lay the computer on its right side, and open the computer cover. 2 Disconnect and remove all disk drives from the chassis drive bay. 3 Release the front panel by pressing each of the seven front-panel release buttons (see the following figure). 31 - Dell Precision 530 | Service Manual - Page 32
www.dell.com | support.dell.com Removing the Front Panel front-panel release buttons (7) 4 Close the computer cover halfway and rotate the top of the panel outward, away from the - Dell Precision 530 | Service Manual - Page 33
outlets, wait at least 10 to 20 seconds, lay the computer on its right side, and open the computer cover. 2 Disconnect and remove any disk drives from the chassis drive bay that obstruct your access to the front-panel insert you want to use. 3 Remove the front-panel insert for the chassis - Dell Precision 530 | Service Manual - Page 34
www.dell.com | support.dell.com Removing Front-Panel Inserts front panel securing tab front-panel insert securing tab Replacing Front-Panel Inserts 1 Connect and replace any disk drives you removed from the chassis drive bay. 2 Close the computer cover and stand the computer upright. 3 Replace - Dell Precision 530 | Service Manual - Page 35
the front panel down with the inside of the panel facing up. 4 Use a small screwdriver to push in the two plastic clips that secure the power button to the computer cover. When these clips are released, the button comes free from the front panel. 35 - Dell Precision 530 | Service Manual - Page 36
www.dell.com | support.dell.com Removing the Front-Panel Button power button front panel 36 - Dell Precision 530 | Service Manual - Page 37
Replacing the Front-Panel Button Insert the button into the hole in the front panel of the computer cover so that the button's clips secure it to the cover. 37 - Dell Precision 530 | Service Manual - Page 38
www.dell.com | support.dell.com 38 - Dell Precision 530 | Service Manual - Page 39
Shield • Removing the Dell shield • Replacing the Dell shield Removing the Dell Shield 1 Turn off the computer and devices, disconnect them from their electrical outlets, wait at least 10 to the shield down and push it away from you, through the front of the front panel. Removing the Dell Shield 39 - Dell Precision 530 | Service Manual - Page 40
www.dell.com | support.dell.com Replacing the Dell Shield To replace the Dell shield, perform the removal procedure in reverse. 40 - Dell Precision 530 | Service Manual - Page 41
on its right side, and open the computer cover. 2 Remove the expansion cards. 3 Remove the expansion-card cooling fan and guide. 4 Disconnect the power supply cables and the expansion-card cooling fan cable from the system board, and disconnect the drive power cable (see the following figure). 41 - Dell Precision 530 | Service Manual - Page 42
www.dell.com | support.dell.com Removing the Plastic Cable Retainer drive power cable cable retainer release button expansion-card cooling fan cable power supply cables 5 Remove the cable retainer. a Pull up on the cable retainer release button. b Slide the cable retainer to the right. c Lift the - Dell Precision 530 | Service Manual - Page 43
through the hole. Removing the Power Supply power supply power supply securing tabs (5) power supply release button Replacing the Power Supply 1 Slide the power supply cables through the hole into the chassis. 2 Insert the power supply securing tab into the power supply securing slot on the chassis - Dell Precision 530 | Service Manual - Page 44
www.dell.com | support.dell.com a Place the cable retainer into the four securing slots in the chassis. b Slide the cable retainer to the left until it locks into place. 5 Connect the power supply cables and the expansion-card cooling fan cable to the system board, and connect the drive power cable - Dell Precision 530 | Service Manual - Page 45
• Removing memory riser boards • Installing memory riser boards To locate the memory sockets on the system board, see "System Board Memory Components." To locate the memory sockets on the optional memory riser boards, see "Memory Riser Board Components." NOTE: The computer does not support RIMMs - Dell Precision 530 | Service Manual - Page 46
www.dell.com | support.dell.com pair 2 pair 1 socket 4 socket 3 socket 2 socket 1 System Board Memory Components suspend-to-RAM (STR) light 46 - Dell Precision 530 | Service Manual - Page 47
Memory Riser Board Components suspend-to-RAM (STR) light riser board A suspend-to-RAM light riser board B socket 4 socket 3 pair 4 socket 2 pair 3 socket 1 pair 2 pair 1 socket 4 socket 3 socket 2 socket 1 System Memory Installation Guidelines • System board installation • Riser board - Dell Precision 530 | Service Manual - Page 48
riser boards only support PC800 memory modules. Removing a Memory Module NOTICE: Before disconnecting a device from the computer, wait 10 to 20 seconds after disconnecting the computer from its electrical outlet. Before removing a component from the system board, verify that the standby power light - Dell Precision 530 | Service Manual - Page 49
(see the following figure). 2 Align the slots on the bottom of the module with the ridges inside the socket. NOTICE: To avoid damage to the memory module, press the module straight down into the socket with equal force applied at each end of the module. 3 Press the module straight down into - Dell Precision 530 | Service Manual - Page 50
. Before removing a component from the system board, verify that the standby power light on the system board has turned off. To locate this light, see "System Board Components." 1 Remove the microprocessor airflow shroud. 2 Remove the memory riser board retention bracket (see the following figure - Dell Precision 530 | Service Manual - Page 51
b Lift riser board A away from the retention brackets on riser board B. 4 Remove memory riser board B: a Press the securing clips of system board memory socket B outward simultaneously until riser board B pops out slightly from the socket. b Lift riser board B away from socket 2. 51 - Dell Precision 530 | Service Manual - Page 52
www.dell.com | support.dell.com Removing Memory Riser Boards memory riser board retention bracket securing clips (2) memory riser board A memory riser board B system board 52 - Dell Precision 530 | Service Manual - Page 53
ends of the riser board. 3 Install memory riser board A: a Align the edges of riser board A with the retention brackets on riser board B. b Align the slots on the bottom of riser board A with the ridges inside memory socket 1 on the system board. The memory sockets on the riser board will face away - Dell Precision 530 | Service Manual - Page 54
www.dell.com | support.dell.com Installing Memory Riser Boards memory riser board retention bracket memory sockets (4) 54 memory riser board A memory riser board B system board - Dell Precision 530 | Service Manual - Page 55
two 5.25-inch externally accessible drives and one 3.5-inch hard drive. • Hard drive bay: holds up to three 3.5-inch hard drives. The bay can hold three 1-inch-high drives, two 1-inch-high drives and one 1.6-inchhigh drive, or two 1.6-inch-high drives. NOTE: Cable ends are color coded so that black - Dell Precision 530 | Service Manual - Page 56
www.dell.com | support.dell.com Drive Types diskette drive 5.25-inch drive 1 (1.6-inch high) 5.25-inch drive 2 (1.6-inch high) 5.25-inch drive 3, or 3.5-inch drive 4 (1-inch high) 3.5-inch drive 3 (1-inch high) 3.5-inch drive 2 (1-inch high, or 1.6-inch high) 3.5-inch drive 1 (1.6-inch high) 56 - Dell Precision 530 | Service Manual - Page 57
a CD, Zip, or Other Externally Accessible Drive NOTE: If you are replacing a hard drive that contains data you want to keep, be component from the system board, verify that the standby power light on the system board has turned off. To locate this light, see "System Board Components." 1 Turn off - Dell Precision 530 | Service Manual - Page 58
www.dell.com | support.dell.com Removing an Externally Accessible Drive 58 - Dell Precision 530 | Service Manual - Page 59
it for installation. NOTICE: Ground yourself by touching an unpainted metal surface on the back of the computer. See the documentation that accompanied the drive to verify that the drive is configured for your computer. Change any settings necessary for your configuration. 6 If the replacement - Dell Precision 530 | Service Manual - Page 60
www.dell.com | support.dell.com NOTE: If you are not replacing an existing drive and the new drive does not have bracket rails attached, install the extra rail set that is located inside your computer in an empty drive bay. Attaching Bracket Rails for an Externally Accessible Drive drive bracket - Dell Precision 530 | Service Manual - Page 61
Installing an Externally Accessible Drive 61 - Dell Precision 530 | Service Manual - Page 62
www.dell.com | support.dell.com Installing the Diskette Drive 8 If you are installing a drive that has its own controller card, install the controller card in an expansion slot. See the documentation that accompanied the drive and controller card to verify that the configuration is correct for your - Dell Precision 530 | Service Manual - Page 63
"EIDE Device Installation Guidelines." • For an EIDE hard drive, connect the drive interface cable to the primary EIDE connector on the system board. For more information, see "EIDE Device Installation Guidelines." • For a SCSI drive, connect the drive interface cable to the SCSI connector on system - Dell Precision 530 | Service Manual - Page 64
www.dell.com | support.dell.com Attaching Cables for an Externally Accessible Drive DC power cable drive interface cable secondary EIDE system board connector 64 - Dell Precision 530 | Service Manual - Page 65
Cables for the Diskette Drive DC power cable drive interface cable cable clips (2) cable retainer diskette system board connector 11 Ensure that all cables are firmly connected. Fold cables out of the way to provide airflow for the fan and cooling vents. 12 If the drive bay was previously empty - Dell Precision 530 | Service Manual - Page 66
for instructions. 18 Test the drive to verify that it is operating properly. • If the drive you installed is a hard drive, run the Dell Diagnostics to test the drive. • For other types of drives, see the drive's documentation for information on testing the drive. NOTE: Tape drives sold by Dell come - Dell Precision 530 | Service Manual - Page 67
NOTE: If you are replacing a hard drive that contains data you want to keep, be sure to back up Before removing a component from the system board, verify that the standby power light on the system board has turned off. To locate this light, see "System Board Components." 1 Turn off the computer - Dell Precision 530 | Service Manual - Page 68
www.dell.com | support.dell.com Removing a Hard Drive 5 Unpack the replacement drive and prepare it for installation. NOTICE: Ground yourself by touching an unpainted metal surface on the back of the computer. See the documentation that accompanied the drive to verify that the drive is configured - Dell Precision 530 | Service Manual - Page 69
NOTE: You must use the shoulder screws shipped with the spare drive rails. Attaching Bracket Rails for a Hard Drive drive bracket rails (2) shoulder screws (4) 7 Slide the drive/bracket assembly into the drive bay until both drive bracket tabs snap securely into place (see the following figure). 69 - Dell Precision 530 | Service Manual - Page 70
www.dell.com | support.dell.com Installing a Hard Drive 8 If you are installing a drive that has its own controller card, install the controller card in an expansion slot. See the documentation that accompanied the drive and controller card to verify that the configuration is correct for your - Dell Precision 530 | Service Manual - Page 71
. 10 Connect the interface cable(s) to the system board or a controller card, depending on the type of drive you are installing. See "Attaching Cables for a Hard Drive." NOTE: To locate system board drive connectors, see "System Board Components." NOTICE: To avoid possible damage, you must match - Dell Precision 530 | Service Manual - Page 72
www.dell.com | support.dell.com Attaching Cables for a Hard Drive drive interface cable DC power cable primary EIDE system board connector LVD SCSI system board connector 11 Ensure that all cables are firmly connected. Fold cables out of the way to provide airflow for the fan and cooling vents. - Dell Precision 530 | Service Manual - Page 73
you update the system settings, exit system setup and reboot the computer. 17 Partition and logically format the drive before proceeding to the next step. See the operating system's documentation for instructions. 18 Run the Dell Diagnostics to test the drive. 19 If the hard drive you installed - Dell Precision 530 | Service Manual - Page 74
cabled to EIDE hard drives • The secondary EIDE connector should be cabled to EIDE CD, DVD, tape, DAT, and zip drives To locate the EIDE interface connectors on the system board, see "System Board Components" or "Interior Service Label." Each EIDE interface connector on the system board supports the - Dell Precision 530 | Service Manual - Page 75
SCSI devices are shipped from Dell, the default SCSI ID numbers for are assigned as follows: Default SCSI ID Settings System Board Controller Optional Controller Card Device ID Device ID Controller 7 Controller 7 Boot hard drive 0 Boot hard drive 0 CD or DVD drive 5 tape or DAT - Dell Precision 530 | Service Manual - Page 76
www.dell.com | support.dell.com SCSI devices installed by Dell are configured correctly during the termination, if necessary. • To use an external SCSI device, you must have a SCSI controller card installed in your computer. Connect one end of the external SCSI cable to the connector on the - Dell Precision 530 | Service Manual - Page 77
on installing the appropriate drivers and preparing your SCSI hard drive for use. SCSI Cables Ultra 160/m and Ultra2/Wide LVD drives (typically hard drives) both use a 68-pin cable. One end of the cable attaches to the SCSI connector on the system board or the SCSI controller card installed in your - Dell Precision 530 | Service Manual - Page 78
www.dell.com | support.dell.com 78 - Dell Precision 530 | Service Manual - Page 79
Airflow Shroud • Removing the expansion-card airflow shroud • Replacing the expansion-card airflow shroud Removing the Expansion-Card Airflow Shroud To access some components on the system board, you may need to remove the expansion-card airflow shroud. CAUTION: Before you perform this procedure - Dell Precision 530 | Service Manual - Page 80
www.dell.com | support.dell.com Removing the Expansion-Card Airflow Shroud expansion-card airflow shroud release button air baffle Replacing the Expansion-Card Airflow Shroud NOTE: You must install the expansion-card airflow shroud with the air baffle connected to the shroud to keep the computer - Dell Precision 530 | Service Manual - Page 81
to three 32-bit, 33-MHz PCI cards. • Up to two 64-bit, 66-MHz PCI expansion cards. • One 32-bit AGP card. The expansion slot supports AGP 4x or 2x Pro110 modes operating at 1.5 V. See "Expansion Card Types" for examples of these cards. NOTE: To meet PC99 Workstation requirements, your Dell™ computer - Dell Precision 530 | Service Manual - Page 82
www.dell.com | support.dell.com Expansion Card Types 32-bit PCI card 64-bit PCI card AGP 4x card AGP 4x Pro card NOTE: The AGP expansion slot only supports 1.5-V cards. 82 - Dell Precision 530 | Service Manual - Page 83
System Board Expansion Card Components AGP Pro connector 32-bit, 33 MHz PCI connector 1 PCI connector 2 PCI connector 3 64-bit, 66 MHz PCI connector 4 PCI connector 5 NOTE: Install only 66-MHz expansion cards in the 66-MHz slots. You can install 33-MHz cards in the 66-MHz slots. However, the - Dell Precision 530 | Service Manual - Page 84
www.dell.com | support.dell.com expansion card Raising the Expansion Card Retention Arm card retention arm card bracket card connector 3 If you are installing a new expansion card, remove the filler bracket for an empty card-slot opening. Then continue with step 5. 4 If you are replacing an - Dell Precision 530 | Service Manual - Page 85
verify that the standby power light on the system board has turned off. To locate this light, see "System Board Components." 6 Insert the expansion card into the expansion-card connector. If the expansion card is full-length, insert the end of the card into the expansion-card guide bracket as you - Dell Precision 530 | Service Manual - Page 86
www.dell.com | support.dell.com 7 Lower the expansion card retention arm and press it into place, securing the expansion card(s) in the chassis. 8 Connect any cables that should be attached to the card. See the documentation for the card for information about the card's cable connections. NOTICE: - Dell Precision 530 | Service Manual - Page 87
the computer from its electrical outlet. Before removing a component from the system board, verify that the standby power light on the system board has turned off. To locate this light, see "System Board Components." 1 Turn off the computer and devices, disconnect them from their electrical - Dell Precision 530 | Service Manual - Page 88
www.dell.com | support.dell.com a Enter system setup, clear the security field, select Integrated steps: a Enter system setup, select Integrated Devices and change the setting for Network Interface Card to On. b Connect the network cable to the integrated connector on the computer back panel (see - Dell Precision 530 | Service Manual - Page 89
expansion-card guide. Removing an Expansion-Card Cooling Fan and Guide CAUTION: Before you perform this procedure, see "Safety First- For You and Your Computer." NOTICE: Before disconnecting a device from the computer or removing a component from the system board, verify that the standby power light - Dell Precision 530 | Service Manual - Page 90
www.dell.com | support.dell.com Removing an Expansion-Card Cooling Fan and Guide expansion-card cooling fan expansion-card guide release tabs (2) Replacing an Expansion-Card Cooling Fan and Guide NOTICE: Ensure that the fan is properly installed on the guide bracket. When the fan is properly - Dell Precision 530 | Service Manual - Page 91
Insert the bottom of the cooling fan into the clips on the card guide. Then press the top of the fan toward the card guide until the tabs on the card guide grasp the fan. See "Removing an Expansion-Card Cooling Fan and Guide." 91 - Dell Precision 530 | Service Manual - Page 92
www.dell.com | support.dell.com 92 - Dell Precision 530 | Service Manual - Page 93
Components The following figure shows the control panel and the location of its principal connectors and components. Control Panel Components alignment hole control-panel connector hard-drive access light power button screw hole 93 - Dell Precision 530 | Service Manual - Page 94
www.dell.com | support.dell.com Removing the Control Panel CAUTION: Before you perform this procedure, see "Safety First- For You and Your Computer." NOTICE: Before disconnecting a device from the computer or removing a component from the system board, verify that the standby power light on the - Dell Precision 530 | Service Manual - Page 95
Panel control panel mounting screw Replacing the Control Panel NOTE: When mounting the control panel on the drive door, ensure that the control-panel alignment hole is positioned over the guide pin. See "Removing the Control Panel." To replace the control panel, perform the removal procedure in - Dell Precision 530 | Service Manual - Page 96
www.dell.com | support.dell.com 96 - Dell Precision 530 | Service Manual - Page 97
front panel audio connector control panel connector speaker/headphone jack chassis intrusion switch connector Port 2 USB connectors (2) IEEE 1394 connector diagnostic lights system board connector front panel IEEE 1394 connector chassis speaker connector Removing the I/O Panel 1 Turn off the - Dell Precision 530 | Service Manual - Page 98
www.dell.com | support.dell.com 3 Disconnect the control panel cable from the control panel connector. Disconnect the front-panel cable from the connector on the system board. 4 Remove all cables that are connected to the front I/O panel. 5 From inside the chassis cover, remove the mounting screw - Dell Precision 530 | Service Manual - Page 99
: Before disconnecting a device from the computer or removing a component from the system board, verify that the standby power light on the system board has turned off. To locate this light, see "System Board Components." 1 Turn off the computer and devices, disconnect them from their electrical - Dell Precision 530 | Service Manual - Page 100
www.dell.com | support.dell.com Removing the Chassis Intrusion Switch chassis intrusion switch Replacing the Chassis Intrusion Switch To replace the chassis intrusion switch, perform the removal procedure in reverse. 100 - Dell Precision 530 | Service Manual - Page 101
: Before disconnecting a device from the computer or removing a component from the system board, verify that the standby power light on the system board has turned off. To locate this light, see "System Board Components." 1 Turn off the computer and devices, disconnect them from their electrical - Dell Precision 530 | Service Manual - Page 102
www.dell.com | support.dell.com speaker speaker cable Removing the Speaker speaker release tab securing clip 4 From inside the chassis, press the speaker release tab and slide the speaker - Dell Precision 530 | Service Manual - Page 103
the computer from its electrical outlet. Before removing a component from the system board, verify that the standby power light on the system board has turned off. To locate this light, see "System Board Components." 1 Turn off the computer and devices, disconnect them from their electrical - Dell Precision 530 | Service Manual - Page 104
www.dell.com | support.dell.com Removing the Microprocessor Airflow Shroud microprocessor airflow shroud top anchor tabs (2) bottom anchor tabs (2) Installing the Microprocessor Airflow Shroud 1 Install the airflow shroud: • Insert - Dell Precision 530 | Service Manual - Page 105
at the next computer start-up: ALERT! Cover was previously removed. Enter system setup and reset the Chassis Intrusion option as described in your User's Guide. 105 - Dell Precision 530 | Service Manual - Page 106
www.dell.com | support.dell.com 106 - Dell Precision 530 | Service Manual - Page 107
match, you receive a computer message, the diagnostic lights indicate an error, and the computer does not start. If the VRMs do not match, the diagnostic lights indicate an error. • If installing a Dell processor upgrade kit for either single or dual processors, remove and discard the original VRM - Dell Precision 530 | Service Manual - Page 108
www.dell.com | support.dell.com CAUTION: Before you perform this procedure, see "Safety First- For You and removing a component from the system board, verify that the standby power light on the system board has turned off. To locate this light, see "System Board Components." 1 Turn off the computer - Dell Precision 530 | Service Manual - Page 109
microprocessor, keep your original microprocessor heat sink and securing clips for future trouble shooting. NOTE: Your microprocessor upgrade kit includes a replacement microprocessor heat sink and two replacement securing clips. 4 Remove the microprocessor from its connector. Your microprocessor - Dell Precision 530 | Service Manual - Page 110
www.dell.com | support.dell.com To remove the microprocessor, pull the socket lever up until the microprocessor is released. Then remove the microprocessor from damage, ensure that the microprocessor aligns properly with the socket, and do not use excessive force when installing the processor. 110 - Dell Precision 530 | Service Manual - Page 111
c Carefully set the microprocessor in the socket and press it down lightly to seat it. d Rotate the socket lever back toward the socket until it snaps into place, securing the microprocessor. Installing the Microprocessor microprocessor microprocessor pin-1 - Dell Precision 530 | Service Manual - Page 112
www.dell.com | support.dell.com NOTICE: Carefully align the heat sink with the was previously removed. Enter system setup and reset the Chassis Intrusion option as described in your User's Guide. 11 Enter system setup and confirm that in the top left corner the correct microprocessor speed appears. - Dell Precision 530 | Service Manual - Page 113
: Before disconnecting a device from the computer or removing a component from the system board, verify that the standby power light on the system board has turned off. To locate this light, see "System Board Components." 1 Turn off the computer and devices, disconnect them from their electrical - Dell Precision 530 | Service Manual - Page 114
www.dell.com | support.dell.com Removing the Microprocessor Cooling Fan anchor tabs (4) locking tab fan power cable connector fan power cable Replacing the Microprocessor Cooling Fan To replace the microprocessor cooling fan, follow the removal procedures in reverse. 114 - Dell Precision 530 | Service Manual - Page 115
installed. To locate the VRM and microprocessor sockets, see "System Board Components." Removing a VRM CAUTION: Before you perform this procedure, see system board, verify that the standby power light on the system board has turned off. To locate this light, see "System Board Components." - Dell Precision 530 | Service Manual - Page 116
www.dell.com | support.dell.com Removing a VRM VRM securing clip VRM connector 5 Grasp the VRM by its top corners, and ease it out of its connector. Installing a VRM NOTE: - Dell Precision 530 | Service Manual - Page 117
at the next computer start-up: ALERT! Cover was previously removed. Enter system setup and reset the Chassis Intrusion option as described in your User's Guide. 117 - Dell Precision 530 | Service Manual - Page 118
www.dell.com | support.dell.com 118 - Dell Precision 530 | Service Manual - Page 119
after disconnecting the computer from its electrical outlet. Before removing a component from the system board, verify that the standby power light on the system board has turned off. To locate this light, see "System Board Components." 1 If you have not already done so, make a copy of your computer - Dell Precision 530 | Service Manual - Page 120
.dell.com | support.dell.com NOTICE: If you use a blunt, nonconductive object to pry the battery out of its socket, be careful not to touch the system board you attempt to pry out the battery. Otherwise, you may damage the system board. Pry the battery out of its socket with your fingers or with a - Dell Precision 530 | Service Manual - Page 121
was previously removed. 9 Enter system setup, reset the Chassis Intrusion option as described in your User's Guide, and enter the current time and date. Then exit system setup and save the information. 10 Turn 13 If the time and date are still incorrect, contact Dell for technical assistance. 121 - Dell Precision 530 | Service Manual - Page 122
www.dell.com | support.dell.com 122 - Dell Precision 530 | Service Manual - Page 123
, verify that the standby power light on the system board has turned off. To locate this light, see "System Board Components." 1 Write down your BIOS settings before you turn off your computer. See the User's Guide that came with your computer for instructions to find your BIOS settings. 2 Turn off - Dell Precision 530 | Service Manual - Page 124
www.dell.com | support.dell.com Removing the System Board TEM pan screw back panel green TEM pan release tabs (2) gray metal tabs (2) I/O panel connectors system board 10 Press down on the two gray metal chassis tabs, lift the two green TEM pan release tabs, and slide the TEM pan toward the - Dell Precision 530 | Service Manual - Page 125
are identical to those on the original board. 6 Close the computer cover and restart the computer. 7 Run system setup to ensure that your settings are correct and that all system board components are correctly identified. 8 Run the Dell Diagnostics to verify that the computer is operating properly - Dell Precision 530 | Service Manual - Page 126
www.dell.com | support.dell.com 126
-
 1
1 -
 2
2 -
 3
3 -
 4
4 -
 5
5 -
 6
6 -
 7
7 -
8
-
9
-
10
-
11
-
12
-
13
-
14
-
15
-
16
-
17
-
18
-
19
-
20
-
21
-
22
-
23
-
24
-
25
-
26
-
27
-
28
-
29
-
30
-
31
-
32
-
33
-
34
-
35
-
36
-
37
-
38
-
39
-
40
-
41
-
42
-
43
-
44
-
45
-
46
-
47
-
48
-
49
-
50
-
51
-
52
-
53
-
54
-
55
-
56
-
57
-
58
-
59
-
60
-
61
-
62
-
63
-
64
-
65
-
66
-
67
-
68
-
69
-
70
-
71
-
72
-
73
-
74
-
75
-
76
-
77
-
78
-
79
-
80
-
81
-
82
-
83
-
84
-
85
-
86
-
87
-
88
-
89
-
90
-
91
-
92
-
93
-
94
-
95
-
96
-
97
-
98
-
99
-
100
-
101
-
102
-
103
-
104
-
105
-
106
-
107
-
108
-
109
-
110
-
111
-
112
-
113
-
114
-
115
-
116
-
117
-
118
-
119
-
120
-
121
-
122
-
123
-
124
-
125
-
126
 |
 |

www.dell.com
support.dell.com
Dell Precision™ WorkStation 530
SERVICE MANUAL