Dell Precision 530 Service Manual - Page 59
the rails from the old drive by removing the four screws that secure
 |
View all Dell Precision 530 manuals
Add to My Manuals
Save this manual to your list of manuals |
Page 59 highlights
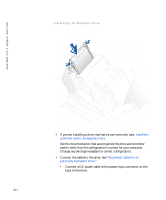
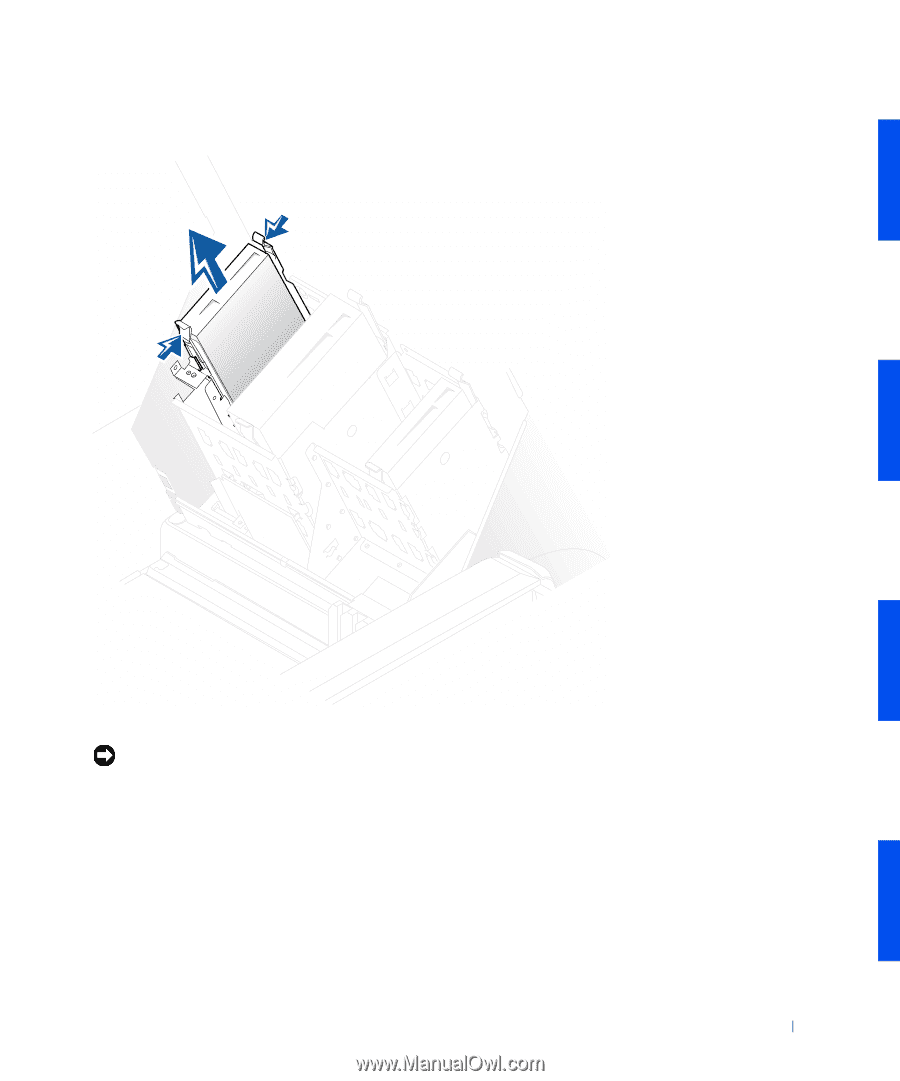
Removing the Diskette Drive 5 Unpack the replacement drive and prepare it for installation. NOTICE: Ground yourself by touching an unpainted metal surface on the back of the computer. See the documentation that accompanied the drive to verify that the drive is configured for your computer. Change any settings necessary for your configuration. 6 If the replacement drive does not have bracket rails attached, remove the rails from the old drive by removing the four screws that secure the rails to the drive. Then attach the bracket rails to the replacement drive (see the following figure). 59
-
 1
1 -
2
-
3
-
4
-
5
-
6
-
7
-
8
-
9
-
10
-
11
-
12
-
13
-
14
-
15
-
16
-
17
-
18
-
19
-
20
-
21
-
22
-
23
-
24
-
25
-
26
-
27
-
28
-
29
-
30
-
31
-
32
-
33
-
34
-
35
-
36
-
37
-
38
-
39
-
40
-
41
-
42
-
43
-
44
-
45
-
46
-
47
-
48
-
49
-
50
-
51
-
52
-
53
-
 54
54 -
 55
55 -
 56
56 -
 57
57 -
 58
58 -
 59
59 -
 60
60 -
 61
61 -
 62
62 -
 63
63 -
 64
64 -
65
-
66
-
67
-
68
-
69
-
70
-
71
-
72
-
73
-
74
-
75
-
76
-
77
-
78
-
79
-
80
-
81
-
82
-
83
-
84
-
85
-
86
-
87
-
88
-
89
-
90
-
91
-
92
-
93
-
94
-
95
-
96
-
97
-
98
-
99
-
100
-
101
-
102
-
103
-
104
-
105
-
106
-
107
-
108
-
109
-
110
-
111
-
112
-
113
-
114
-
115
-
116
-
117
-
118
-
119
-
120
-
121
-
122
-
123
-
124
-
125
-
126
 |
 |
59
Removing the Diskette Drive
5
Unpack the replacement drive and prepare it for installation.
NOTICE:
Ground yourself by touching an unpainted metal surface on the
back of the computer.
See the documentation that accompanied the drive to verify that the
drive is configured for your computer. Change any settings necessary
for your configuration.
6
If the replacement drive does not have bracket rails attached, remove
the rails from the old drive by removing the four screws that secure the
rails to the drive. Then attach the bracket rails to the replacement
drive (see the following figure).