Dell S2810dn Smart Dell Smart Printer Users Guide - Page 77
Setting Up for Shared Printing, Enabling Shared Printing from the Computer
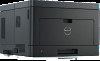 |
View all Dell S2810dn Smart manuals
Add to My Manuals
Save this manual to your list of manuals |
Page 77 highlights
Setting Up for Shared Printing You can share your USB connected printer with other computers (clients) on the same network. To share your USB connected printer, enable shared printing when installing the printer driver. You can also enable shared printing by following the procedures below. NOTE: Printer utilities such as Status Monitor cannot be used from a network client. Enabling Shared Printing from the Computer Windows Server® 2003 or Windows Server® 2003 x64 Edition 1 Click start Printers and Faxes. 2 Right-click the printer icon and select Properties. 3 On the Sharing tab, select the Share this printer check box, and then type a name in the Share name text box. 4 Click Additional Drivers and select the operating systems of all network clients that print to the printer. 5 Click OK. If you are missing files, you are prompted to insert the server operating system CD. Windows Vista® or Windows Vista® 64-bit Edition 1 Click Start Control Panel Hardware and Sound Printers. 2 Right-click the printer icon and select Sharing. 3 Click Change sharing options. The message Windows needs your permission to continue appears. 4 Click Continue. 5 Select the Share this printer check box, and then type a name in the Share name text box. 6 Click Additional Drivers and select the operating systems of all network clients that print to the printer. 7 Click OK. Windows Server® 2008 or Windows Server® 2008 64-bit Edition 1 Click Start Control Panel Printers. 2 Right-click the printer icon and select Sharing. 3 Click Change Sharing Options if exists. 4 Select the Share this printer check box, and then type a name in the Share name text box. 5 Click Additional Drivers and select the operating systems of all network clients that print to the printer. 6 Click OK. Windows® 7, Windows® 7 64-bit Edition, or Windows Server® 2008 R2 1 Click Start Devices and Printers. 2 Right-click the printer icon and select Printer properties. 3 On the Sharing tab, click Change Sharing Options if exists. Select the Share this printer check box, and then type a name in the Share name text box. 4 Click Additional Drivers and select the operating systems of all network clients that print to the printer. 5 Click Apply, and then click OK. Installing Printer Drivers on Windows® Computers 77
-
 1
1 -
2
-
3
-
4
-
5
-
6
-
7
-
8
-
9
-
10
-
11
-
12
-
13
-
14
-
15
-
16
-
17
-
18
-
19
-
20
-
21
-
22
-
23
-
24
-
25
-
26
-
27
-
28
-
29
-
30
-
31
-
32
-
33
-
34
-
35
-
36
-
37
-
38
-
39
-
40
-
41
-
42
-
43
-
44
-
45
-
46
-
47
-
48
-
49
-
50
-
51
-
52
-
53
-
54
-
55
-
56
-
57
-
58
-
59
-
60
-
61
-
62
-
63
-
64
-
65
-
66
-
67
-
68
-
69
-
70
-
71
-
 72
72 -
 73
73 -
 74
74 -
 75
75 -
 76
76 -
 77
77 -
 78
78 -
 79
79 -
 80
80 -
 81
81 -
 82
82 -
83
-
84
-
85
-
86
-
87
-
88
-
89
-
90
-
91
-
92
-
93
-
94
-
95
-
96
-
97
-
98
-
99
-
100
-
101
-
102
-
103
-
104
-
105
-
106
-
107
-
108
-
109
-
110
-
111
-
112
-
113
-
114
-
115
-
116
-
117
-
118
-
119
-
120
-
121
-
122
-
123
-
124
-
125
-
126
-
127
-
128
-
129
-
130
-
131
-
132
-
133
-
134
-
135
-
136
-
137
-
138
-
139
-
140
-
141
-
142
-
143
-
144
-
145
-
146
-
147
-
148
-
149
-
150
-
151
-
152
-
153
-
154
-
155
-
156
-
157
-
158
-
159
-
160
-
161
-
162
-
163
-
164
-
165
-
166
-
167
-
168
-
169
-
170
-
171
-
172
-
173
-
174
-
175
-
176
-
177
-
178
-
179
-
180
-
181
-
182
-
183
-
184
-
185
-
186
-
187
-
188
-
189
-
190
-
191
-
192
-
193
-
194
-
195
-
196
-
197
-
198
-
199
-
200
-
201
-
202
-
203
-
204
-
205
-
206
-
207
-
208
-
209
-
210
-
211
-
212
-
213
-
214
-
215
-
216
-
217
-
218
-
219
-
220
-
221
-
222
-
223
-
224
-
225
-
226
-
227
-
228
-
229
-
230
-
231
-
232
-
233
-
234
-
235
-
236
-
237
-
238
-
239
-
240
-
241
-
242
-
243
-
244
-
245
-
246
-
247
-
248
-
249
-
250
-
251
-
252
-
253
-
254
-
255
-
256
-
257
-
258
-
259
-
260
-
261
-
262
-
263
-
264
-
265
-
266
-
267
-
268
-
269
-
270
-
271
-
272
-
273
-
274
-
275
-
276
-
277
-
278
-
279
-
280
-
281
-
282
-
283
-
284
-
285
-
286
-
287
-
288
-
289
-
290
-
291
-
292
-
293
-
294
-
295
-
296
-
297
-
298
-
299
-
300
-
301
-
302
-
303
-
304
-
305
-
306
-
307
-
308
-
309
-
310
-
311
-
312
-
313
-
314
-
315
-
316
 |
 |
